Whenever a new Android device is realized, the first thing I figure out how to do is to get it root access. Generally speaking, rooting has never been easier, with many one-touch methods like Stump and Towelroot available. But as manufacturers and carriers increase security with each new product, there is one tried-and-true root method that continues to work on most Samsung devices—Chainfire's CF Auto Root.
I'll get this out of the way now—when I say "most", I don't mean most devices, I mean most carrier variants. If you have an AT&T (our model) or Verizon Wireless version of the Samsung Galaxy Note 4, I'm sorry to say that we'll be waiting some time for a proper method of rooting (the bounty at time of writing is about $5,000).
But, if you're sporting a Sprint, T-Mobile, or international variant of the latest in the Note series, here's how to root your new device.
Download the Necessary Files
You'll need a couple of things to get started—the appropriate CF Auto Root file for your device and Odin for Windows (which is packaged with the CF Auto Root ZIP). While there is an Odin-like program for Mac (called Heimdall), it is not officially supported by CF Auto Root, and we cannot recommend using it at this time.
- CF Auto Root for Sprint
- CF Auto Root for T-Mobile
- CF Auto Root for US Cellular
- CF Auto Root for International models (be sure to download the correct file for your model number/processor type)
Extract the Downloaded Files
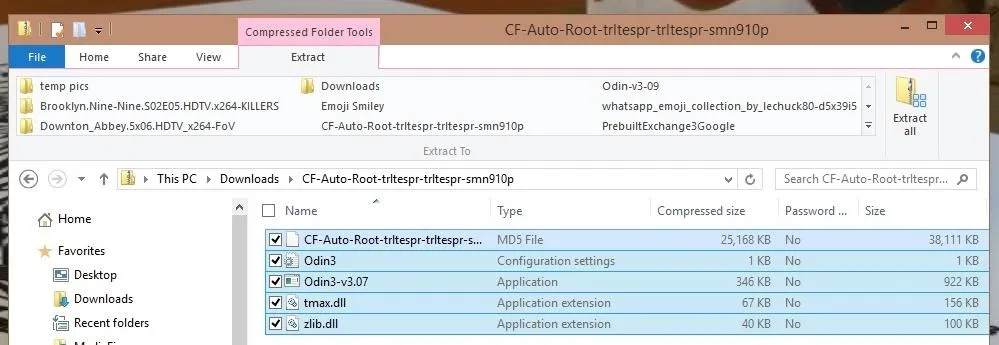
The CF Auto Root ZIP file will extract to one .tar.md5 file—this is the file we want—as well as a couple of files for Odin and a couple of DLL files. If you end up with recovery.img and cache.img files, you've extracted too far.
Set Up Odin
Once extracted, right-click the Odin3 application file, then select "Run as administrator."

Now click the "PDA" option in Odin and select the .tar.md5 file.
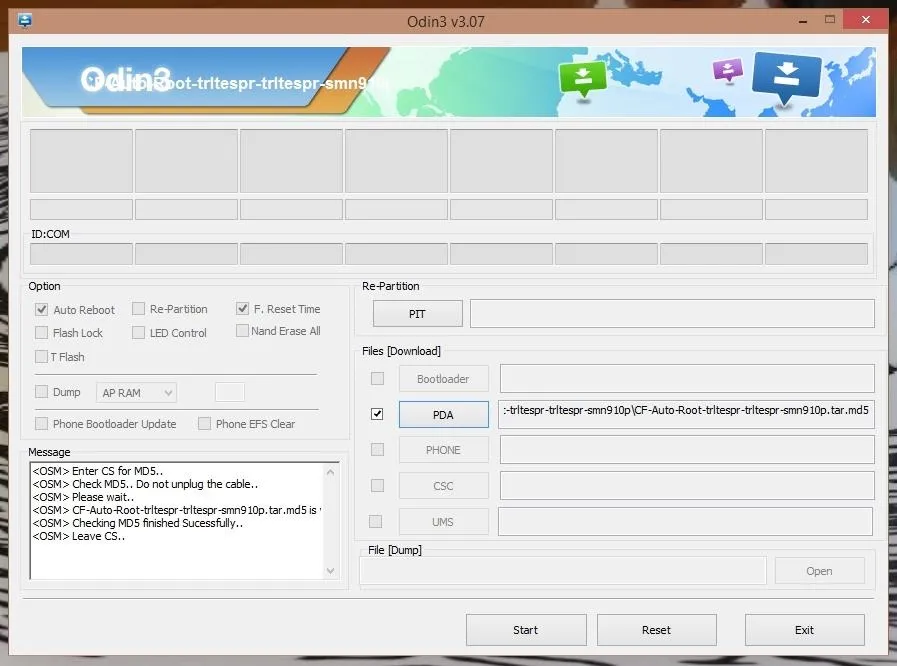
Additionally, be sure that the "Re-Partition" option is not checked.
Place Phone in Download Mode
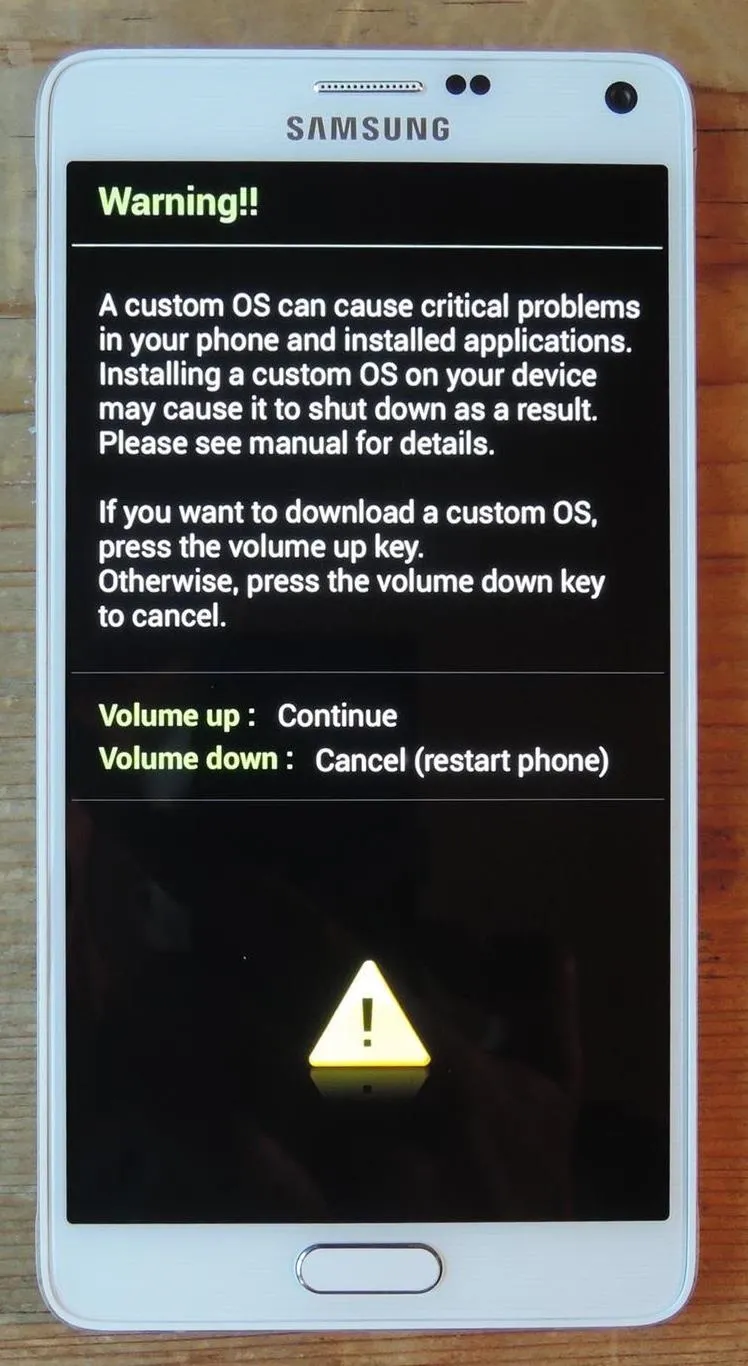
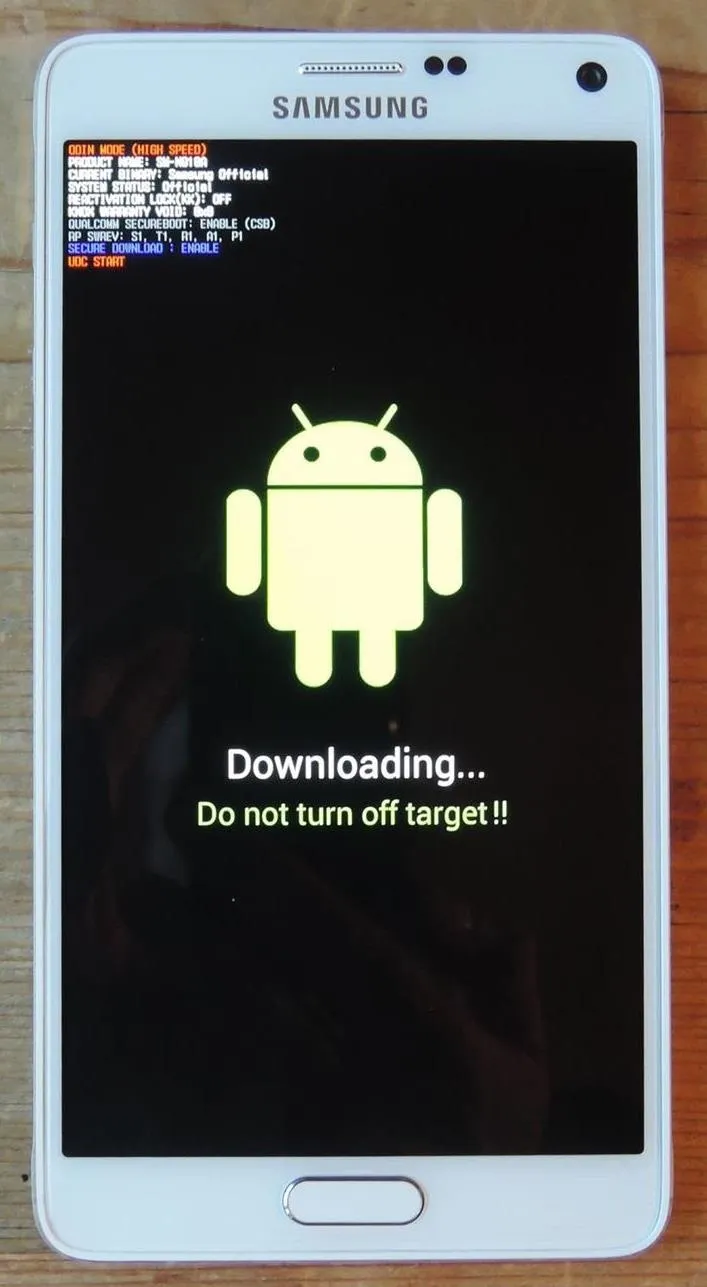
Now power off your device and back on while holding the Volume Down + Home + Power buttons, then select the Volume Up button to enter "Download Mode."


Flash CF Auto Root
Now plug your device into your PC and you'll notice a COM message show in Odin, as well as "Added!!" in the progress window. All that's left to do is hit "Start".
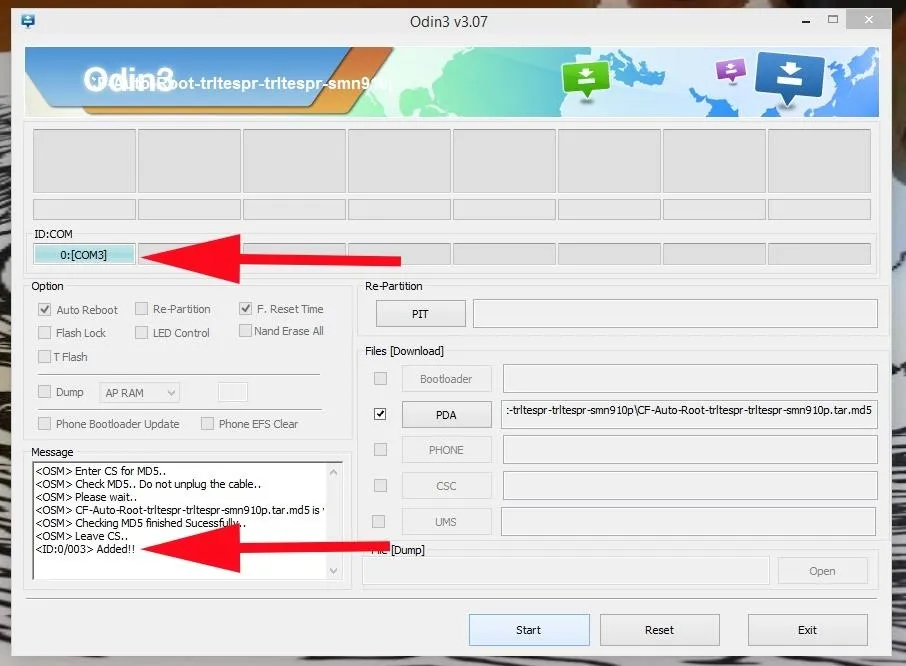
The process can take up to a few minutes—you'll see your device go into recovery mode, flash SuperSU, and reboot. Once your device has booted back up, open the SuperSU app from your app drawer and let it update binary files (if necessary).
Troubleshooting
If your device does not go into recovery mode, simply run the process again, this time unchecking the "Auto Reboot" option in Odin. Run Odin again, and when it sticks, pull the battery from your device, place it back in, and boot holding Volume Up + Power + Home. This will manually take you into recovery mode where the rest of the process will finish up.
If you had any problems with the process, shoot us a comment below or ask away on our Facebook or Twitter feeds.






Comments
Be the first, drop a comment!