


Slide to left, slide to the right, one hop this time. Okay, so maybe those are some of the dance instructions for the "Cha Cha Slide", but sliding and swiping on your Samsung Galaxy S3 can become so much more than just a simple gesture.
While a swipe to the left can unlock your device or switch between your home screens, why not have that swipe open up your favorite app or bring up the dialer? You can using Navigation Layer by Pablo Spagnoli, aka wariat.
This app lets you use different gestures to perform a bunch of custom actions on your device. Swiping from the left, right, or bottom of the screen will activate preprogrammed actions that you can alter in the app's own settings menu.
Pablo is an Italian developer, so you may see some Italian in the app and on the Google Plus page (see Step 1), but the directions can be deciphered without translation.

Navigation Layer is still in beta, so in order to try it out for yourself, you must do a couple things first.
Join the Google+ Community
Join the GlobeTrotter Google+ Community in order to gain access to updates and stay involved in the app's development.
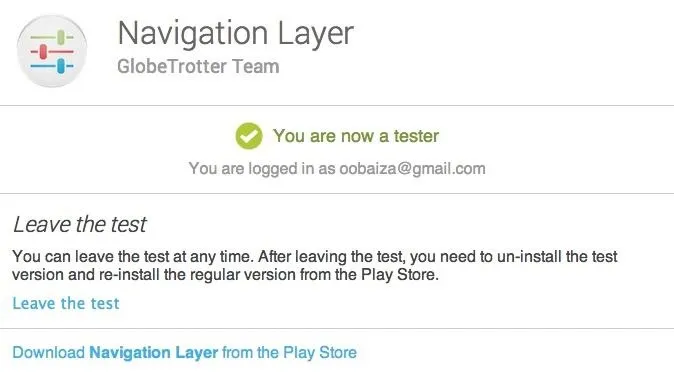
Request to Become a Beta Tester
On your GS3, ask to become a beta tester (using this link) in order to get the download file for Navigation Layer. This is a critical step; without it, the Google Play link will not be active for you.
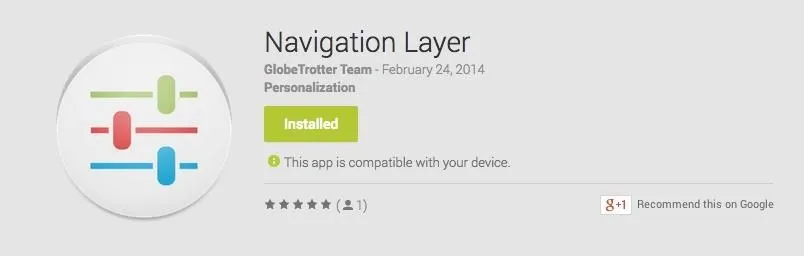
Download Navigation Layer from Google Play
Now that you're a tester, download Navigation Layer from Google Play.
You can also download it directly from Pablo's XDA forum page (get the latest one under the "Attached Files" section), but using this option is not recommended as you will not be able to receive automatic updates.
Customize Your Navigation Layer
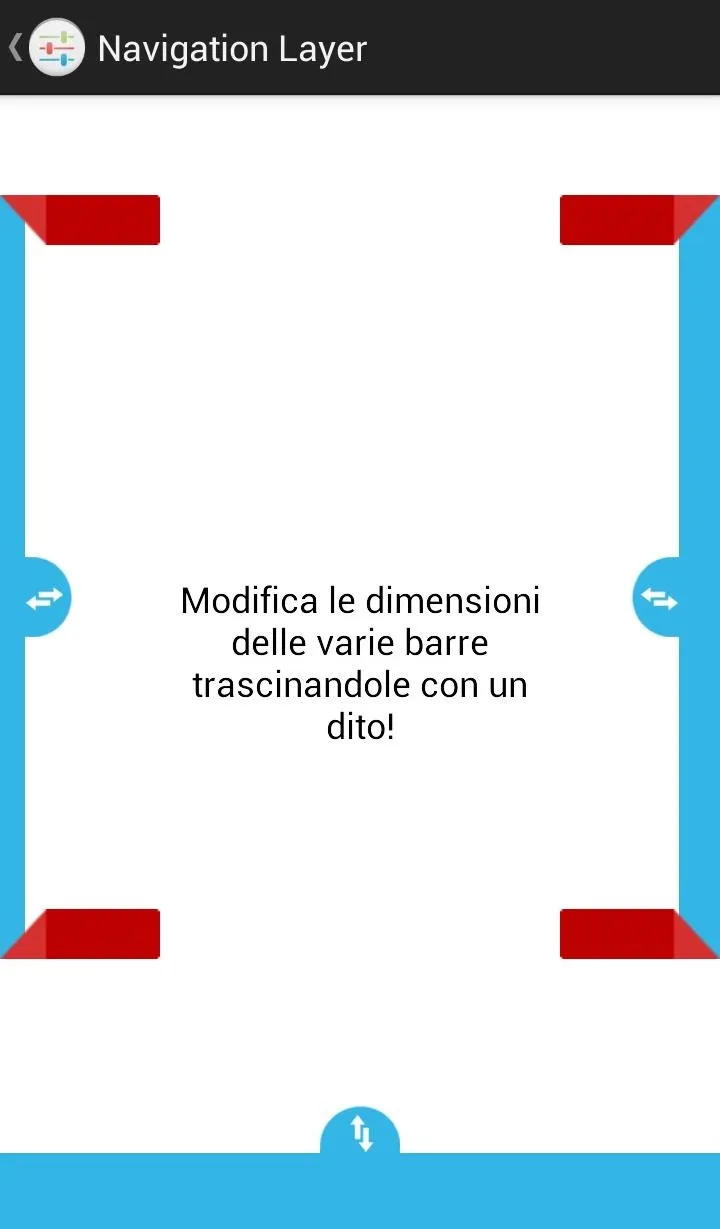
The setup is pretty simple, even though the app can do some complex stuff. Once installed, make sure to enable Navigation Layer and check the box next to "Start on boot". Next, select "Personalize Bar" option to enable the different gesture areas and adjust the size of the bars as well.
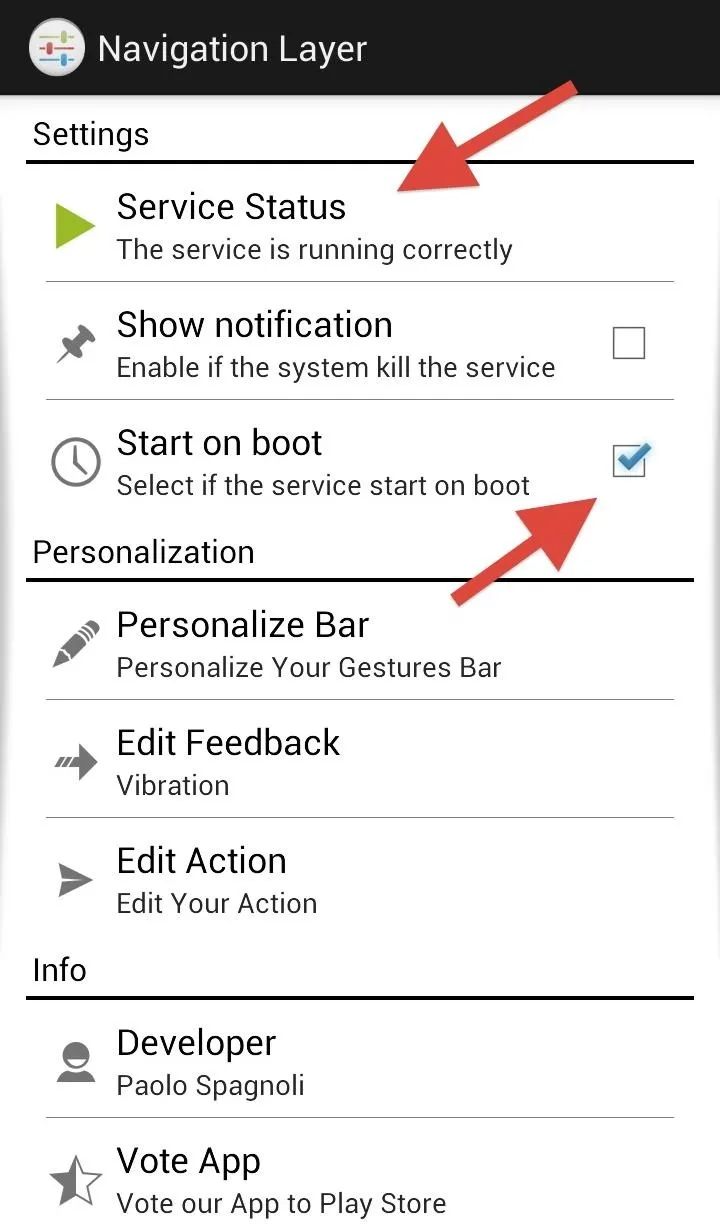
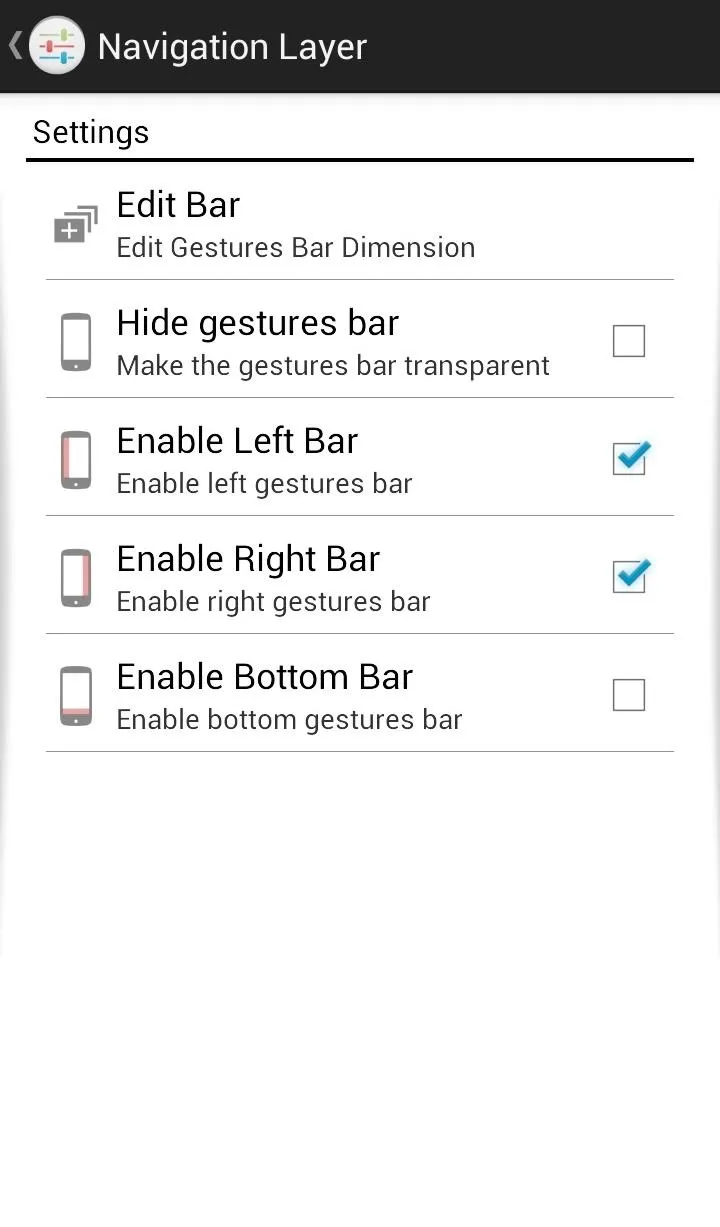
Check the box next to the area you wish the bars to be located. Enabling all three bars will of course allow for more gesture features. Once you've selected your areas, hit "Edit Bar" to adjust the size of the gesture area for each location.

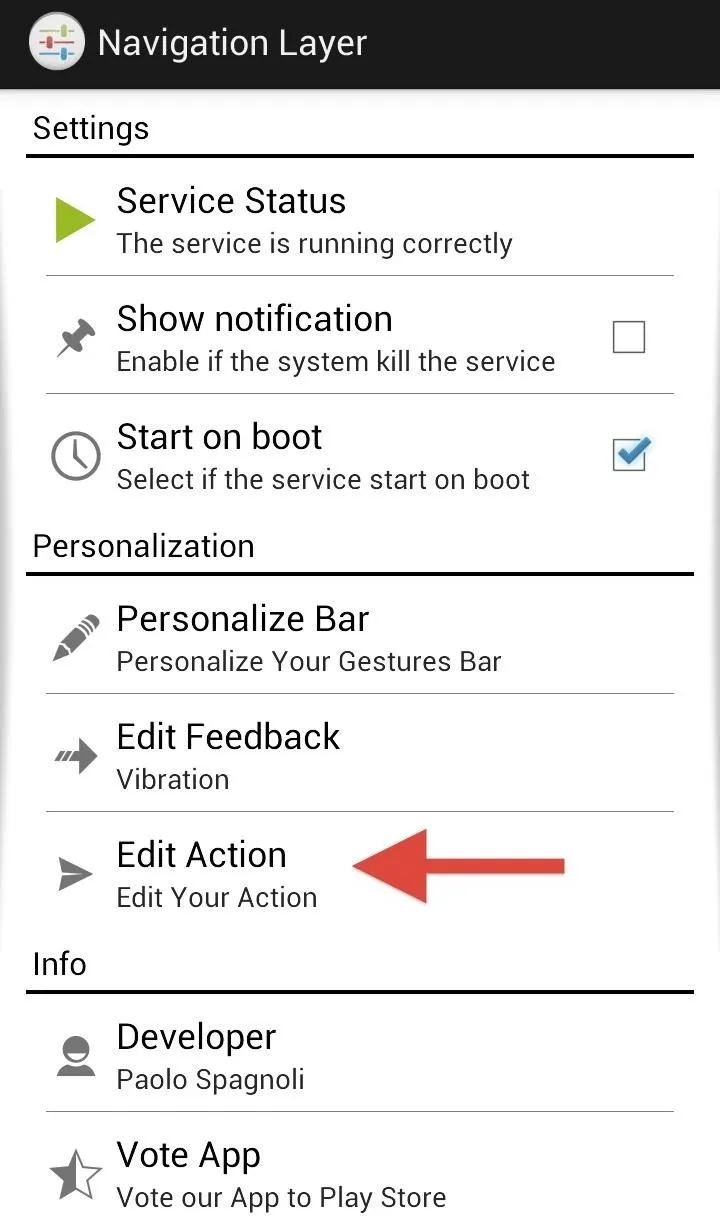
Edit Your Actions
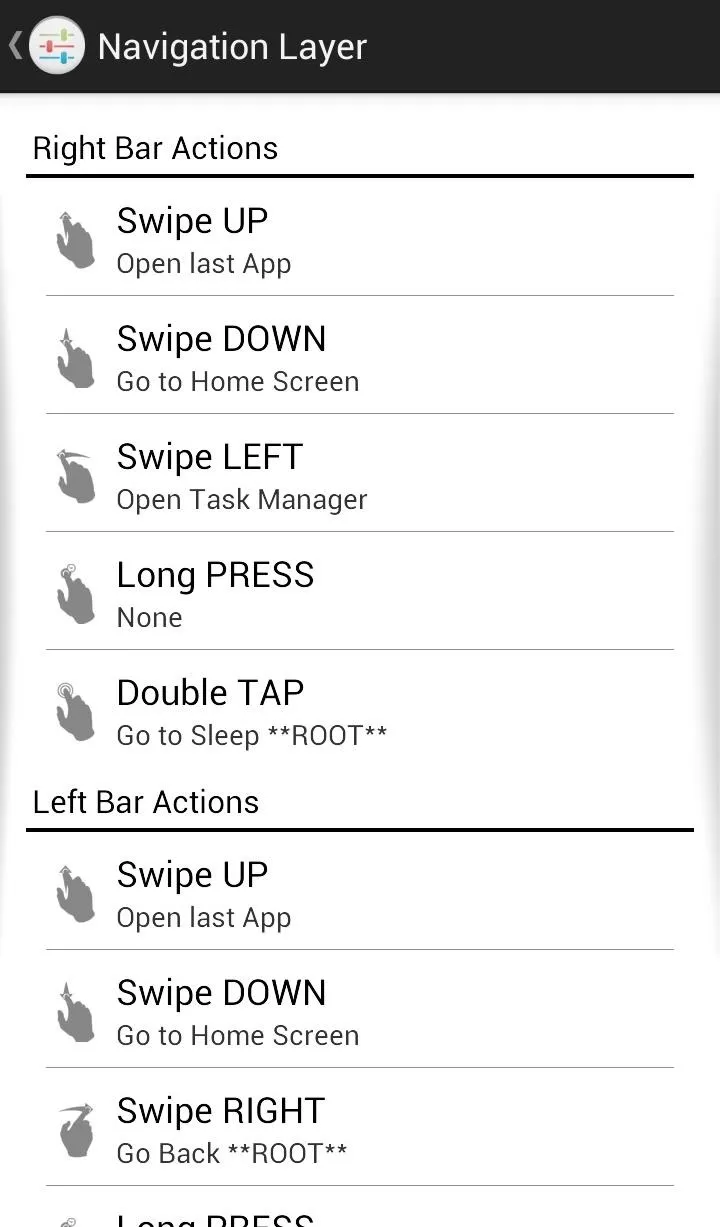
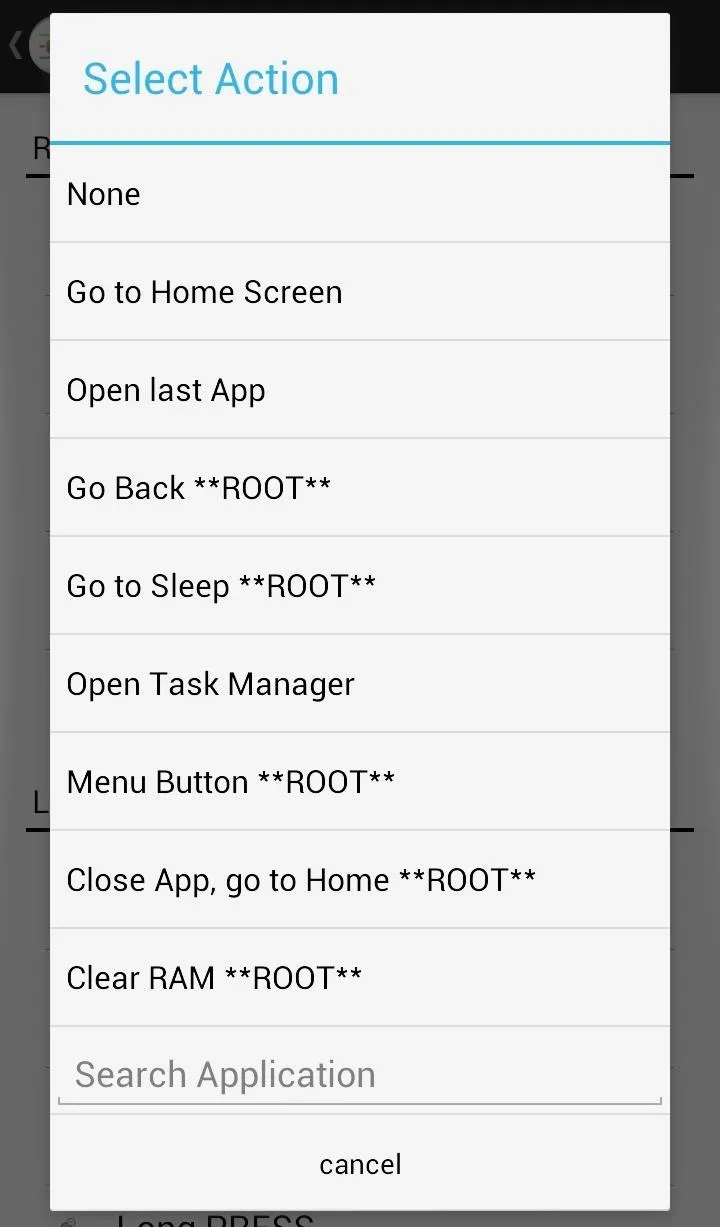
Now that you have your bars in place, you can begin assigning actions to each area. Select "Edit Action", then choose which action you want to change (swipe up, down, left, long-press, and double-tap)—each gesture has a list of actions that can be selected.

Some actions will require root access—those that do will say **ROOT** next to the action.
Test It Out
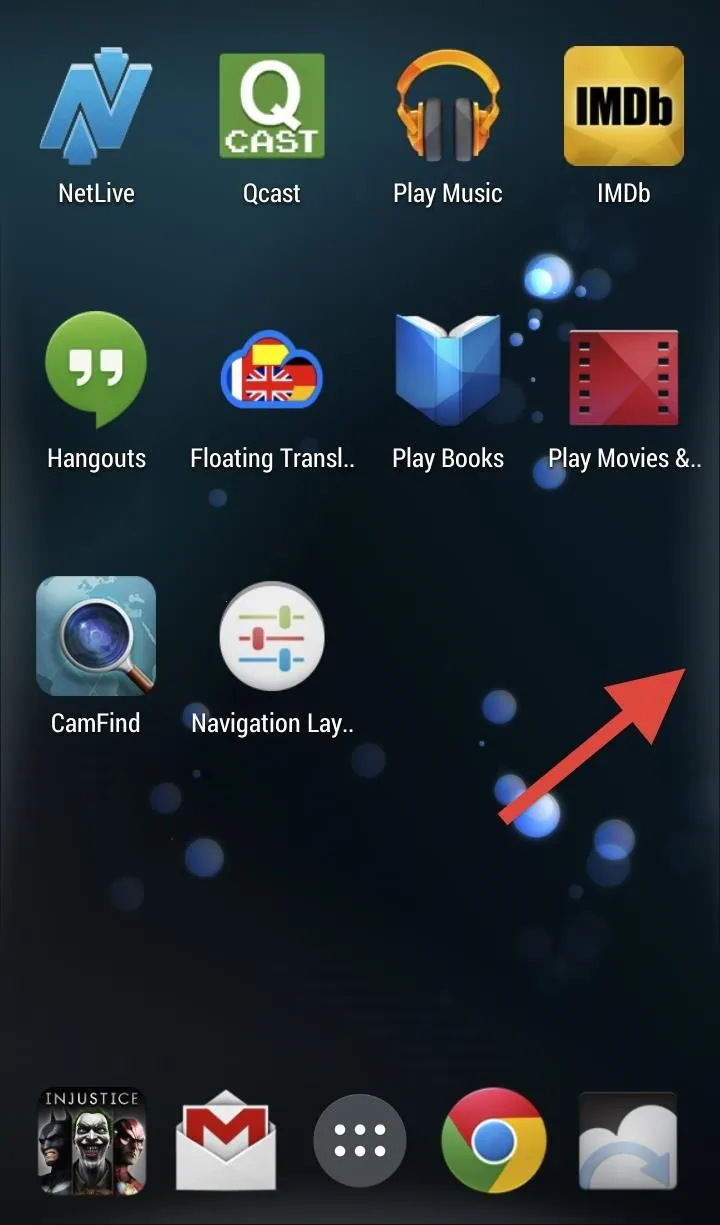
Now you're all set up and Navigation Layer is ready to go. Leave the application to begin testing out the swipe gestures. The gesture areas enabled should barely be visible on the home screen, with just a slight tint of gray for each area we have enabled. That's our swipe area, go ahead and test out your gestures.
Remember, the app is in beta you're now an official tester. If you find bugs, post 'em in the comments below, and definitely make sure to let the dev know on the testers' page.


Comments
Be the first, drop a comment!