Russians are well known for their knack at documenting exciting and horribly beautiful events on the go, from insane car accidents to attempted insurance fraud and even a superbolide meteor streaking across the sky.
Videos like these aren't limited to just Russia—dashcams are prevalent in many other countries across Europe and Asia, and are quickly catching on here in America, too.
In case you're ever in an accident, a dashcam is a great tool to have on your side, and may help prove who's at fault. It's also useful for catching other random occurrences on the road.
A dedicated unit could set you back anywhere between $50 to $200, but if you're a Samsung Galaxy S4 owner, you may not have to pay anything at all! You have all the video recording capability of a dash camera right on your phone.
Required Materials for Your Dashcam
Before you begin, make sure you have these basic components ready.
- Samsung Galaxy S4
Really, you could use any Android smartphone, as long is it has 2.2 or higher installed. At first, you'd think that the Galaxy S4 would make the best dashcam because it can record using both front and rear cameras at the same time, but that's overkill in my opinion, and kills the battery.
- Car dock/mount for your phone
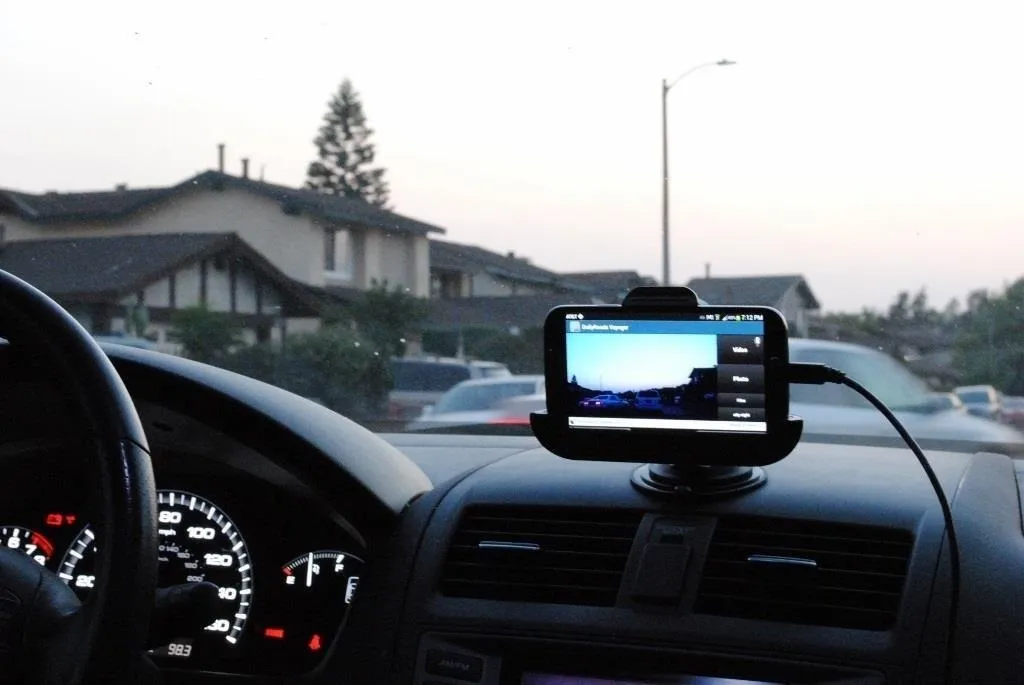
You can find car docks that are made specifically for your model phone, and there are also universal docks with adjustable clamps. I've been using a dock for the GS4 by iBolt. You could even DIY one if you aptitude, and if you do, please share a picture below in the comments so the rest of us can benefit from your genius.
- Car charger
Some docks may come with a car charger already. Video recording is a drain on any phone's battery, so you'll want your phone plugged in.
Note on Legality of Windshield Mounted Devices
If you're using a mount that goes on your windshield, make sure you're aware of your city and state's laws. In California, for example, you're not allowed to mount in the center of your windshield; it has to go in the lower left corner instead.
Download DailyRoads Voyager
To use your GS4 as a dashcam, we'll be using an app called DailyRoads Voyager, available for free on the Google Play Store.
Main Screen Interface
Once you have the app installed and opened up, you'll see your new dashcam's viewfinder and four buttons on the right side.
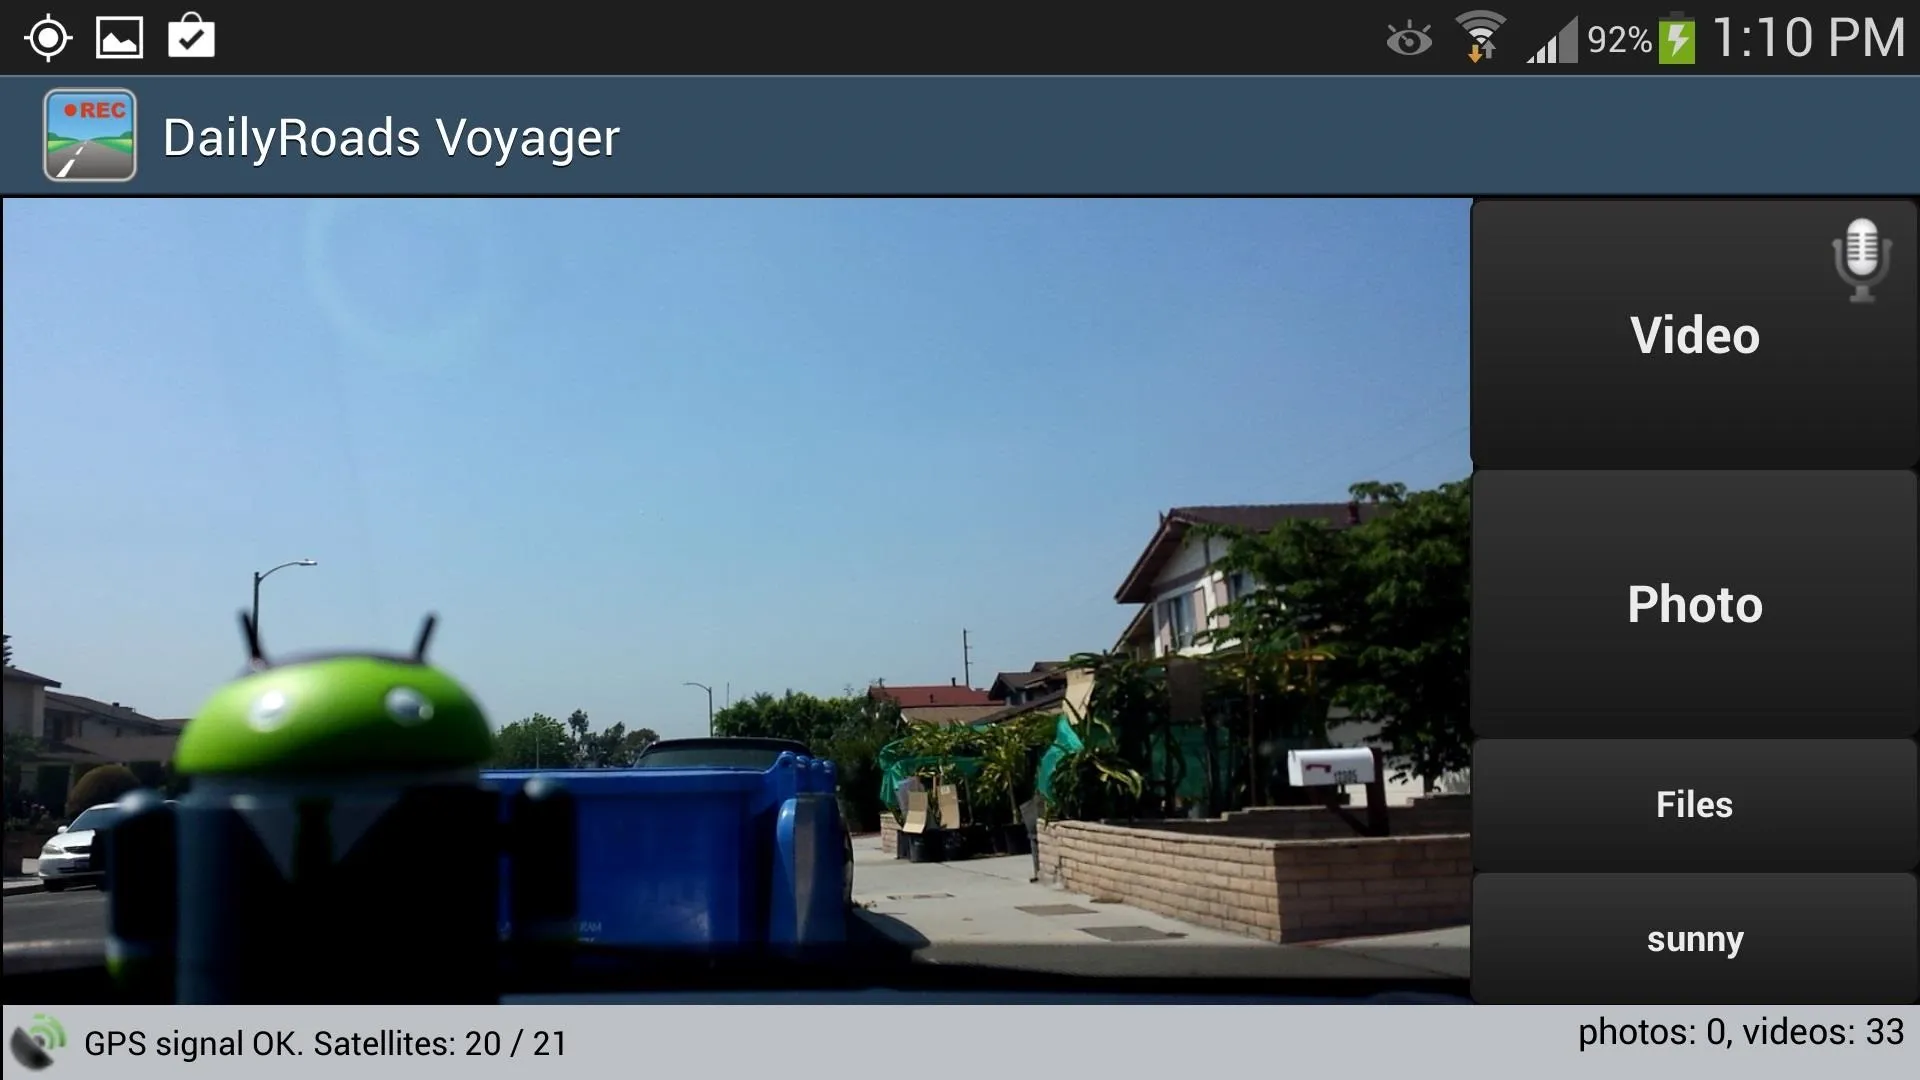
- Video: Tap this to start recording video (turns red while recording). The little mic button toggles sound on and off.
- Photo: Starts photo capturing at a predetermined interval (default is one photo every 60 seconds, but you can change this in the settings).
- Files: Will show you all the videos and photos you have stored.
- Camera mode: It will say default by default, and you can tap it to cycle through different modes, which will help adjust the camera to different lighting conditions (i.e., sunny, cloudy, moonlight, etc).
Customize Your Settings
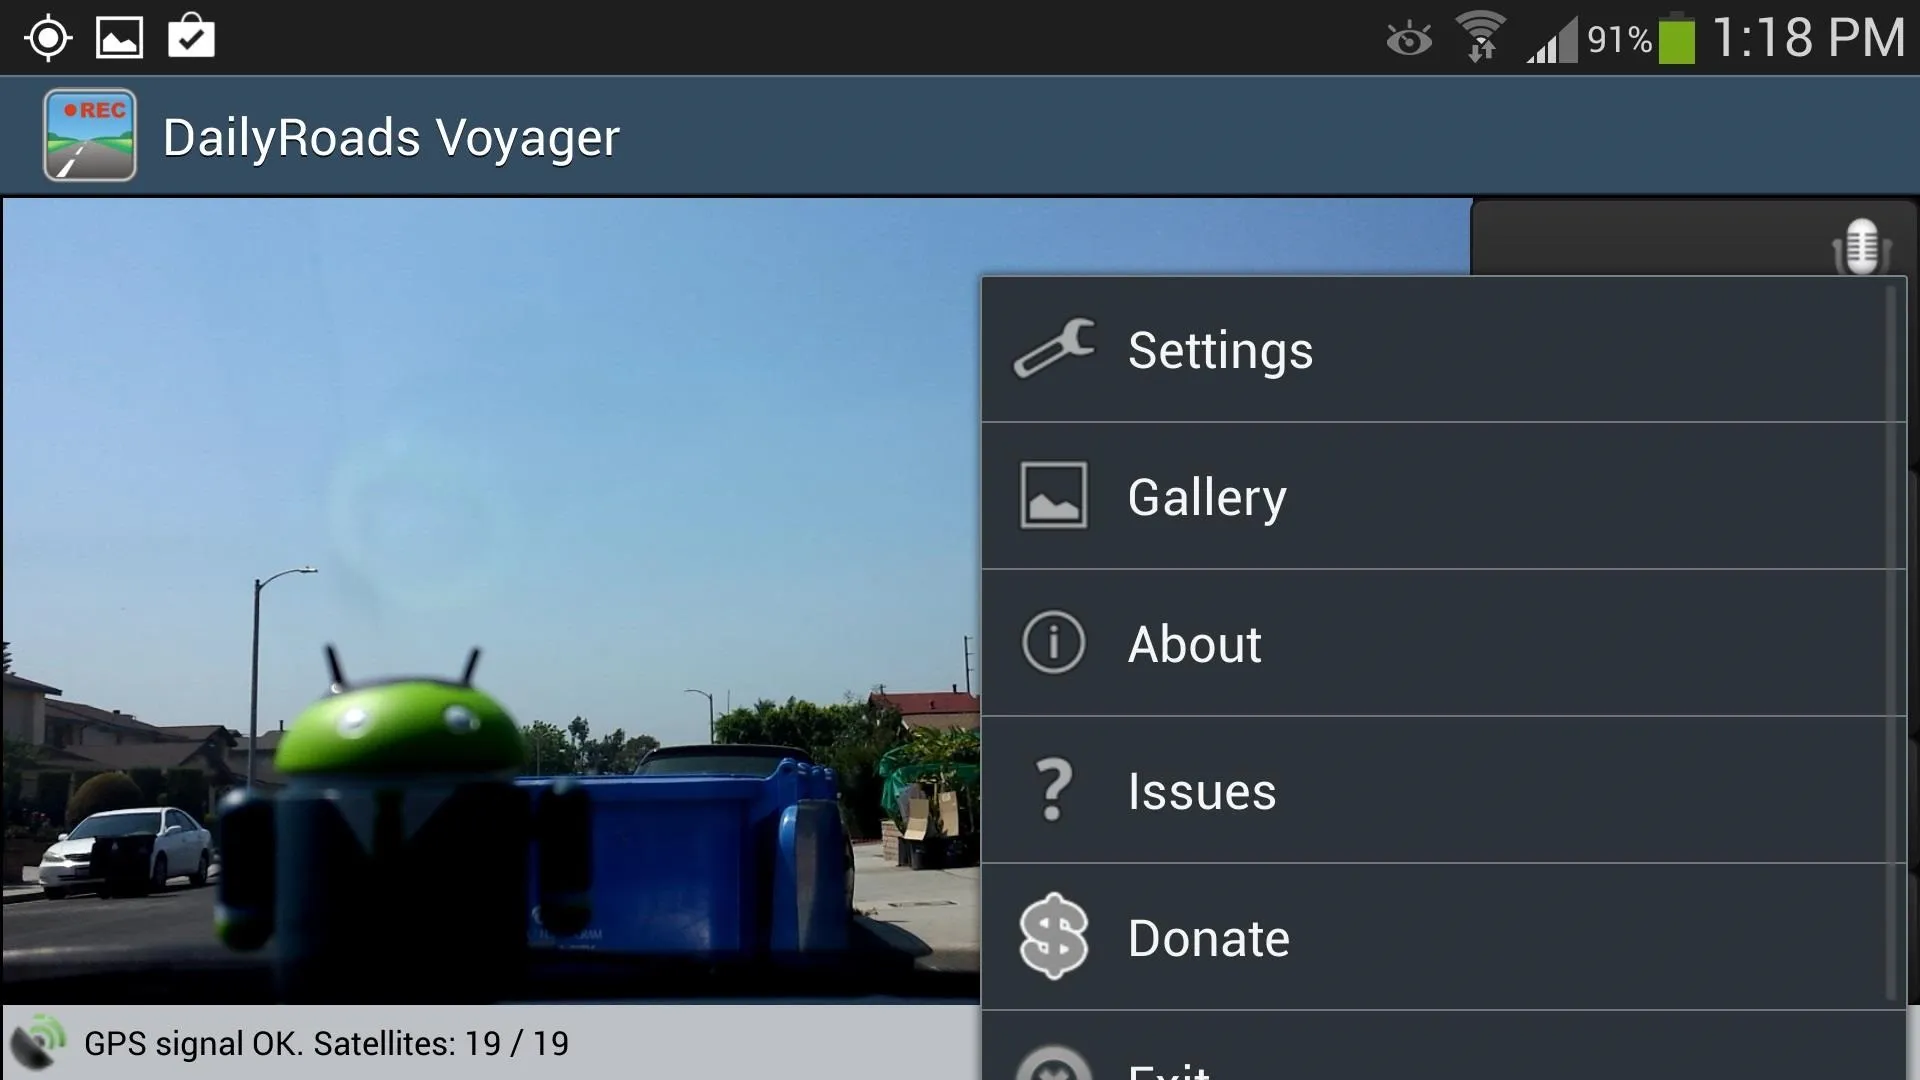
Before using your dashcam, I recommend going through the settings and tweaking them to your needs and preferences. From the app's main screen, simply tap your GS4's menu button, then select Settings.
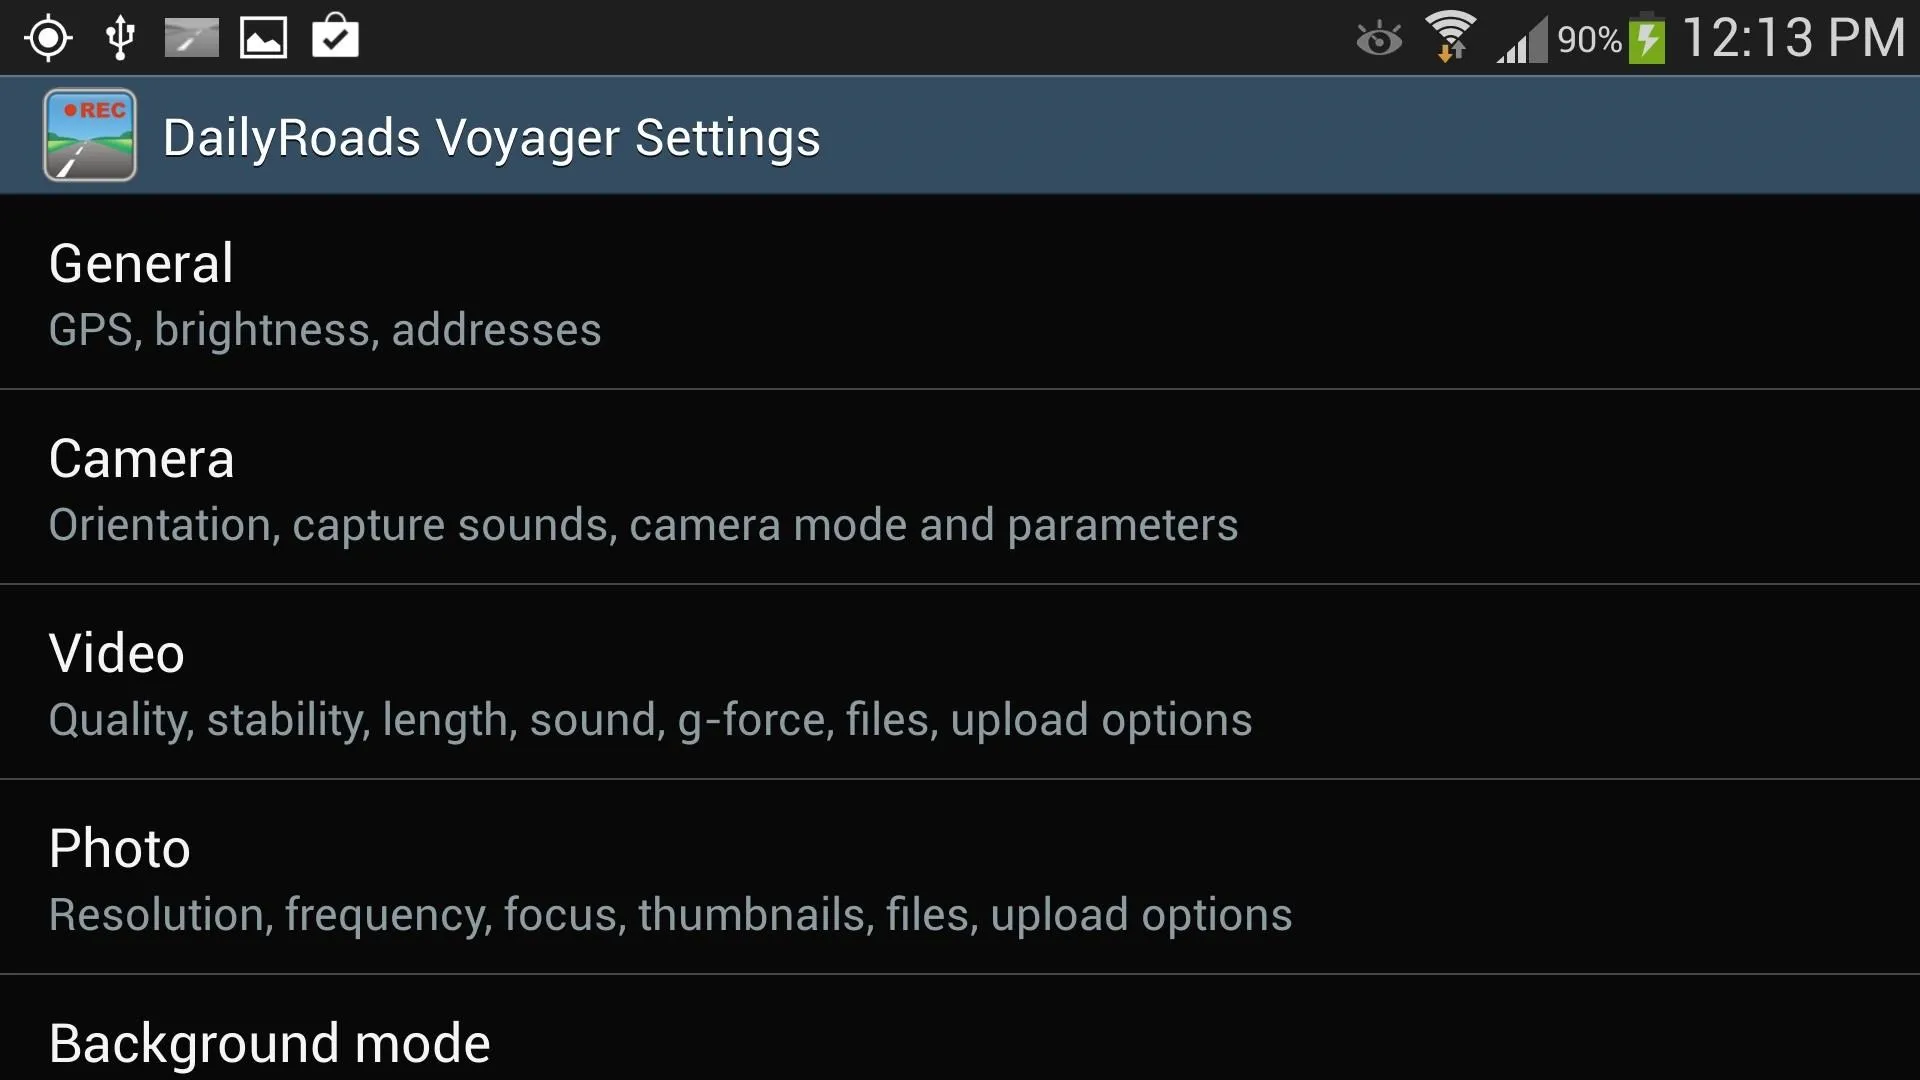


The most important settings to configure would be the video settings. They'll dictate the quality and length of your dashcam videos. Just remember, the higher the quality, the larger the file size. I like to have mine at HD 720p (1280 x 720), putting a 10-minute video at around 850 megabytes in file size.
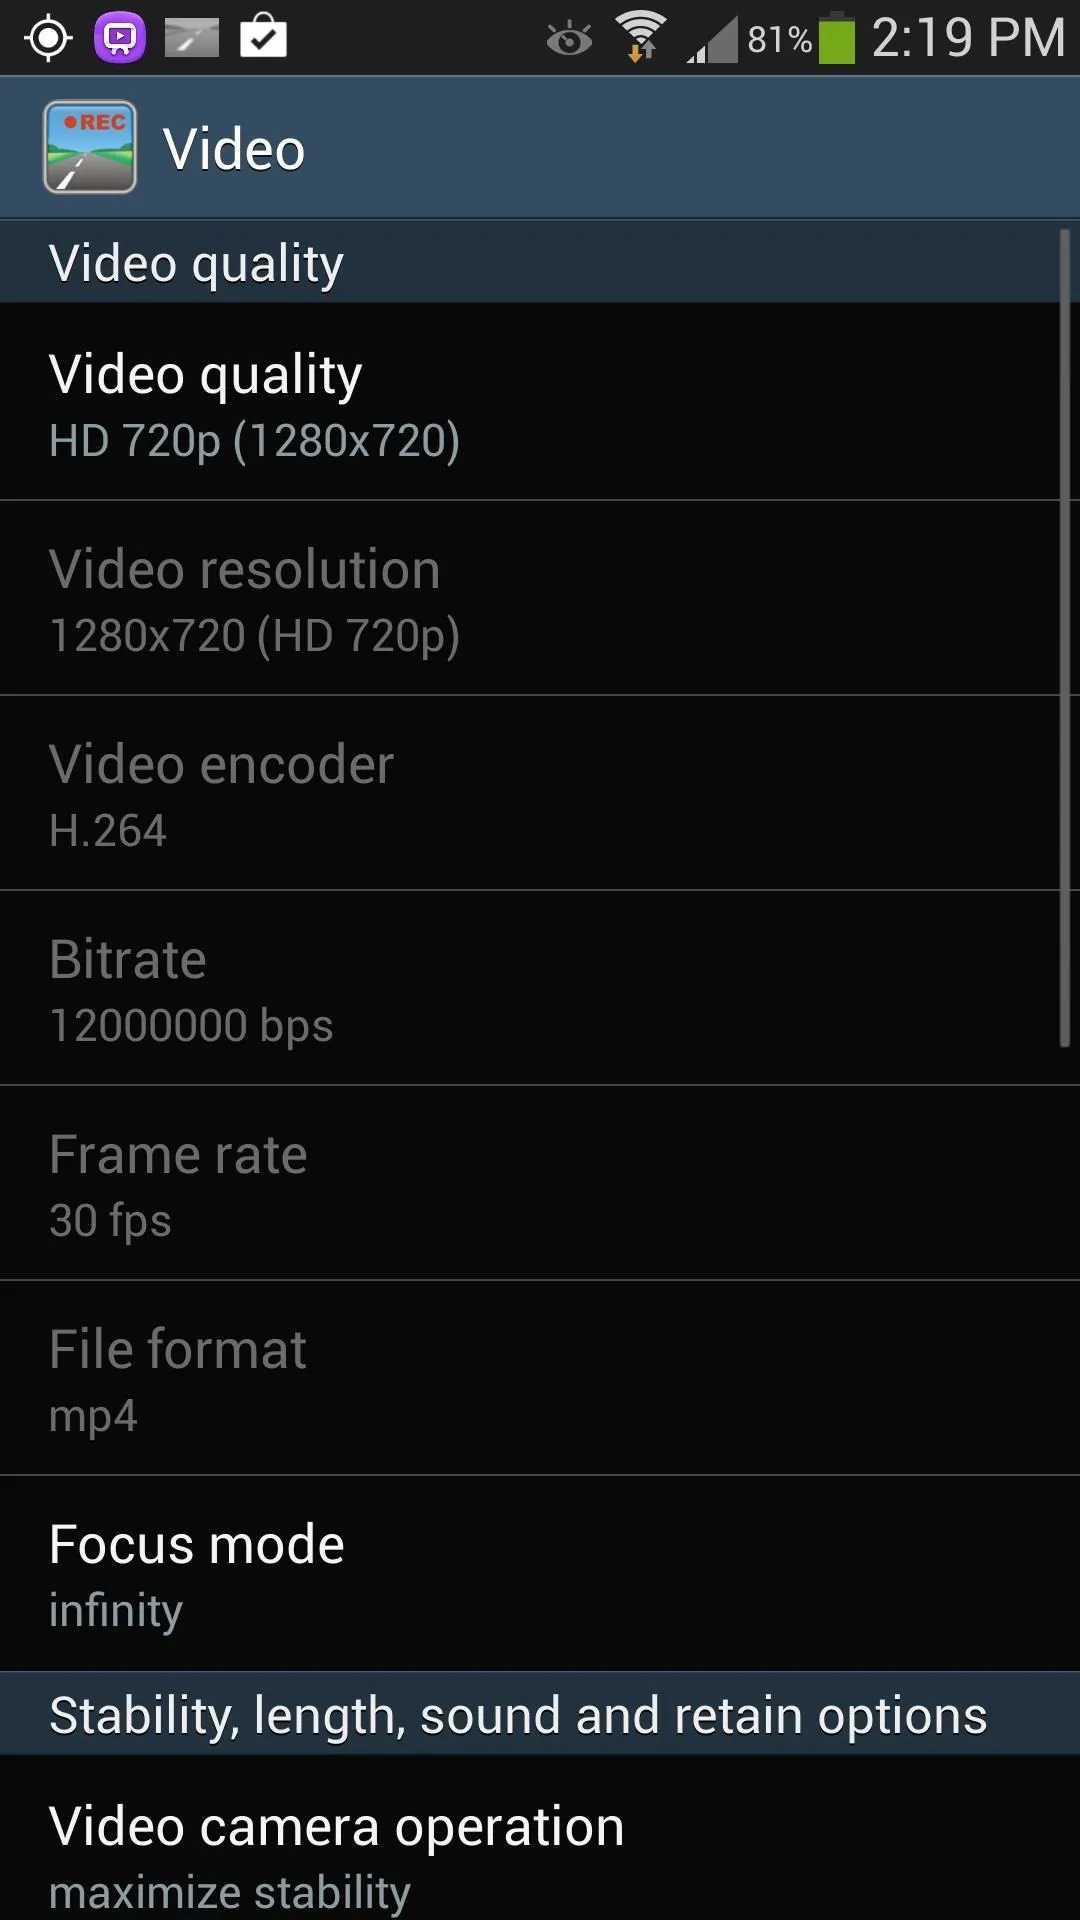
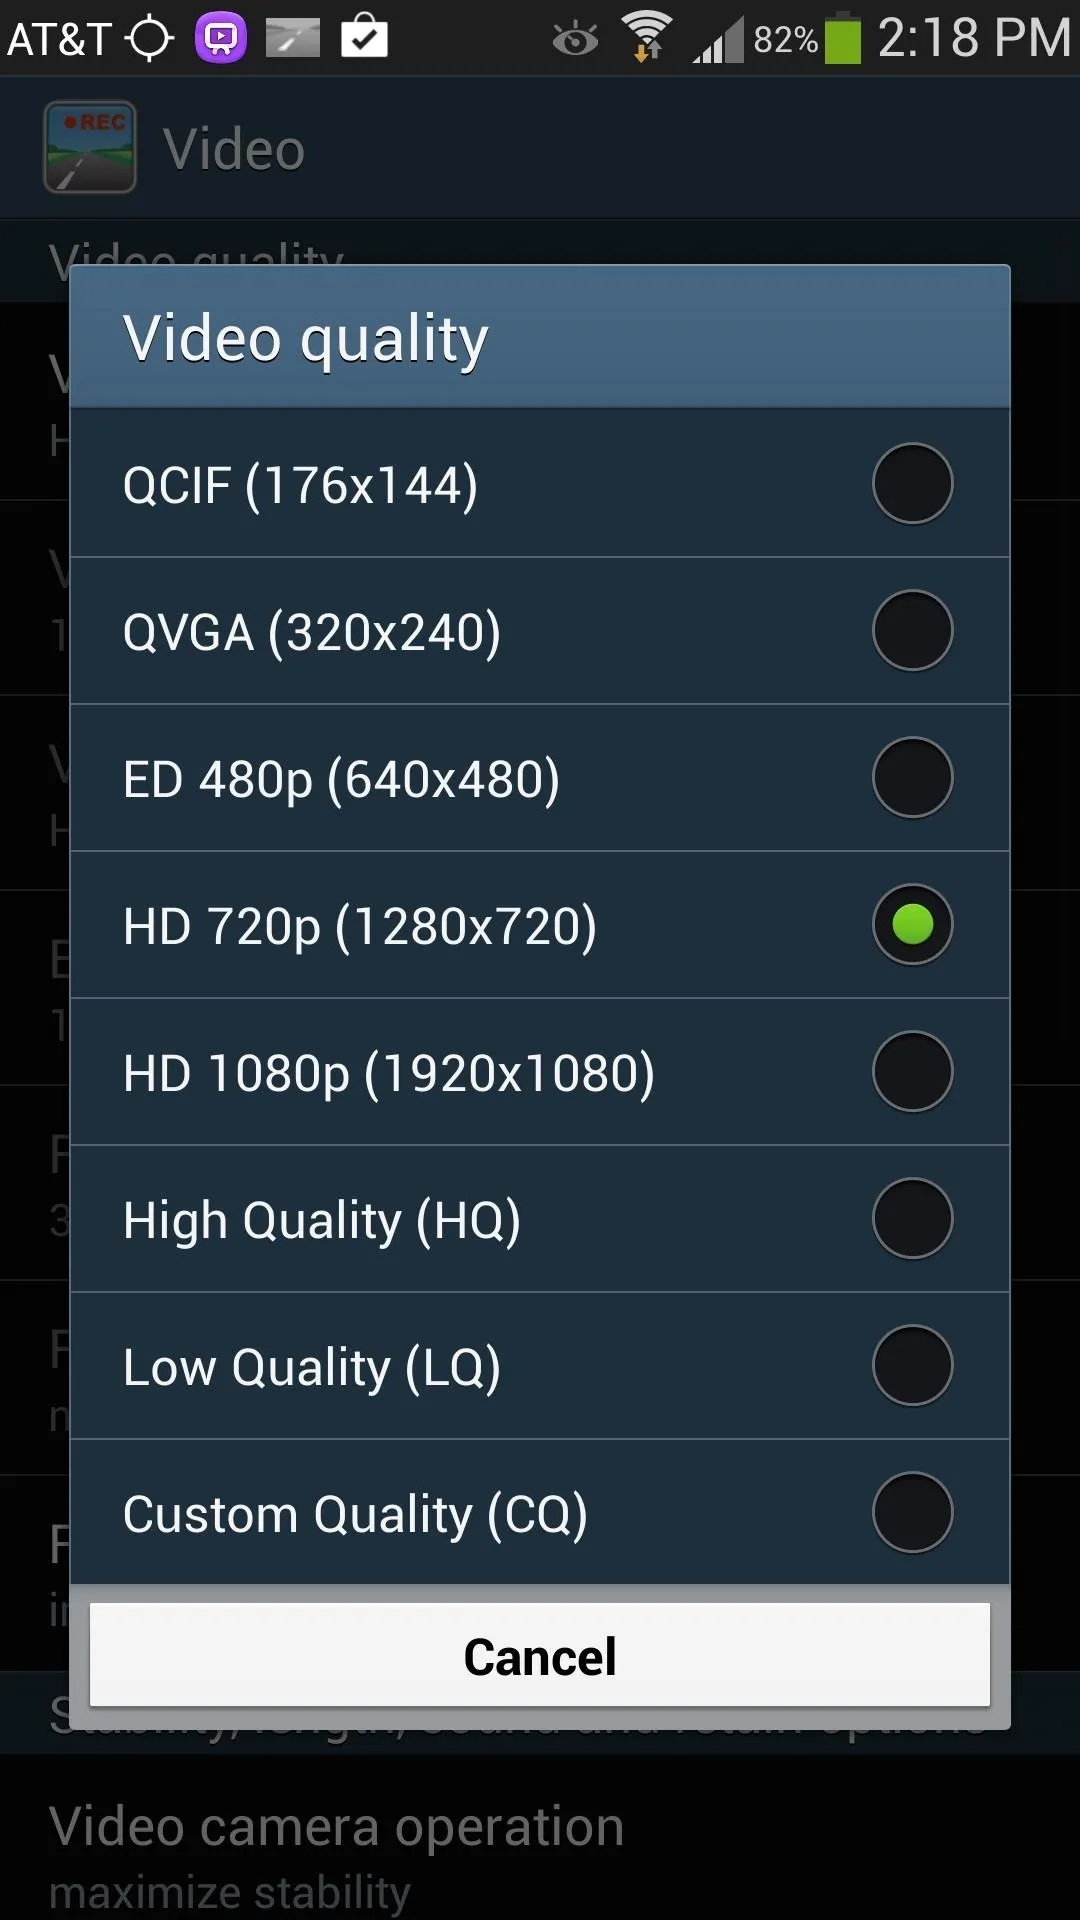


You can set the length of the video under Video length per file.
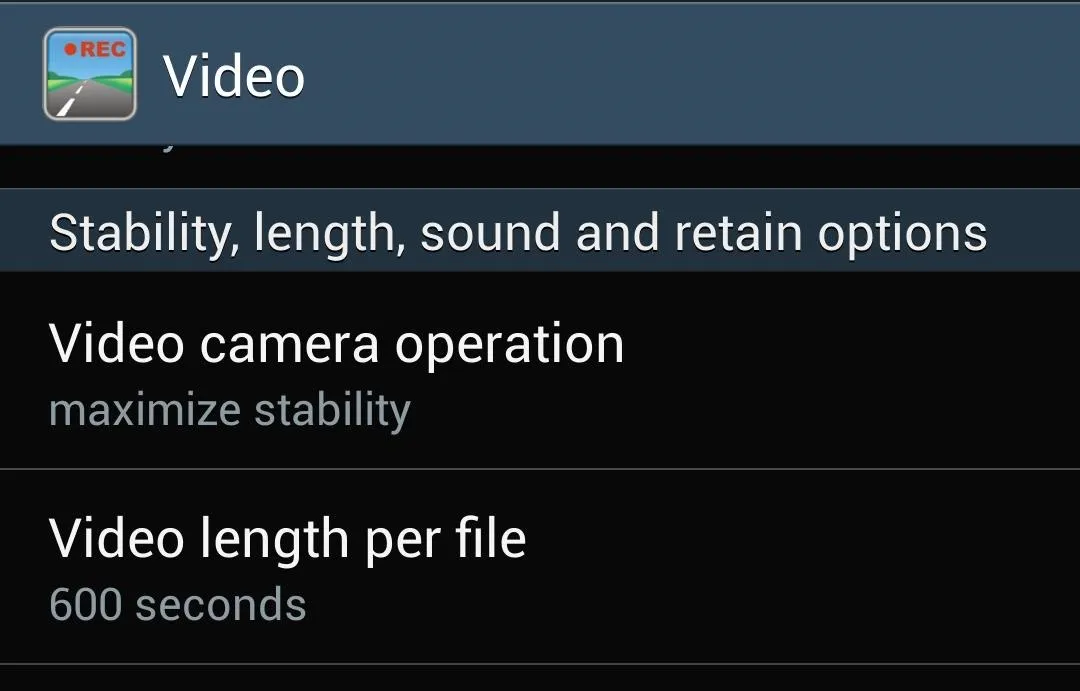
I have mine set at 600 seconds (10 minutes), but you can set it however long you'd like.
Another important setting is where your videos are stored. You can either have them on your GS4's internal memory or an external SD card.
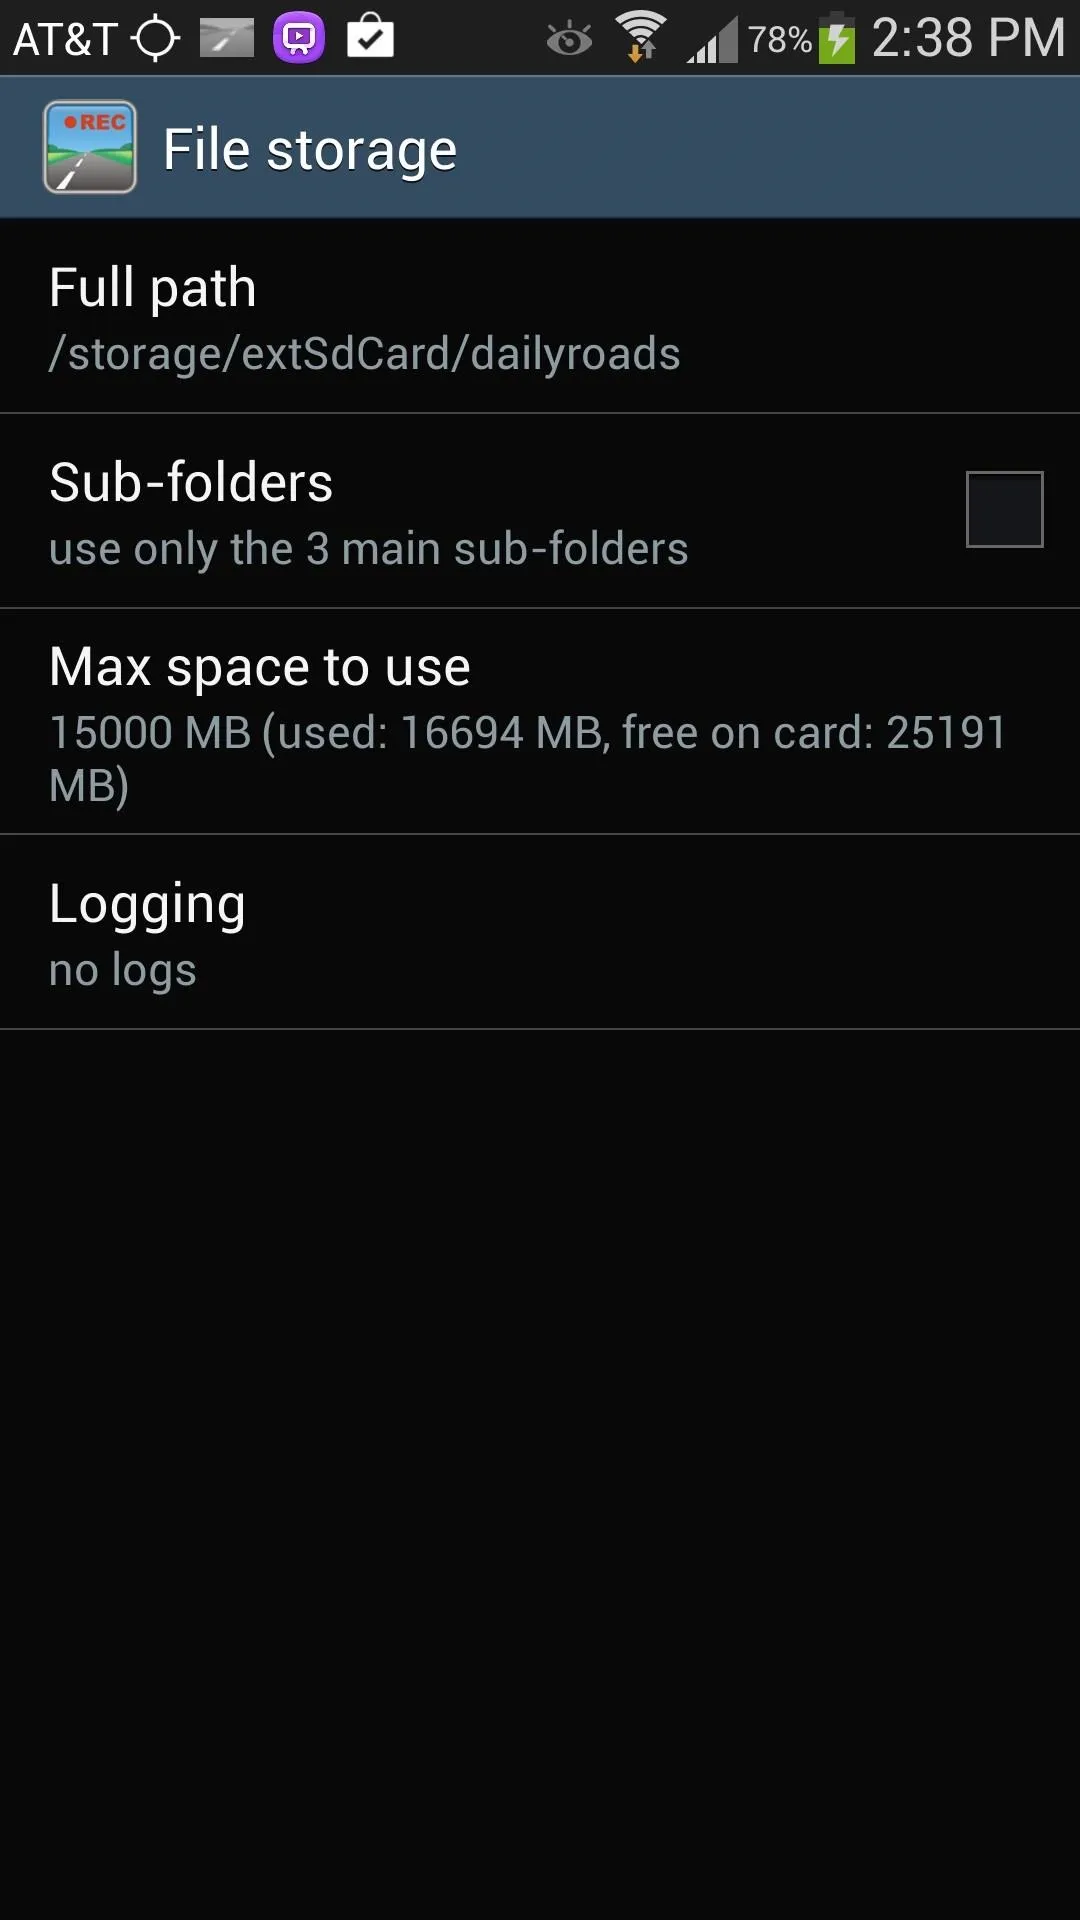
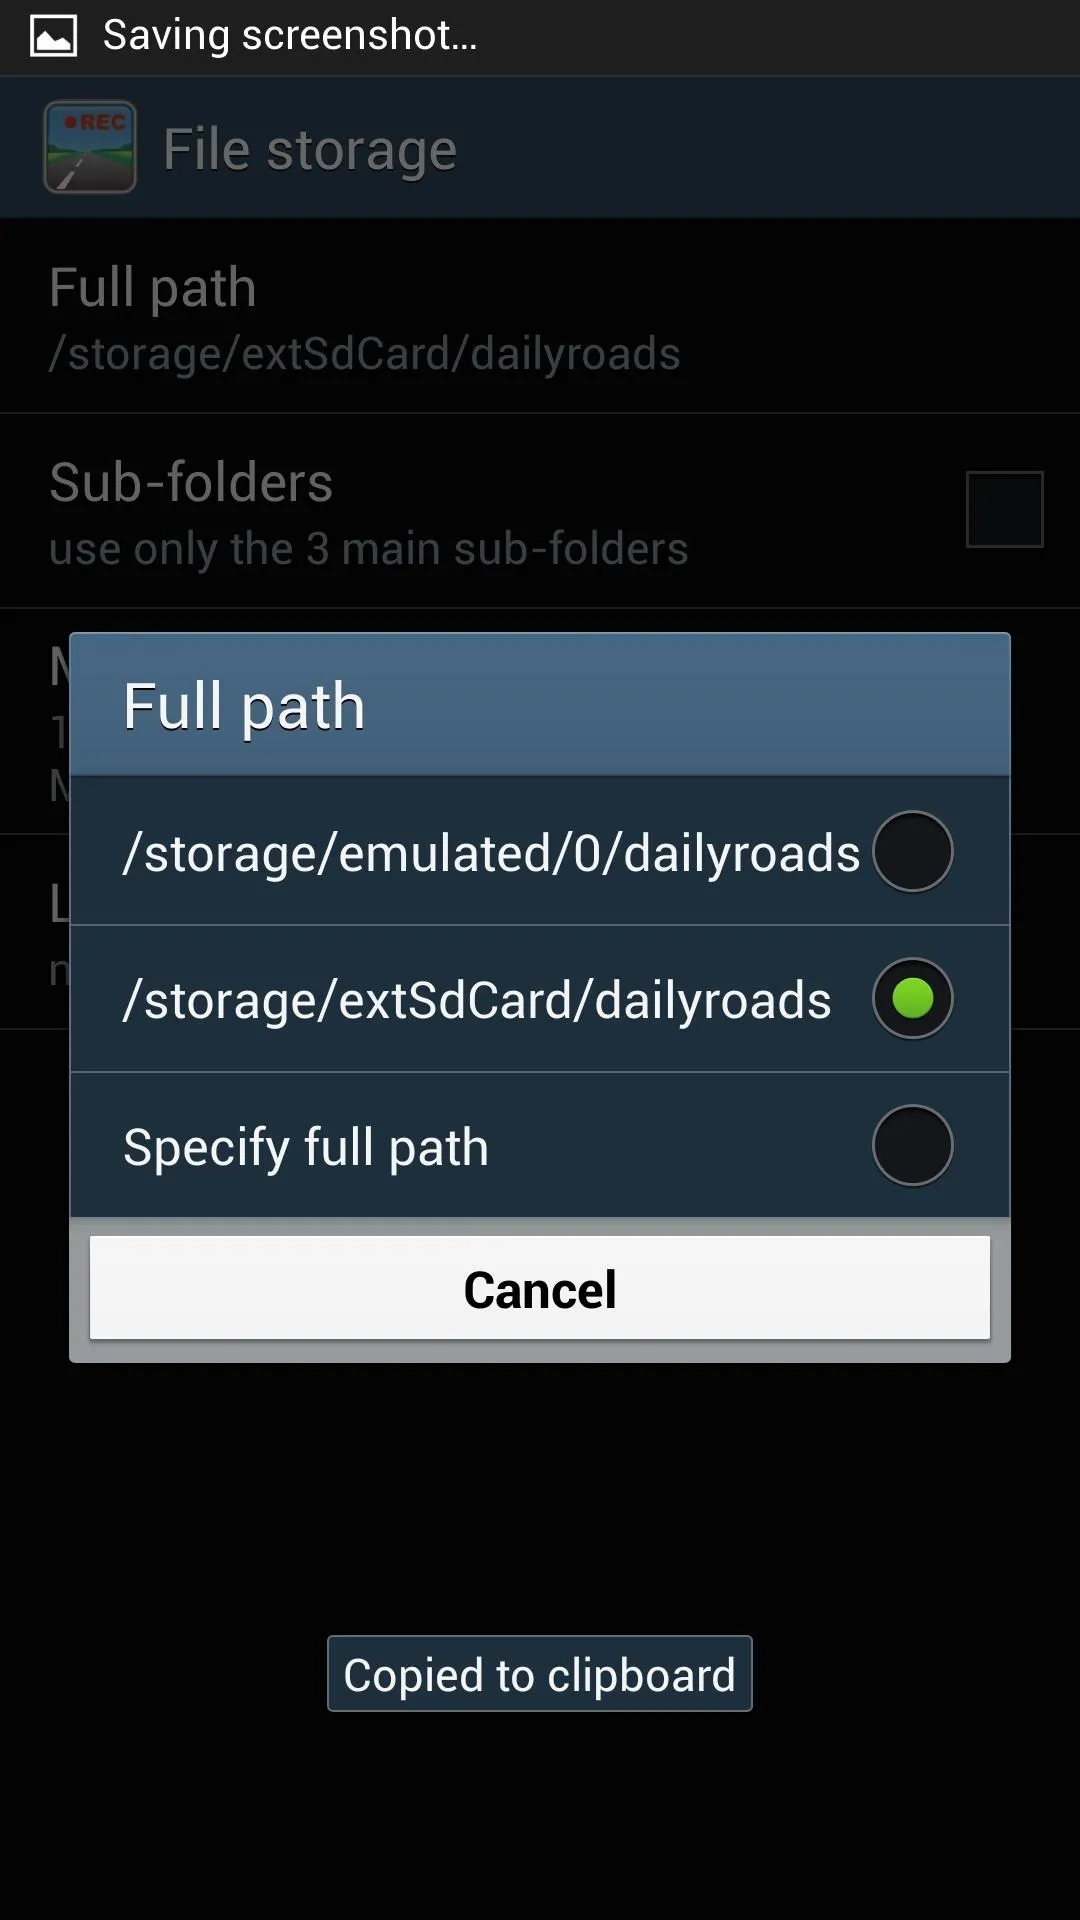


Also make sure to edit Max space to use, where you can allocate a certain amount of space for your videos. If that amount of space starts to fill, the app will delete the oldest videos one by one.
Once you have your settings configured, you can start using your new dashcam!
Recording Videos
When you want to start recording, simply tap the video button and it will turn red, indicating recording is on.
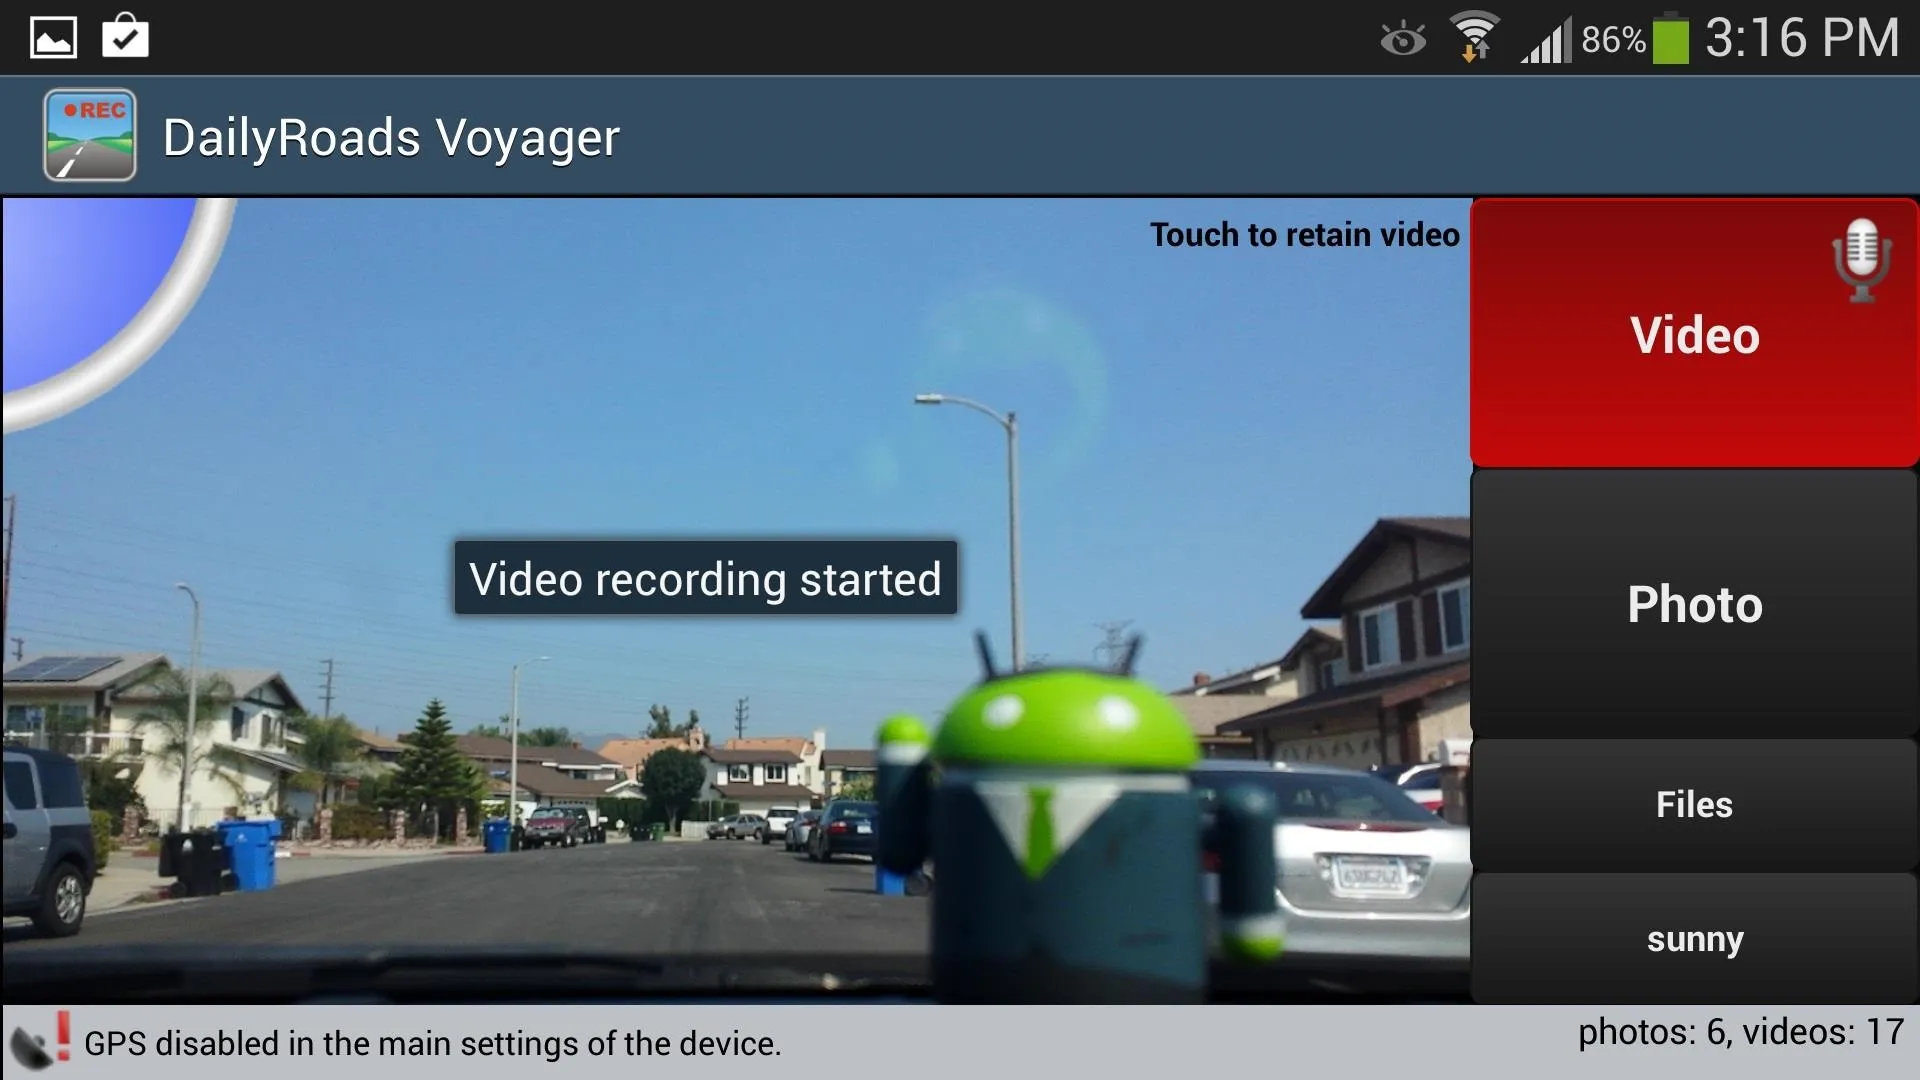
You'll notice in the upper right corner of the viewfinder, it says Touch to retain video. If you film something noteworthy while driving, you can just tap the viewfinder part of the screen and the app will save the video for you. The video will be stored in a separate folder titled Retained videos and will be safe from automatic deletion if you run out of storage space (remember, you can access your videos by tapping on the Files button on the main screen).
Background Mode
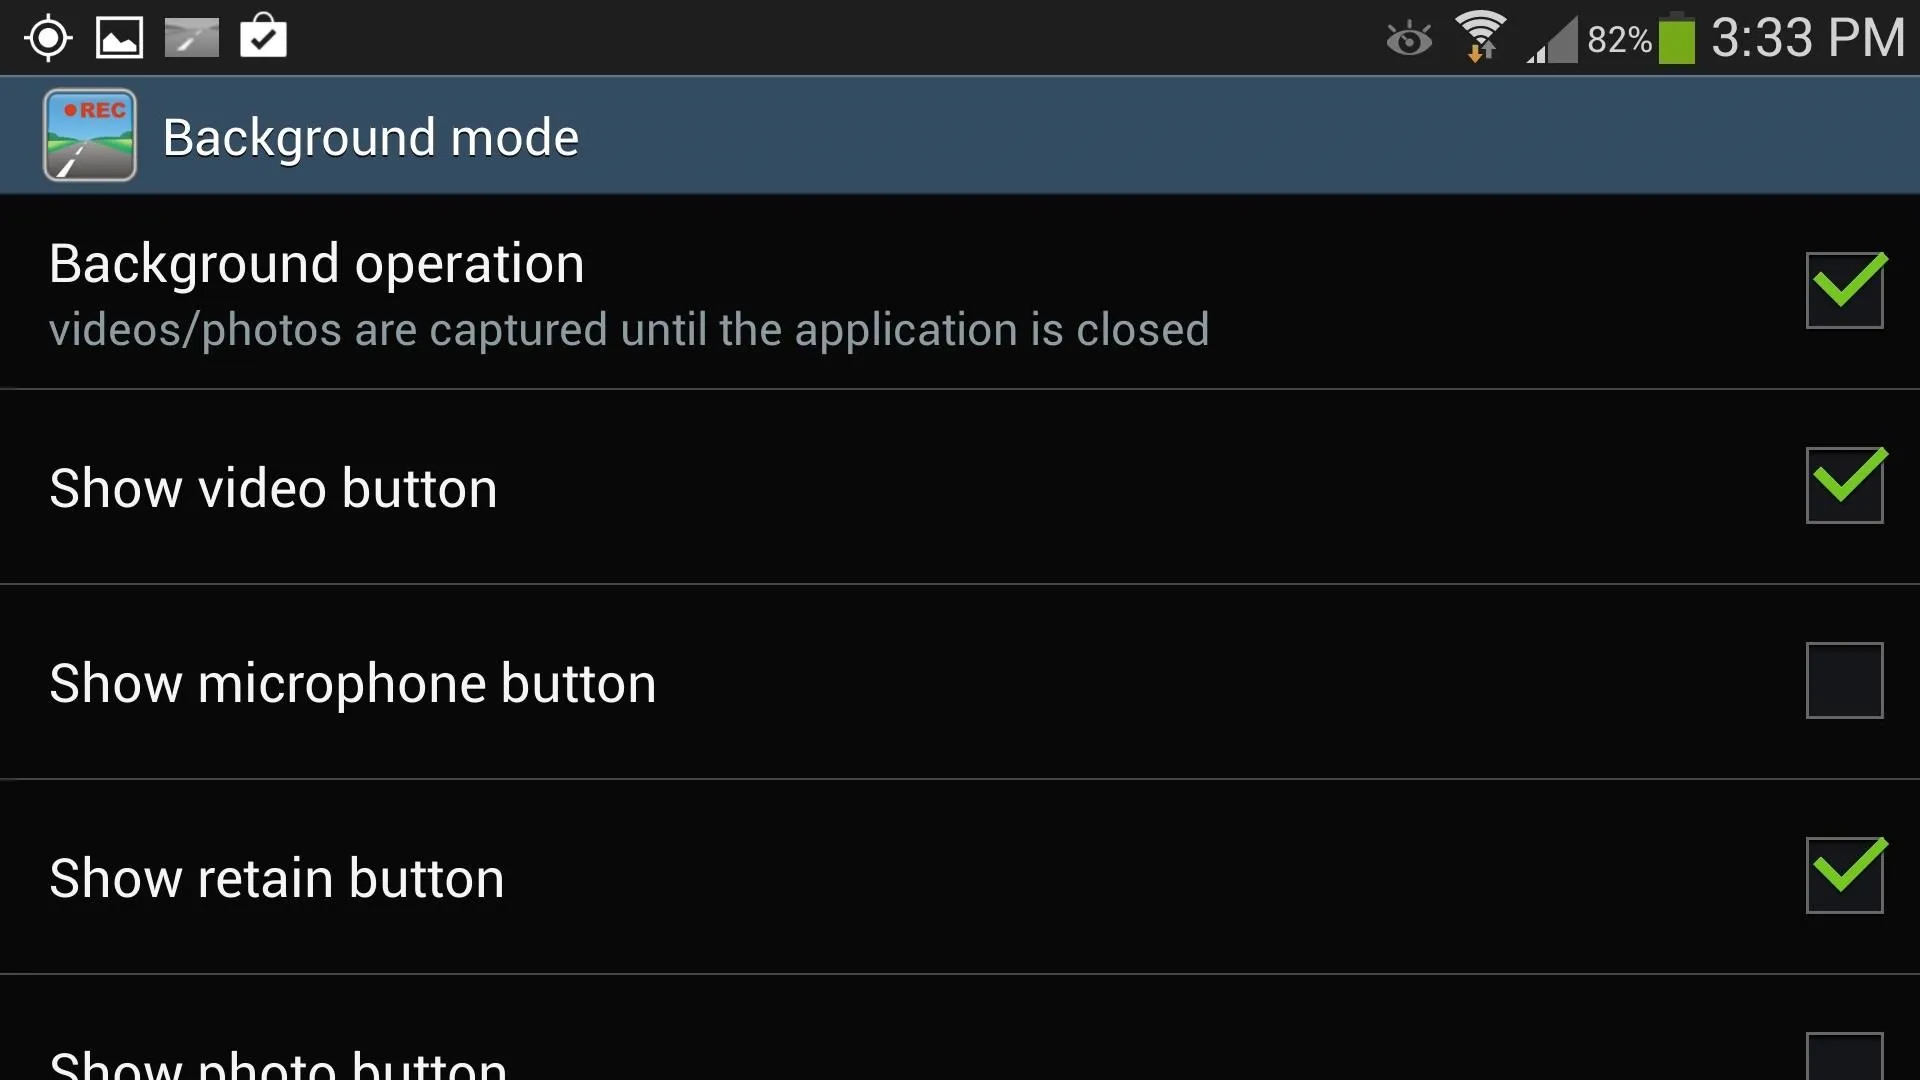
One of my favorite features of this dash cam app is that you can have it running in the background, so you can run a navigation app and still be filming. Simply go to Settings -> Background mode, then make sure Background operation is checked. DailyRoads Voyager will overlay buttons onto whatever app you're running in the foreground, so you can toggle video on and off. I like to have the Show video button and Show retain button checked.
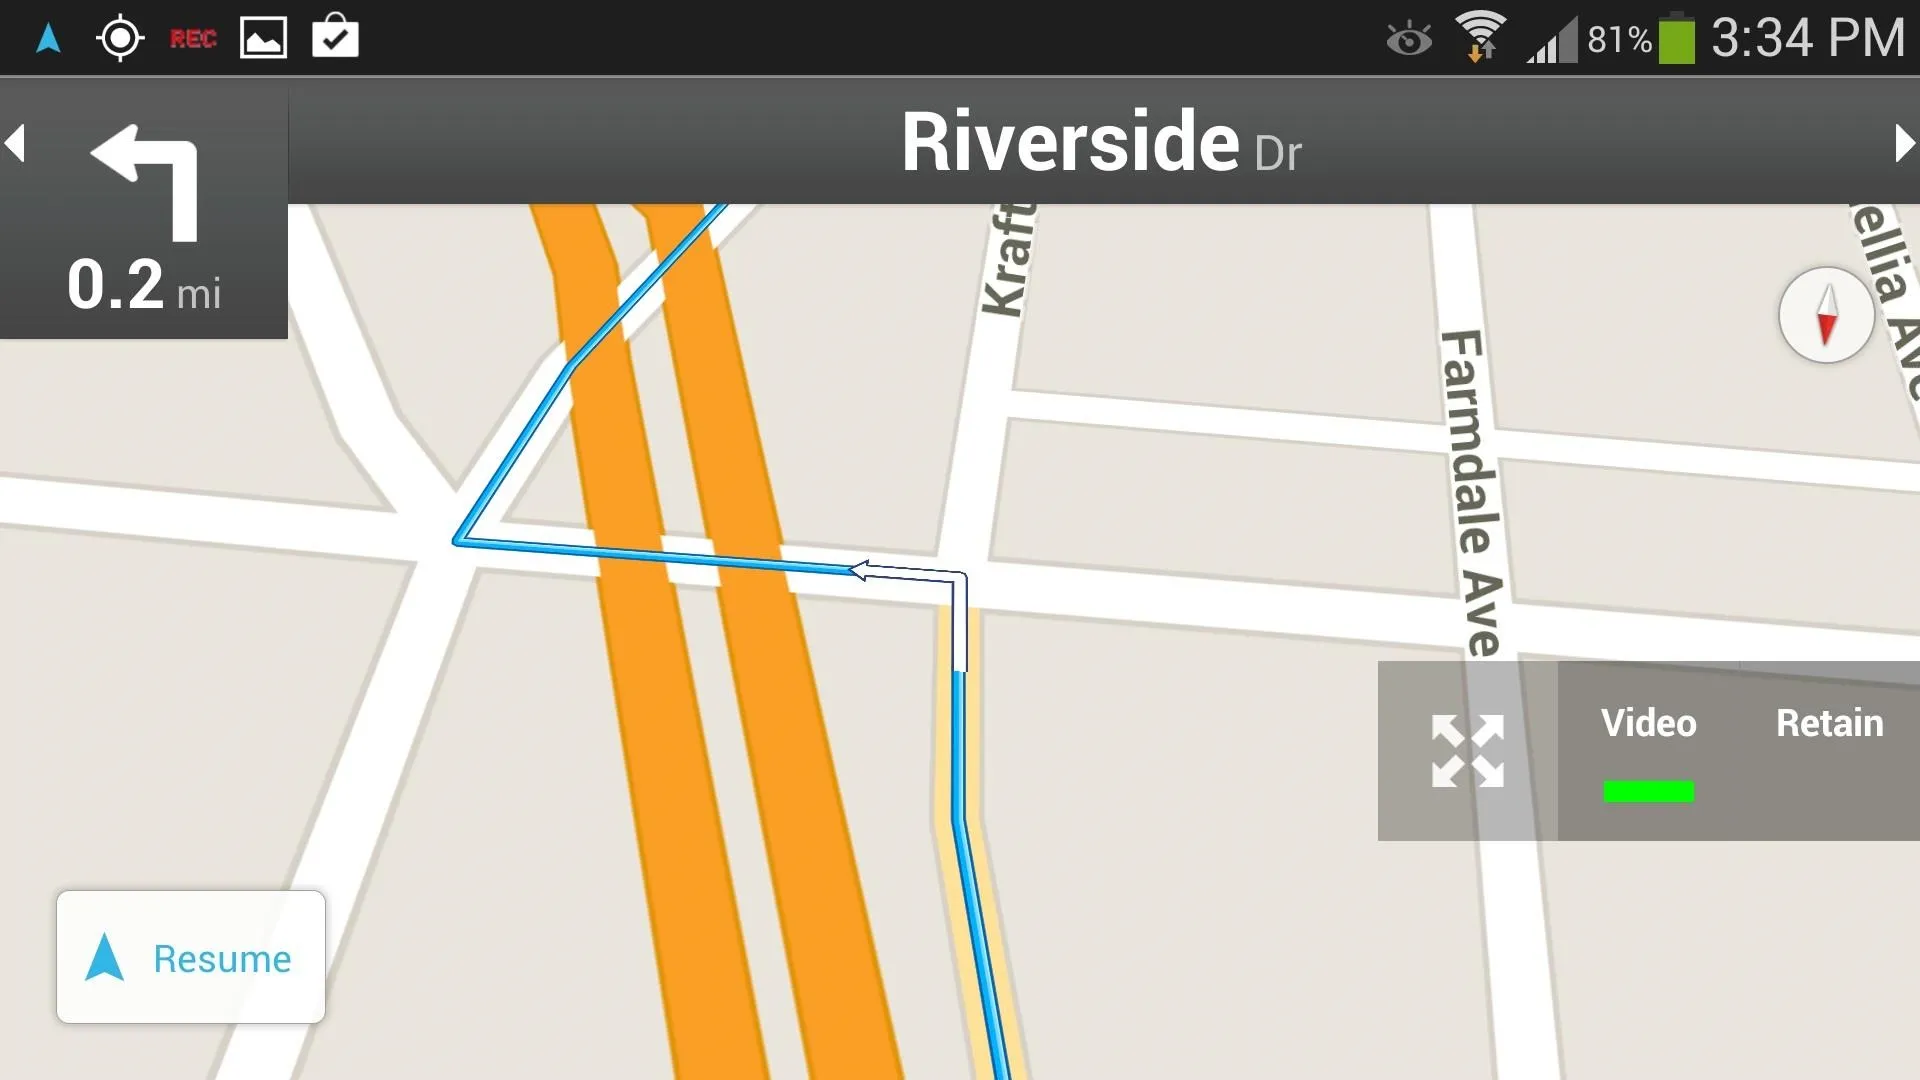


The overlaid video button has another button on its left with four arrows pointing outwards diagonally. You can tap and drag this button to position the overlay anywhere you'd like.
Drive Safely!
Once you're familiar with using the app, pop your phone into your car dock or mount. Always remember to drive safely and if you need to make any adjustments to your device, make sure you're pulled over to the side and at a complete stop, or have a passenger do it.
If you have any questions or comments, feel free to leave them in the discussion section below. And if you DIY your own dash cam mount, please share it with us!














Comments
Be the first, drop a comment!