Android 5.0 "Lollipop" has only existed for a few months, but a leaked version of Samsung's take on the firmware has already been spotted in the wild. This update came straight from Samsung, and brings with it a plethora of new features, including greatly improved performance and a revamped TouchWiz UI.
Before you decide whether or not you'd like to install this new firmware, note that it will only work on the LTE Variant of the N9005 model. For the most part, this means that only devices purchased in North America are compatible, and only those with LTE connectivity. And as a rule of thumb, Verizon Wireless and AT&T phones are not eligible to sideload updates, since both of these carriers like to tamper with the stock firmware on their Android devices.
You should also know that this procedure will wipe all of the data on your device. If you have any important files stored on your Samsung Galaxy Note 3, make sure they're all backed up before proceeding.
Update (4/3/15): Lollipop for AT&T Note 3
Android 5.0 is now available to flash on the AT&T variant of the Galaxy Note 3 (N900A). Download the four files below:
- AP slot download (MD5: 52a7be63a94f034d7d285d046e06420f)
- BL slot download (MD5: 40b3395b138ef8c657089a29df1239fb)
- CP slot download (MD5: 59476097cb52e6672e3a5302a10d5093)
- CSC slot download (MD5: cde59a77b4d45c62869a5dd318233a69)
...and follow the same exact steps below to flash them to your device using ODIN. This method will wipe your data, so make sure to back up your device.
Alternatively, you can use this single MD5 file and place it in the AP slot in ODIN, which will not wipe your data. If you elect to go this route and experiencing excessive lag or app crashes, we'd recommend going into the stock recovery (volume up + home + power buttons from an off state) and wiping system cache.
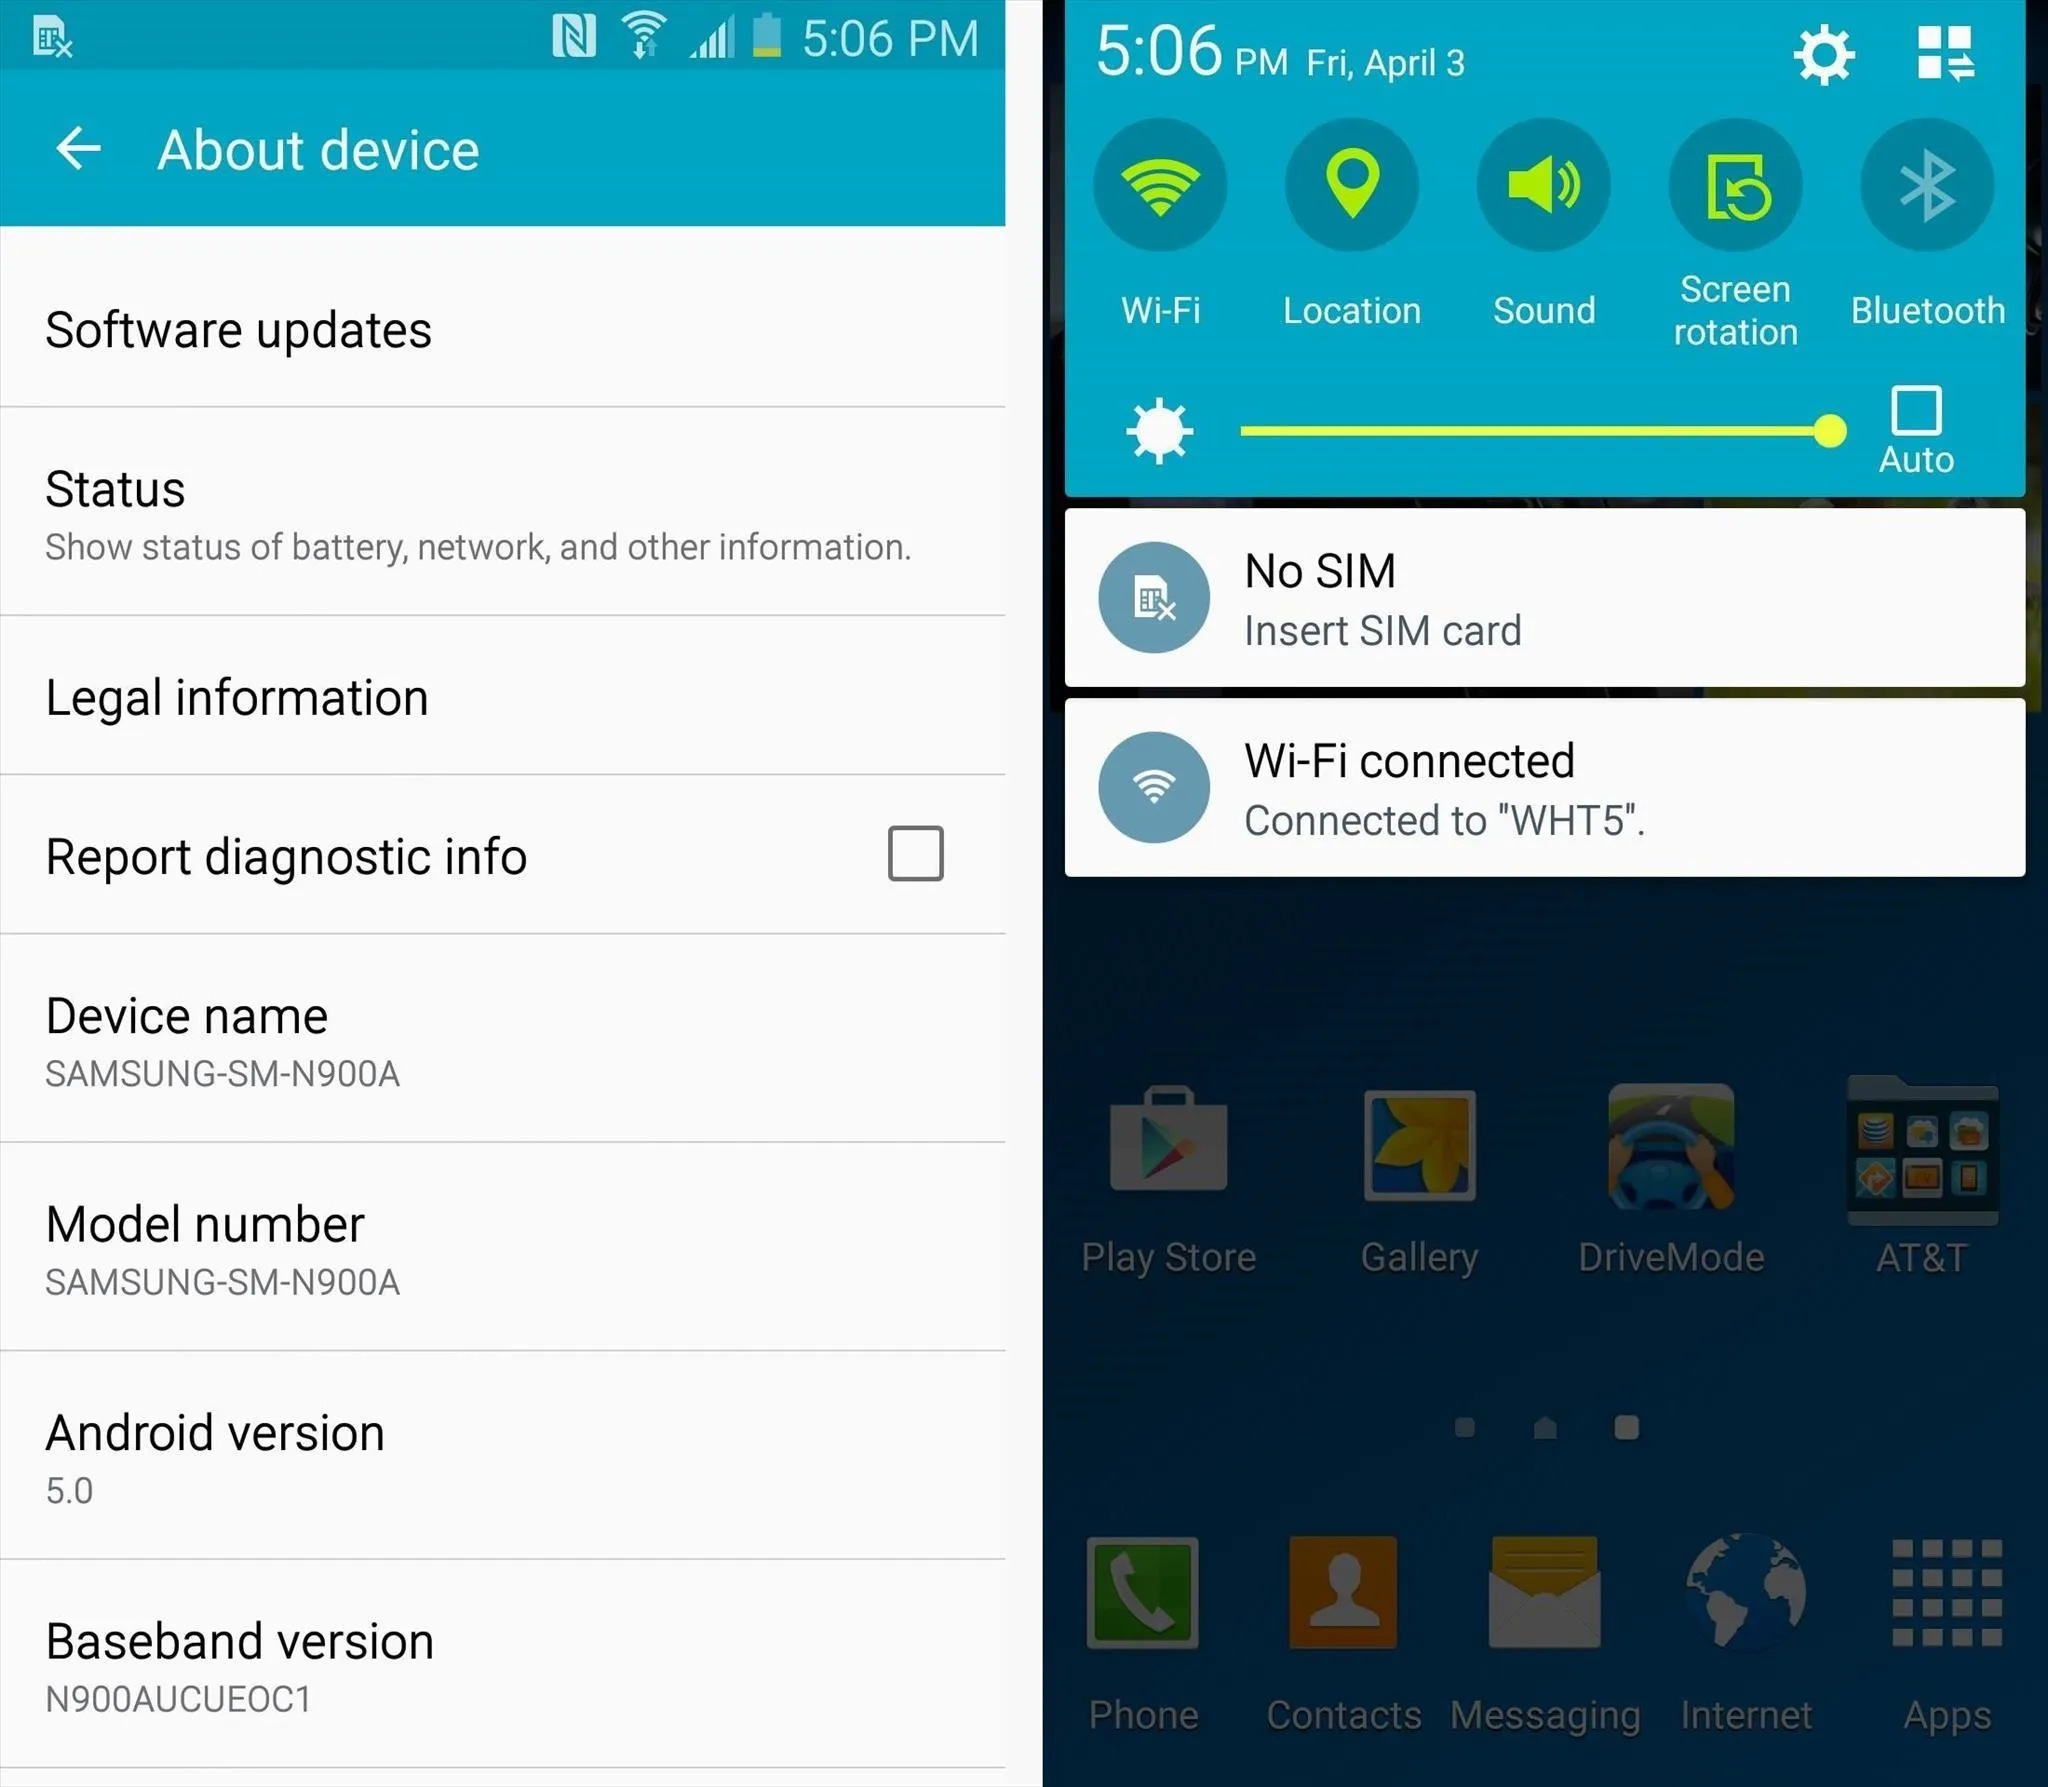
Android 5.0 running on the AT&T Galaxy Note 3.
Requirements
- N9005 Galaxy Note 3 (LTE variant only)
- Windows PC
- USB data cable
Download Necessary Files
To get started, there are a few files that you'll need to download to your Windows PC.
First, grab the Samsung USB drivers from this link. Once downloaded, just open the file and follow the prompts to install the drivers.
After that, grab a copy of Minimal ADB and Fastboot from this link. This tool will be used to back up an essential file on your Note 3, so run the installer and follow the prompts to get it installed.
Next, you'll need to download Odin, which is software for Windows that allows you to install firmware on a Samsung device. You can find Odin at this link, and once you have it downloaded, extract the two files in the ZIP to a folder that you can access easily.
Finally, it's time to grab a copy of the leaked firmware itself. The file is rather large at 1.1GB, so make sure you have room on your hard drive, then click this link to save it to your PC.
Enable USB Debugging on Your Note 3
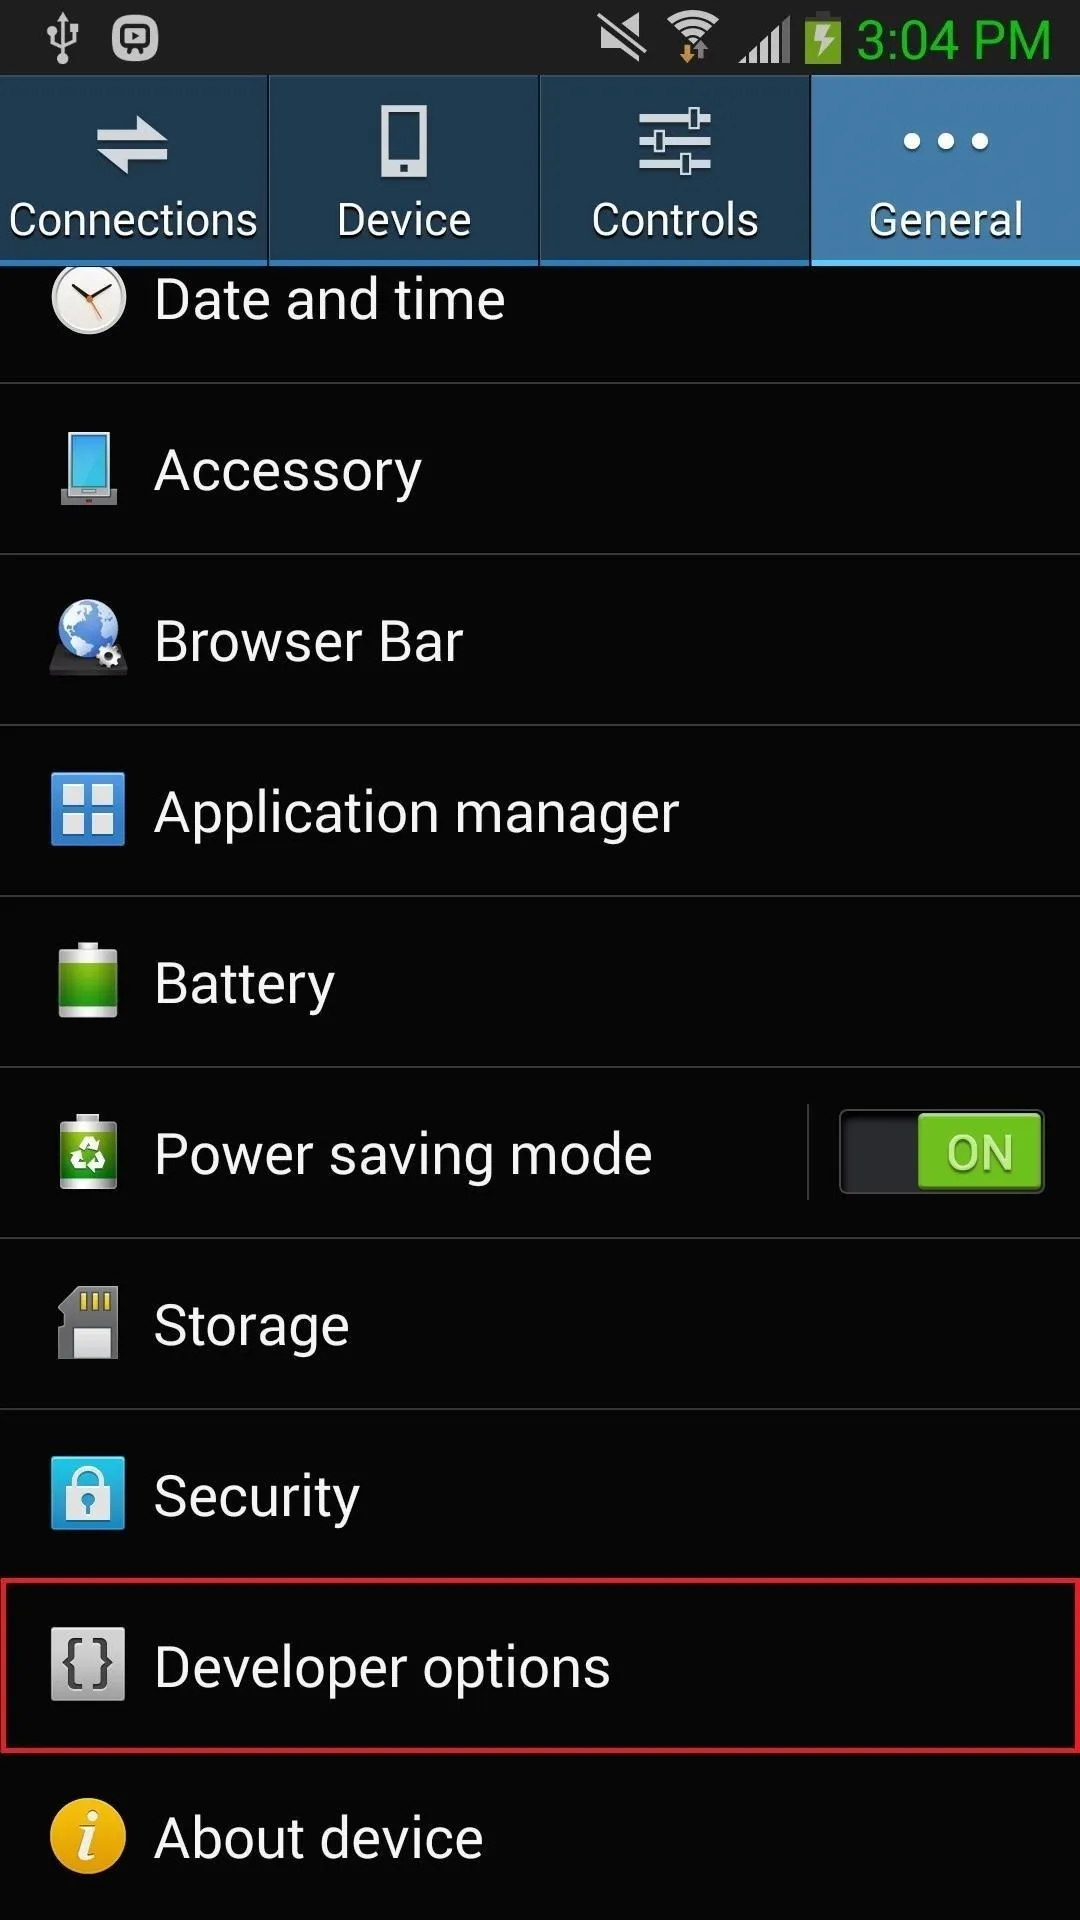
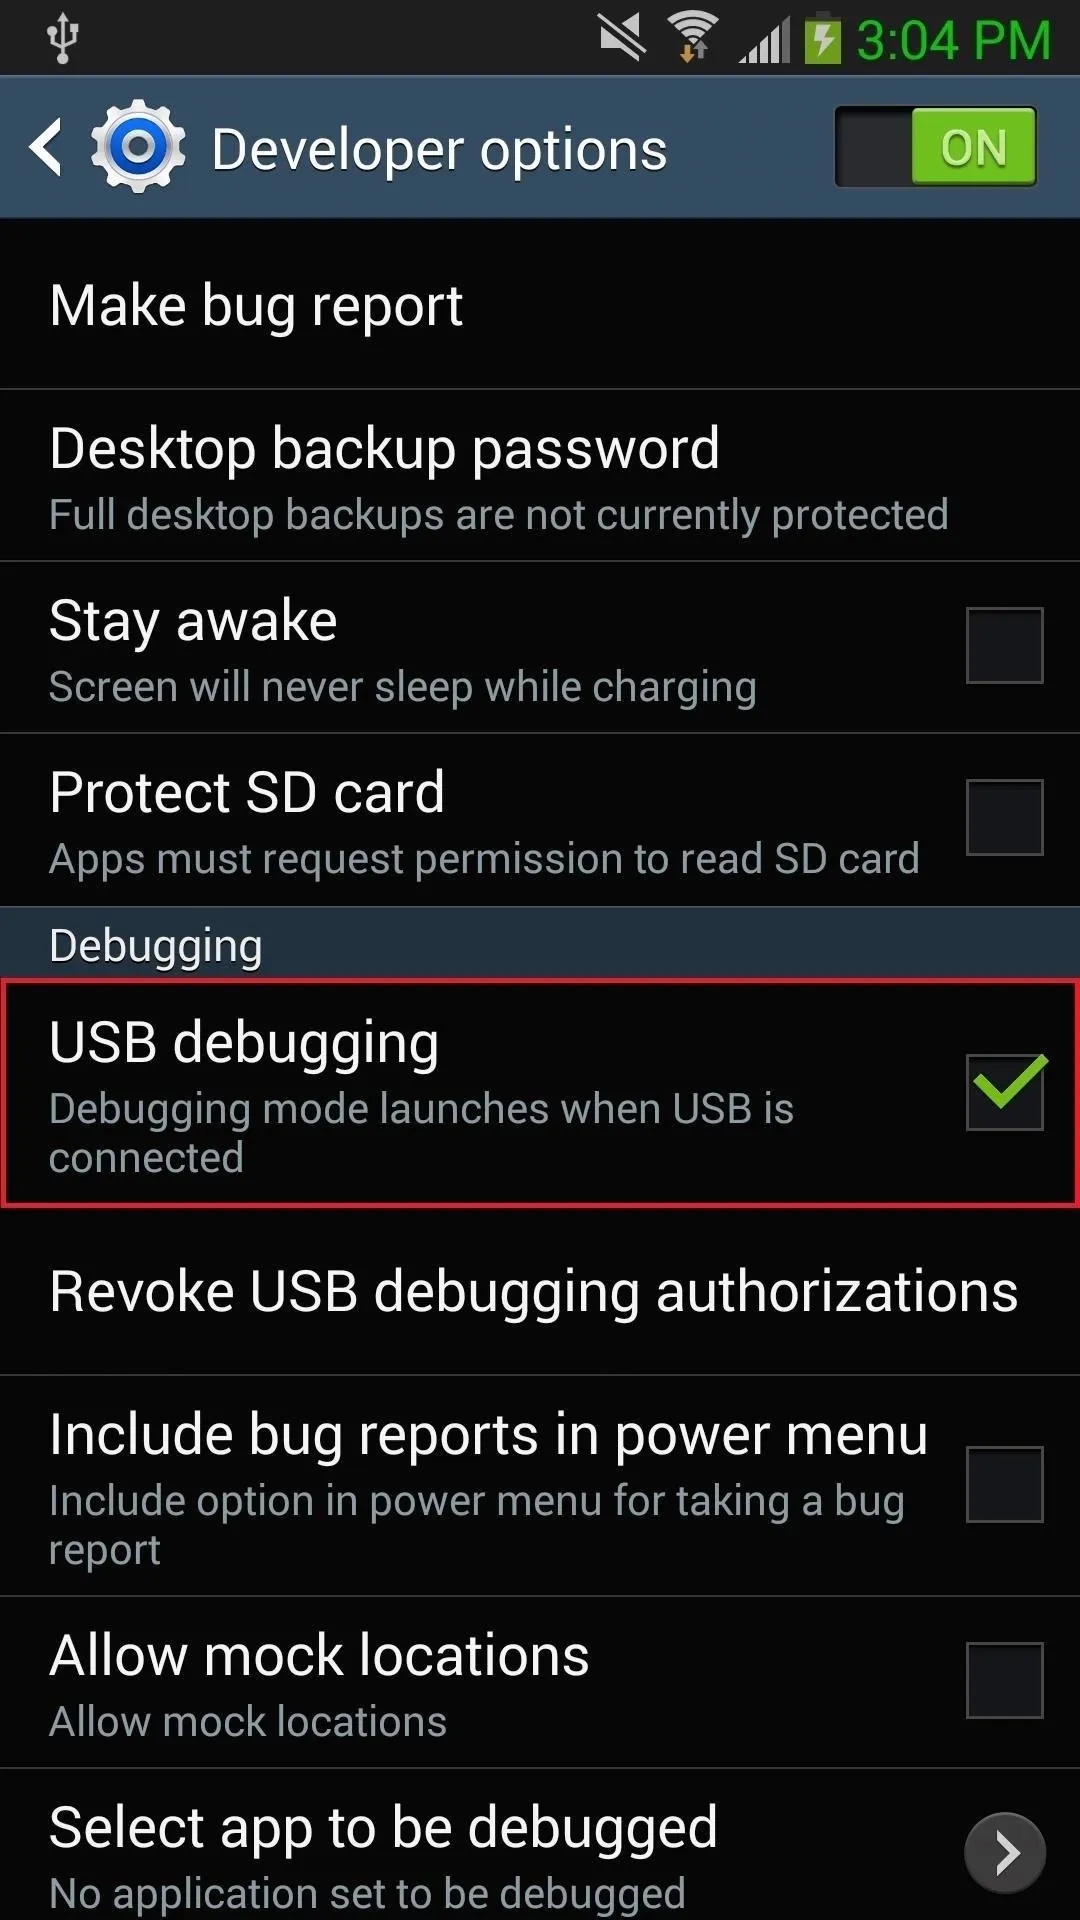
In order to back up one essential file, you'll need to enable "USB debugging" on your Note 3. From the main Settings menu, head to the "General" tab, then find the "Developer options" menu and tick the box next to "USB debugging."


If the Developer options menu is not present, head to "About device," then tap the "Build number" entry 7 times to unlock it.
Back Up Your Old PIT File
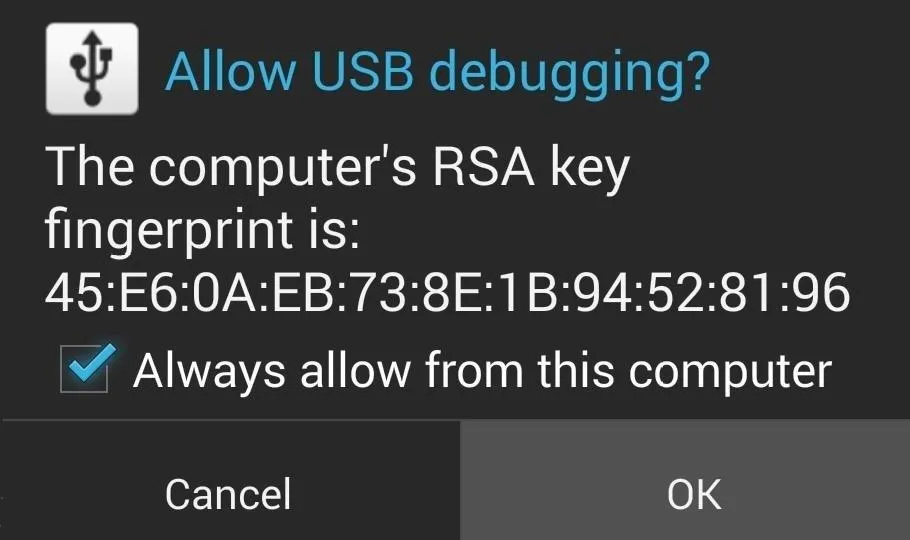
Next, plug your Note 3 into your PC using a good quality USB data cable. At this point, you should see a dialog box on your phone asking if you'd like to allow this computer to connect to your phone. Tick the box next to "Always allow from this computer", then press "OK."
Back on the PC, open the Minimal ADB and Fastboot program that you installed earlier. In the command prompt window, type the following two commands (each followed by the enter key):
- db shell su -c "dd if=/dev/block/mmcblk0 of=/sdcard/My-N9005.pit bs=1 skip=17408 count=4244"
- adb pull /sdcard/My-N9005.pit
This will make a copy of the PIT file and store it on your PC in the C:\Program Files (x86)\Minimal ADB and Fastboot folder.
Extract the Contents of the Leaked Firmware File
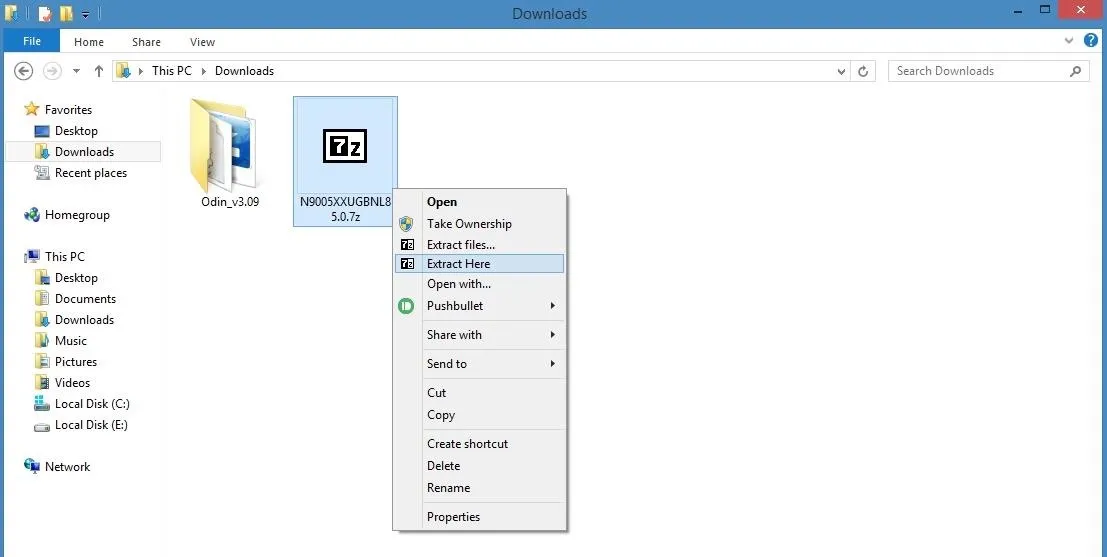
Next up, find the N9005XXUGBNL8 5.0.7z firmware file that you downloaded in Step 1. Extract the contents of this file into a folder that you can access easily.
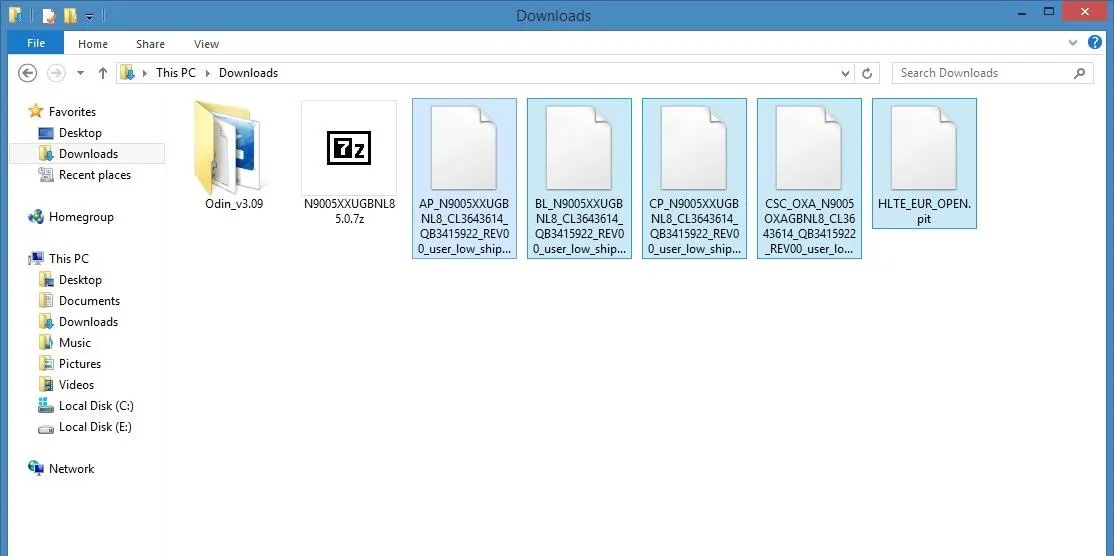
At this point, you should be left with a series of files ending with the extension MD5.
Put Your Phone into Download Mode
You'll be using Odin to install the files you just extracted. For Odin to be able to access the system partitions of your device, you'll need to put your phone into Download Mode.
Start by powering your phone completely off. When the screen goes black, press and hold the home, volume down, and power buttons simultaneously. After a few seconds, a warning message will appear, but like it says, press the volume up key to confirm your choice.
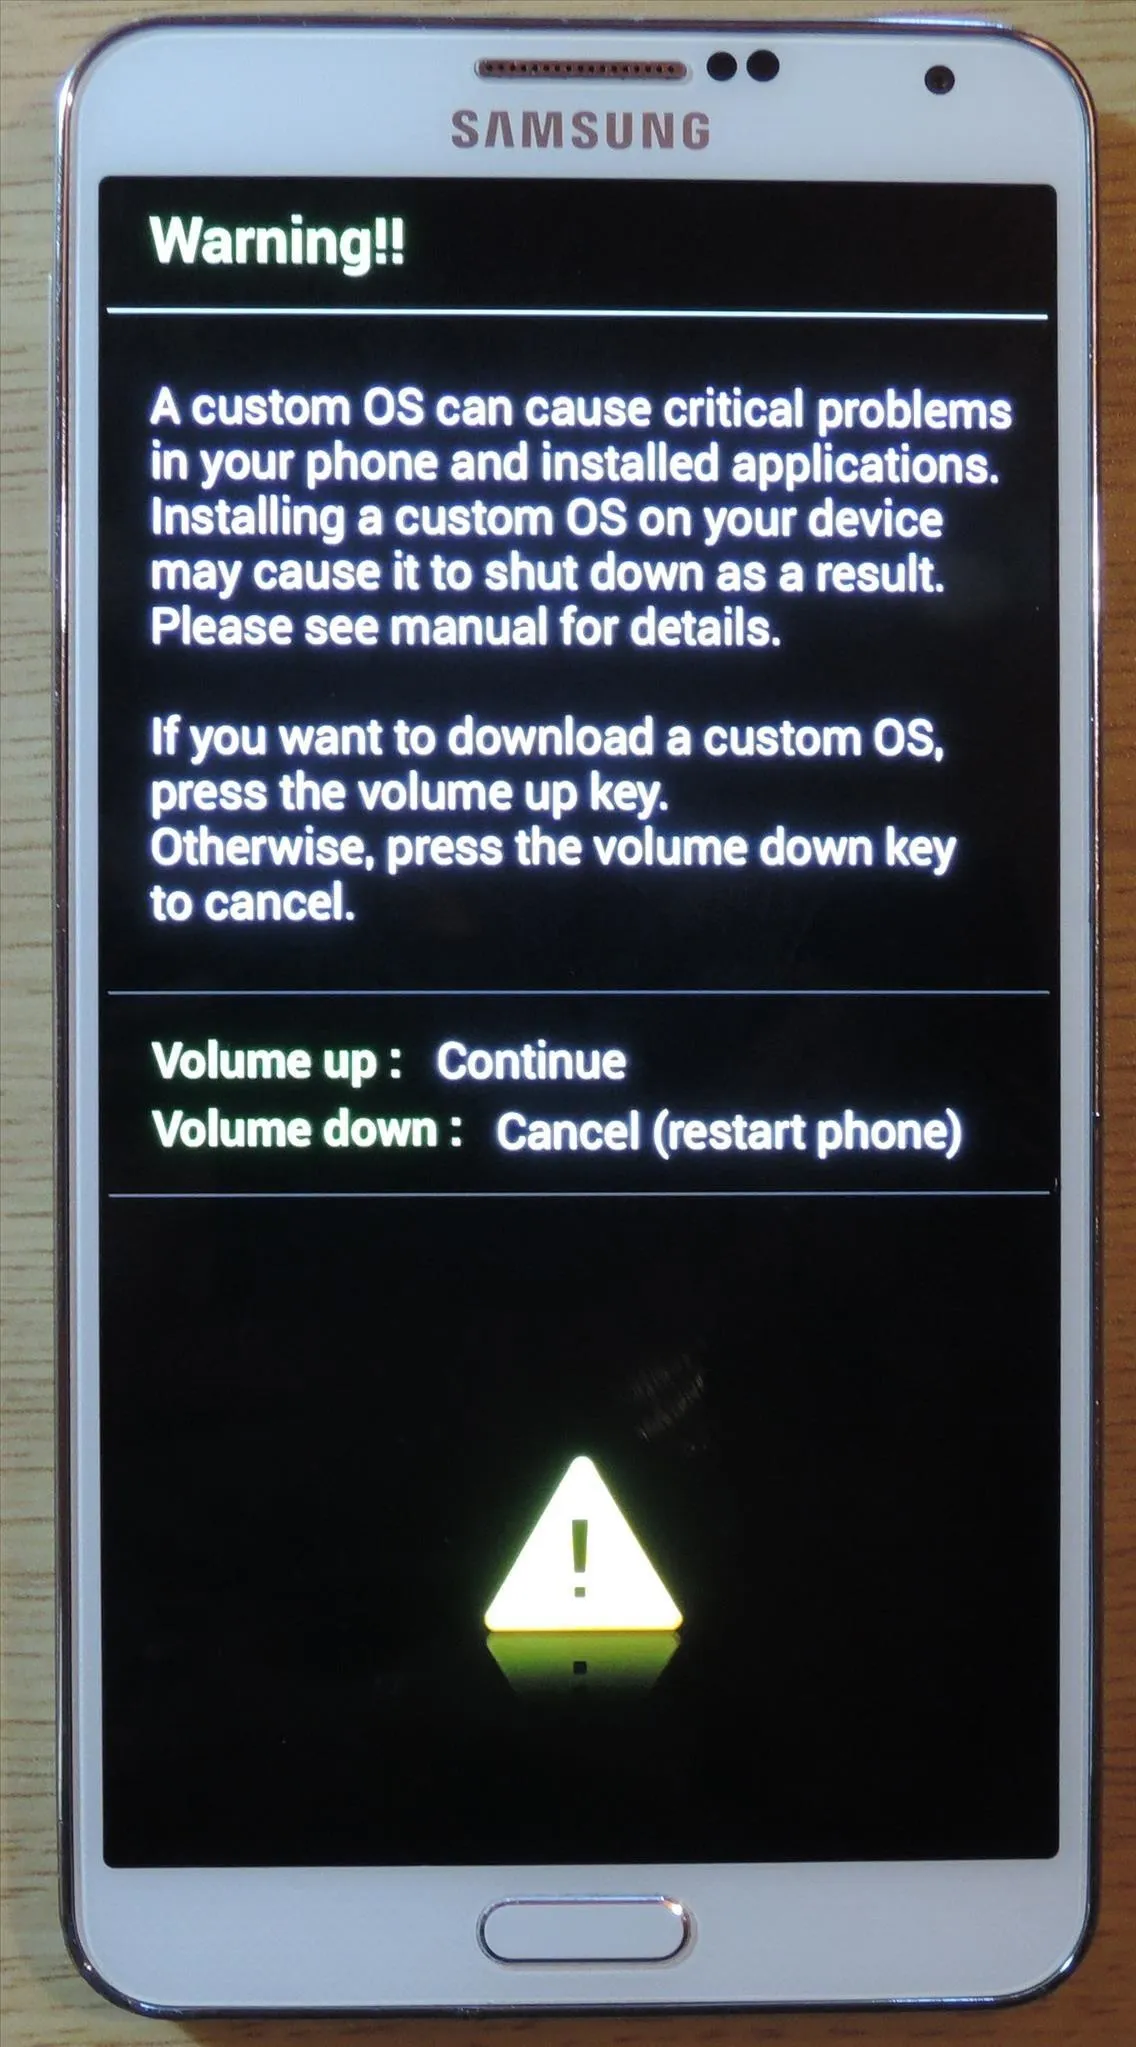
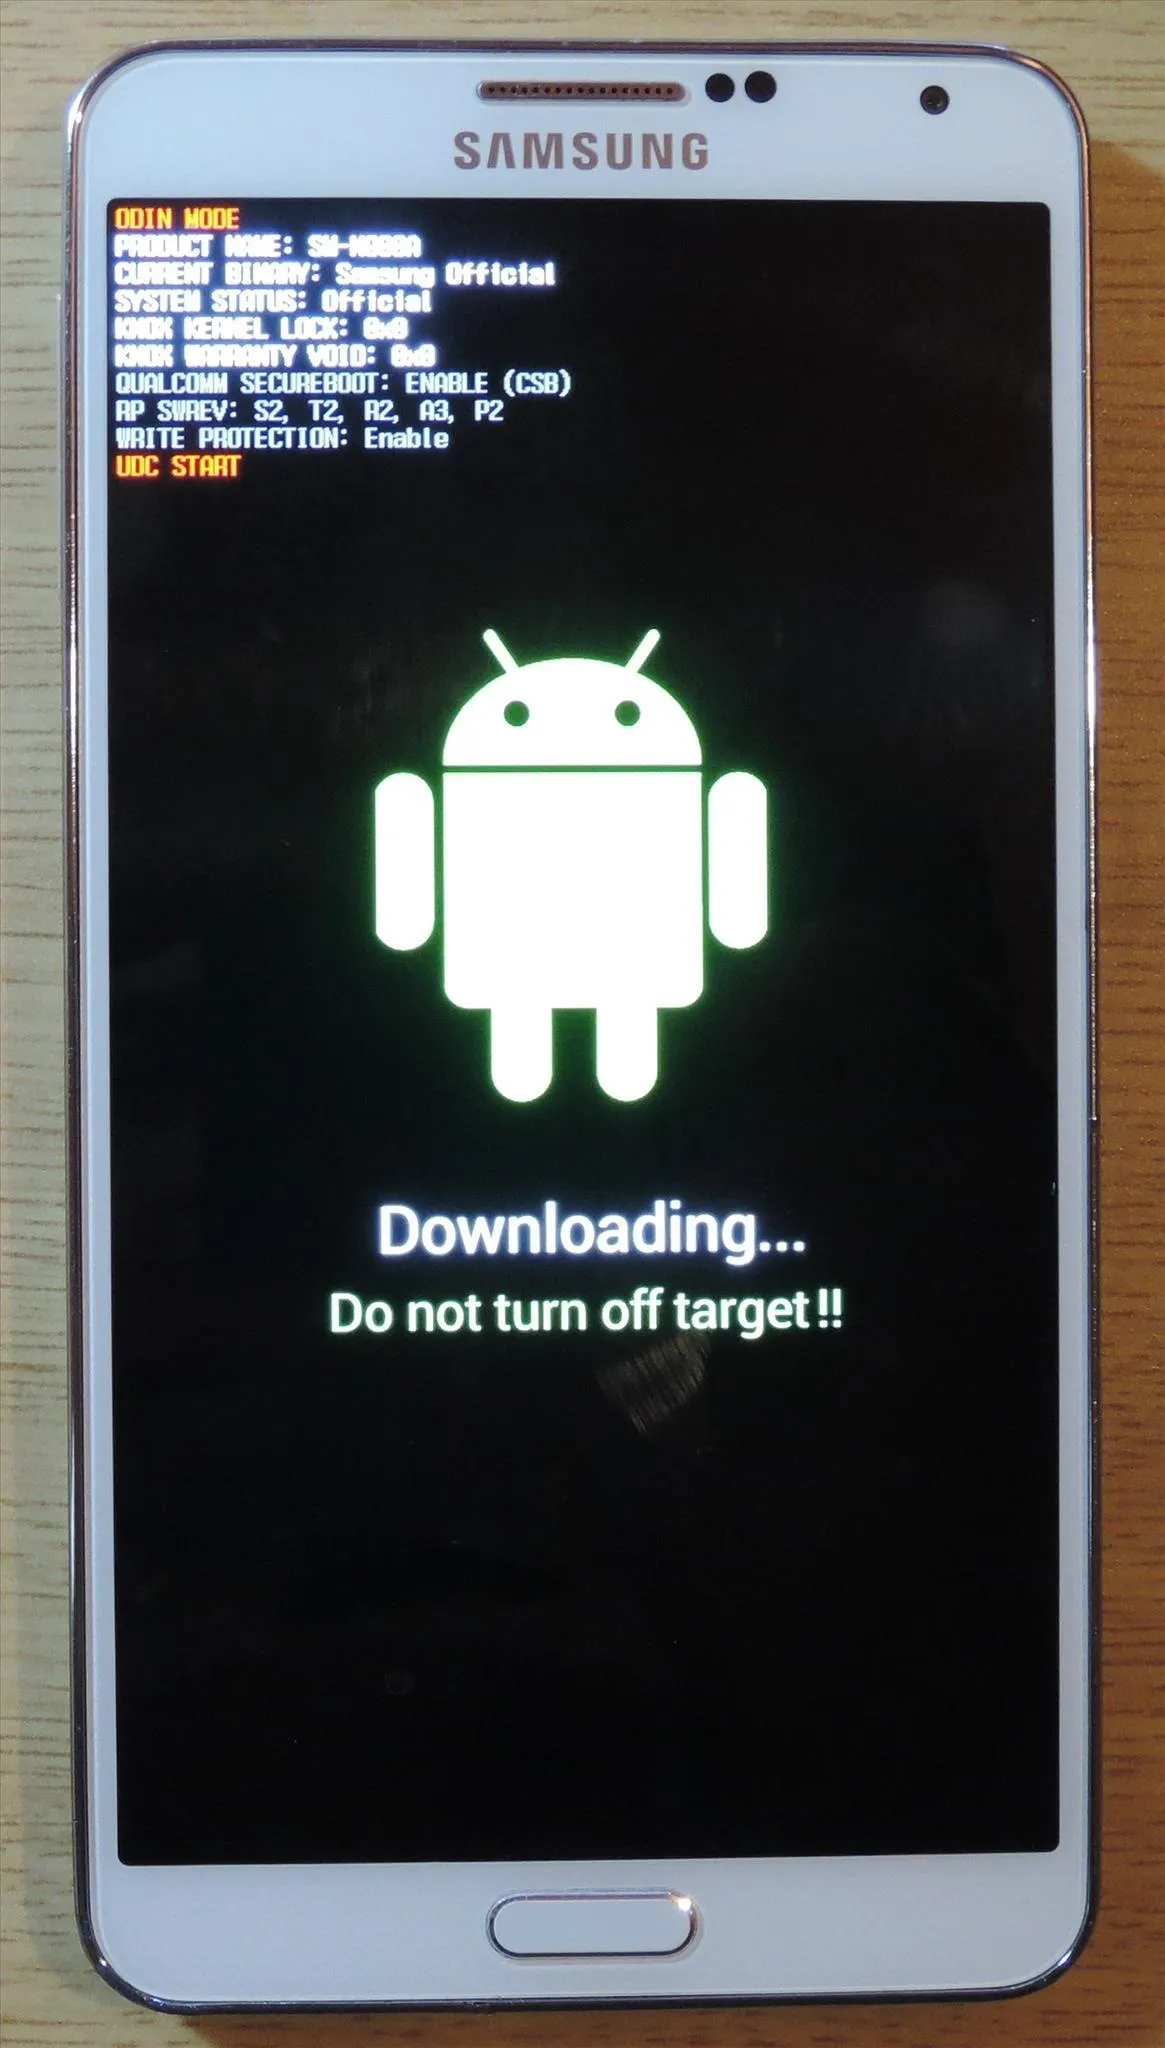


When you have successfully entered Download Mode, plug your phone into your PC with a good quality USB cable.
Load the Firmware Files in Odin
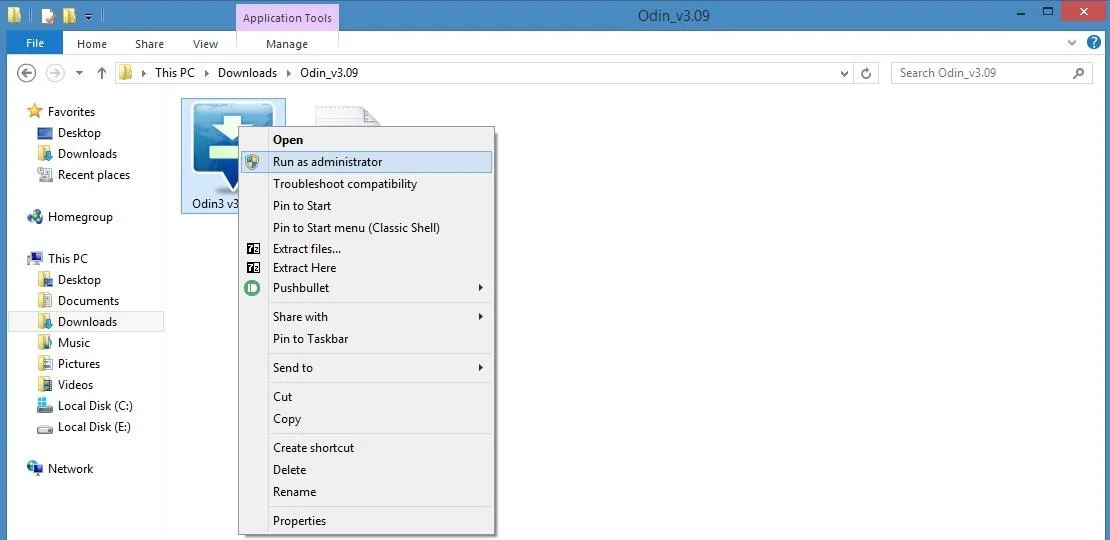
Back over on your PC, locate the Odin3 v3.09.exe file that you extracted from the ZIP in Step 1. From here, right-click it, then select "Run as administrator."
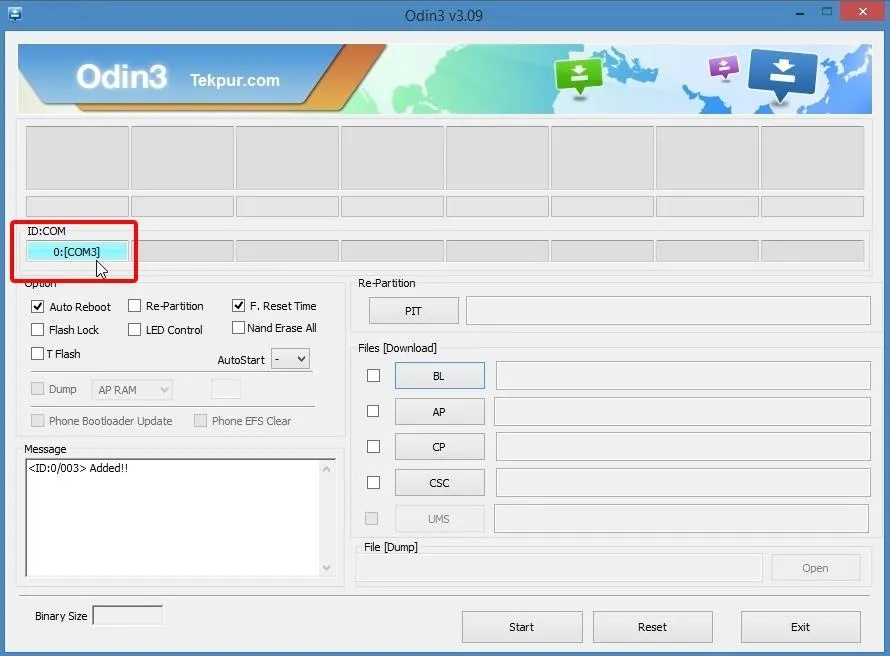
Next, wait until Odin has connected to your Note 3. It may take a few minutes, but you'll know when it's ready when the "ID:COM" box turns light blue and displays a COM port number.
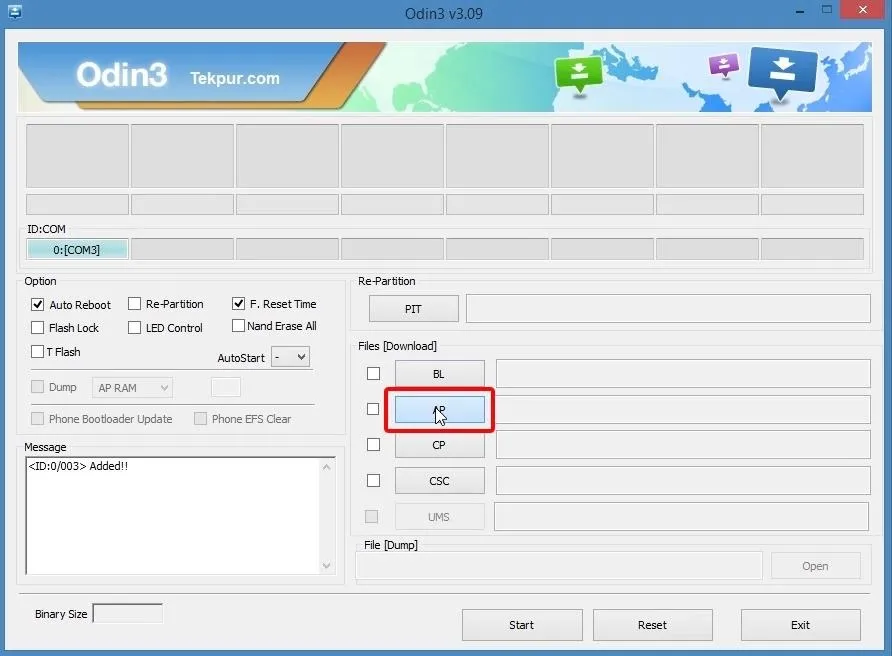
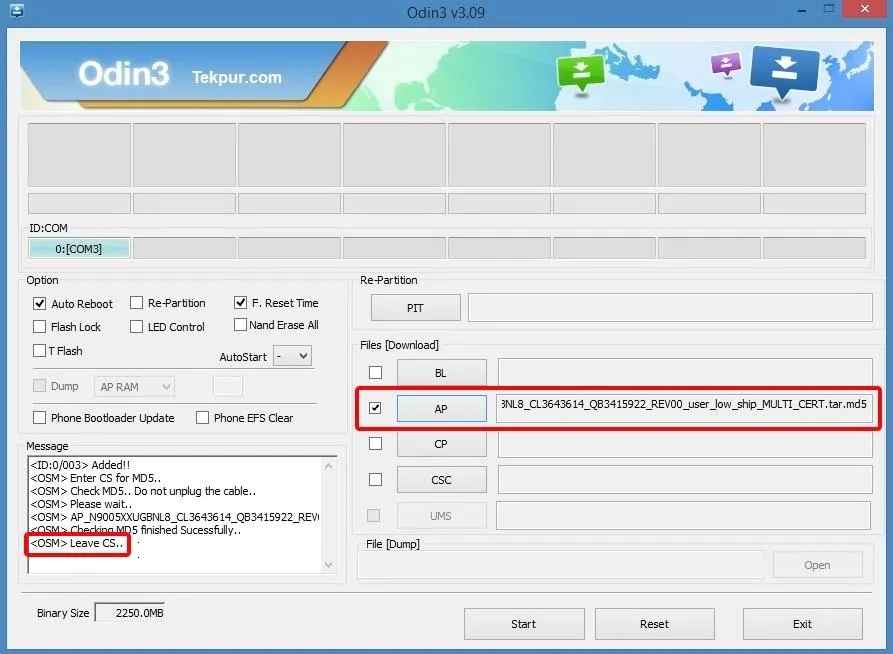
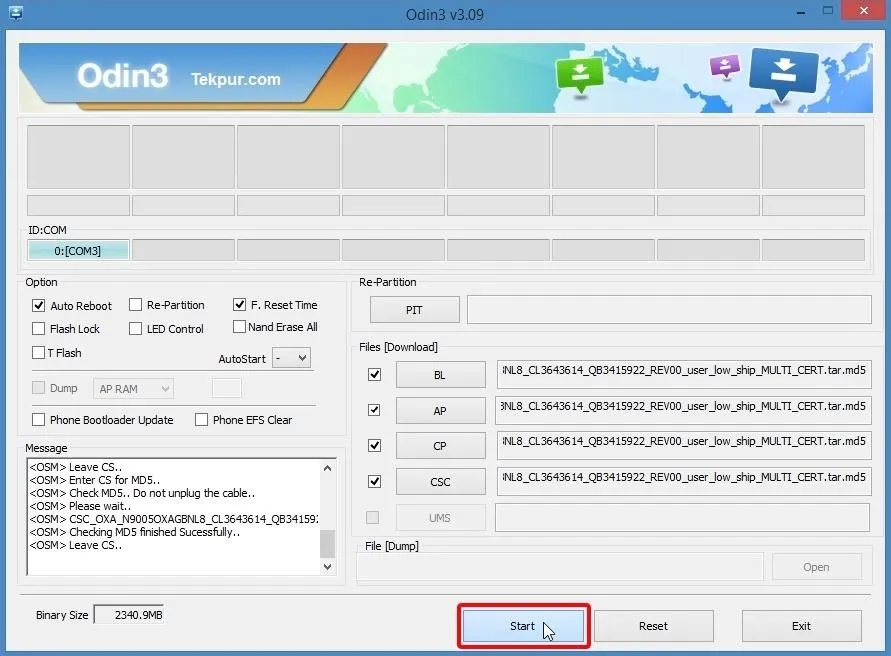
After that, click the "AP" button towards the middle of the Odin window.
Next, navigate to the folder with the extracted firmware files. Locate the MD5 file that starts with the letters "AP," then select it and click open.
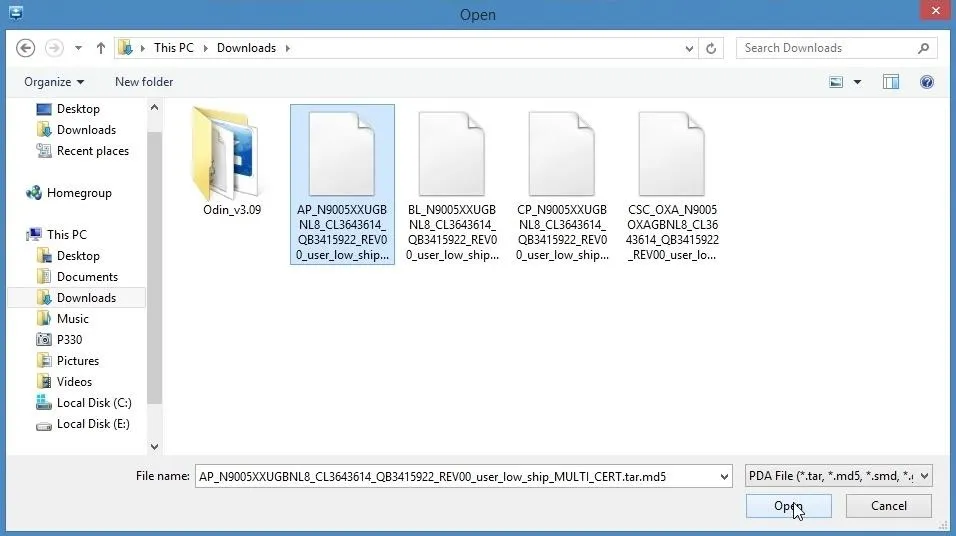
Wait for a minute or two until Odin has successfully loaded this file. When it has, the readout in the bottom-left corner will say "Leave CS" and the AP box will have a check mark next to it.
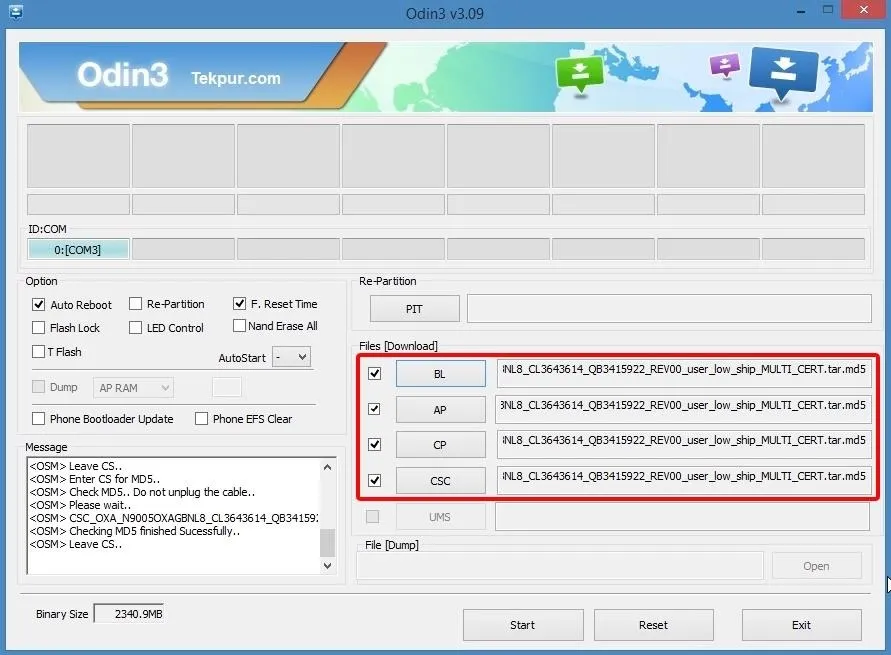
After that, repeat this same process for the "BL," "CP," and "CSC" buttons and their associated MD5 files. When you're finished, all four buttons should have check marks next to them.
Flash the Firmware
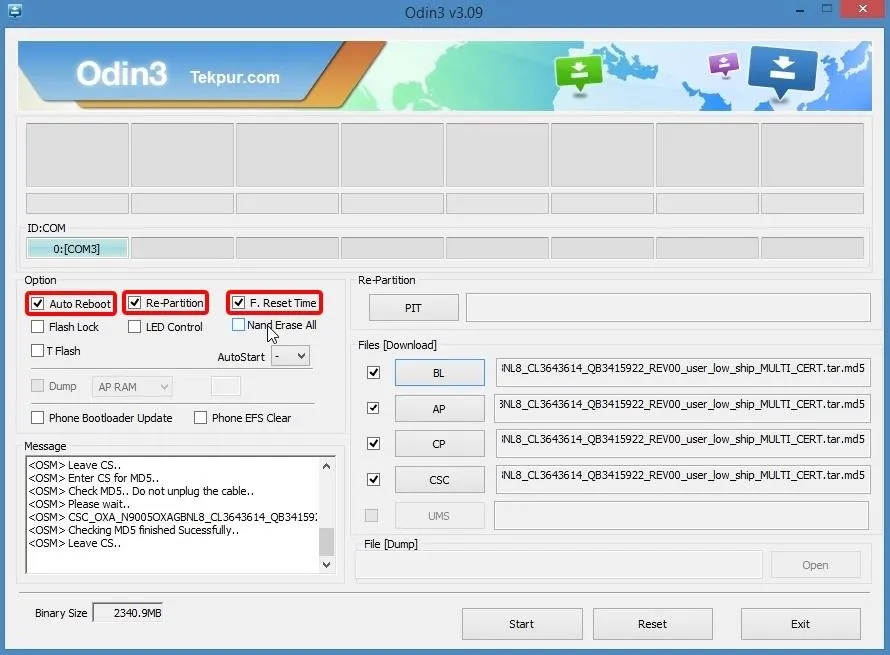
This next part will be a little different depending on whether you have the 16GB version of the Note 3 or the 32GB version. With the 32GB version, make sure that the "Auto Reboot," "Re-Partition," and "F. Reset Time" boxes in Odin are all ticked.
If you have the 16GB version, make sure that only the "Auto Reboot" and "F.Reset Time" boxes are ticked—do not tick the "Re-Partition" box.
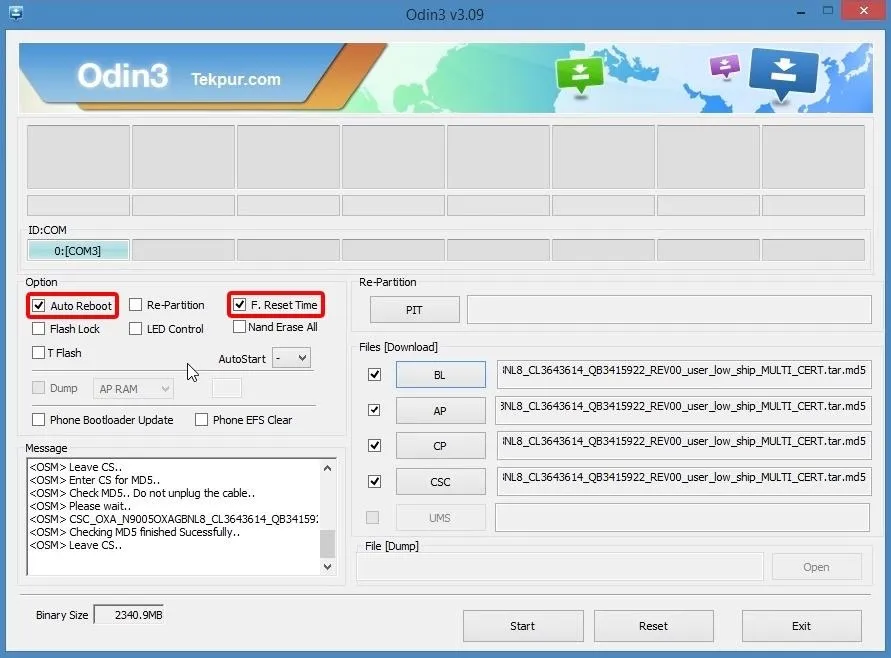
When you're ready, click the "Start" button near the bottom of the window to install the firmware. The process will take 5-10 minutes and your phone will automatically reboot when it's finished.
If you have the 16GB version, you'll have to perform a factory reset after the firmware has been installed. Boot into recovery mode by pressing the volume up, home, and power buttons simultaneously from a powered-off state, then choose the "Factory Reset" option.
With all of that taken care of, your Note 3 will be running Android 5.0 "Lollipop" now. What are some of the biggest improvements with this new firmware, in your opinion? Let us know in the comment section below, or drop us a line on Facebook, Google+, or Twitter.








Comments
Be the first, drop a comment!