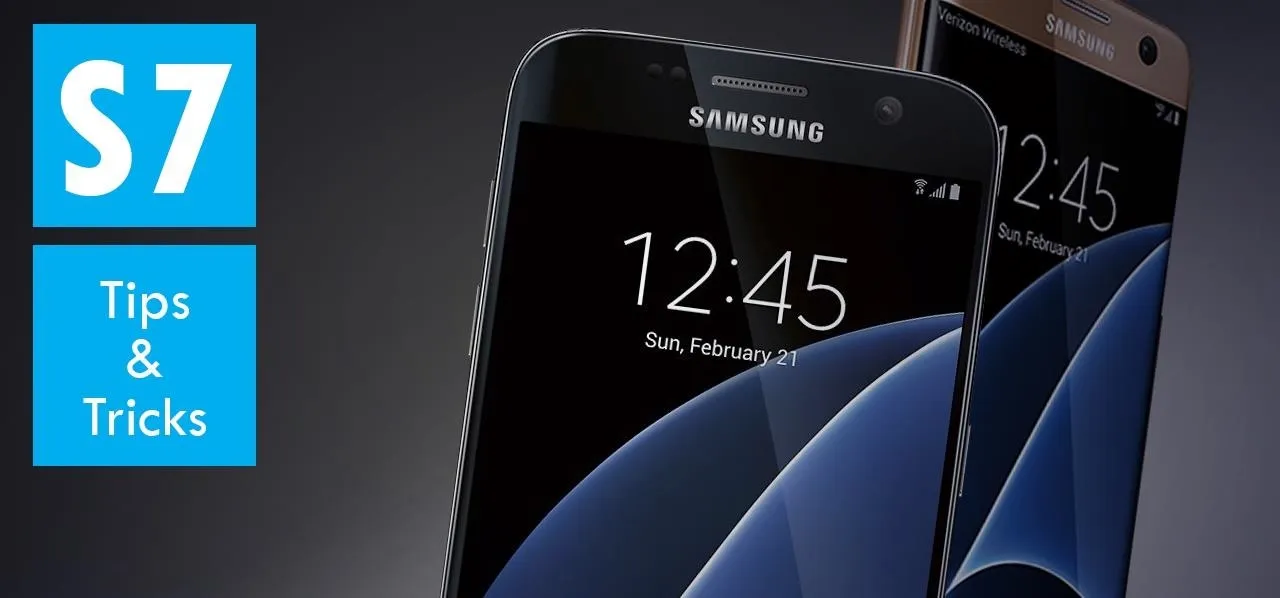
When the Samsung Galaxy S7 and S7 Edge came to market in 2016, they were universally praised as being the pinnacle of Android smartphone design, even topping Consumer Reports' smartphone ratings.
Why? Well, for once, we finally had a smartphone, or in this case, a pair of smartphones, that didn't skimp on features for the sake of design. The Galaxy S7/S7 Edge had one of the best camera sensors, water and dust resistance, and most importantly, a micro SD card slot for expandable storage.
In addition to these wonderful things, Samsung enriched their phones with some pretty handy software tricks to help to enhance the overall experience, and today, we're going to show you some of the best tips and tricks for your Samsung Galaxy S7/S7 Edge.
1. Use Adapt Sound for Better Audio Quality
This is one of the best-hidden features of the Galaxy S7/S7 Edge that really should be a marquee feature of the phone. The Adapt Sound function on the Galaxy smartphone will allow you to custom tailor your audio experience to your own unique audio palette, making even the most average headphones sound exponentially better.
2. Go Parallax with Wallpaper Motion Effect
Apple popularized the Parallax effect back in in 2013 with iOS 7, and since then there have been a whole bevy of Android apps that mimic the same functionality. However, why download an app when your smartphone can already do it?
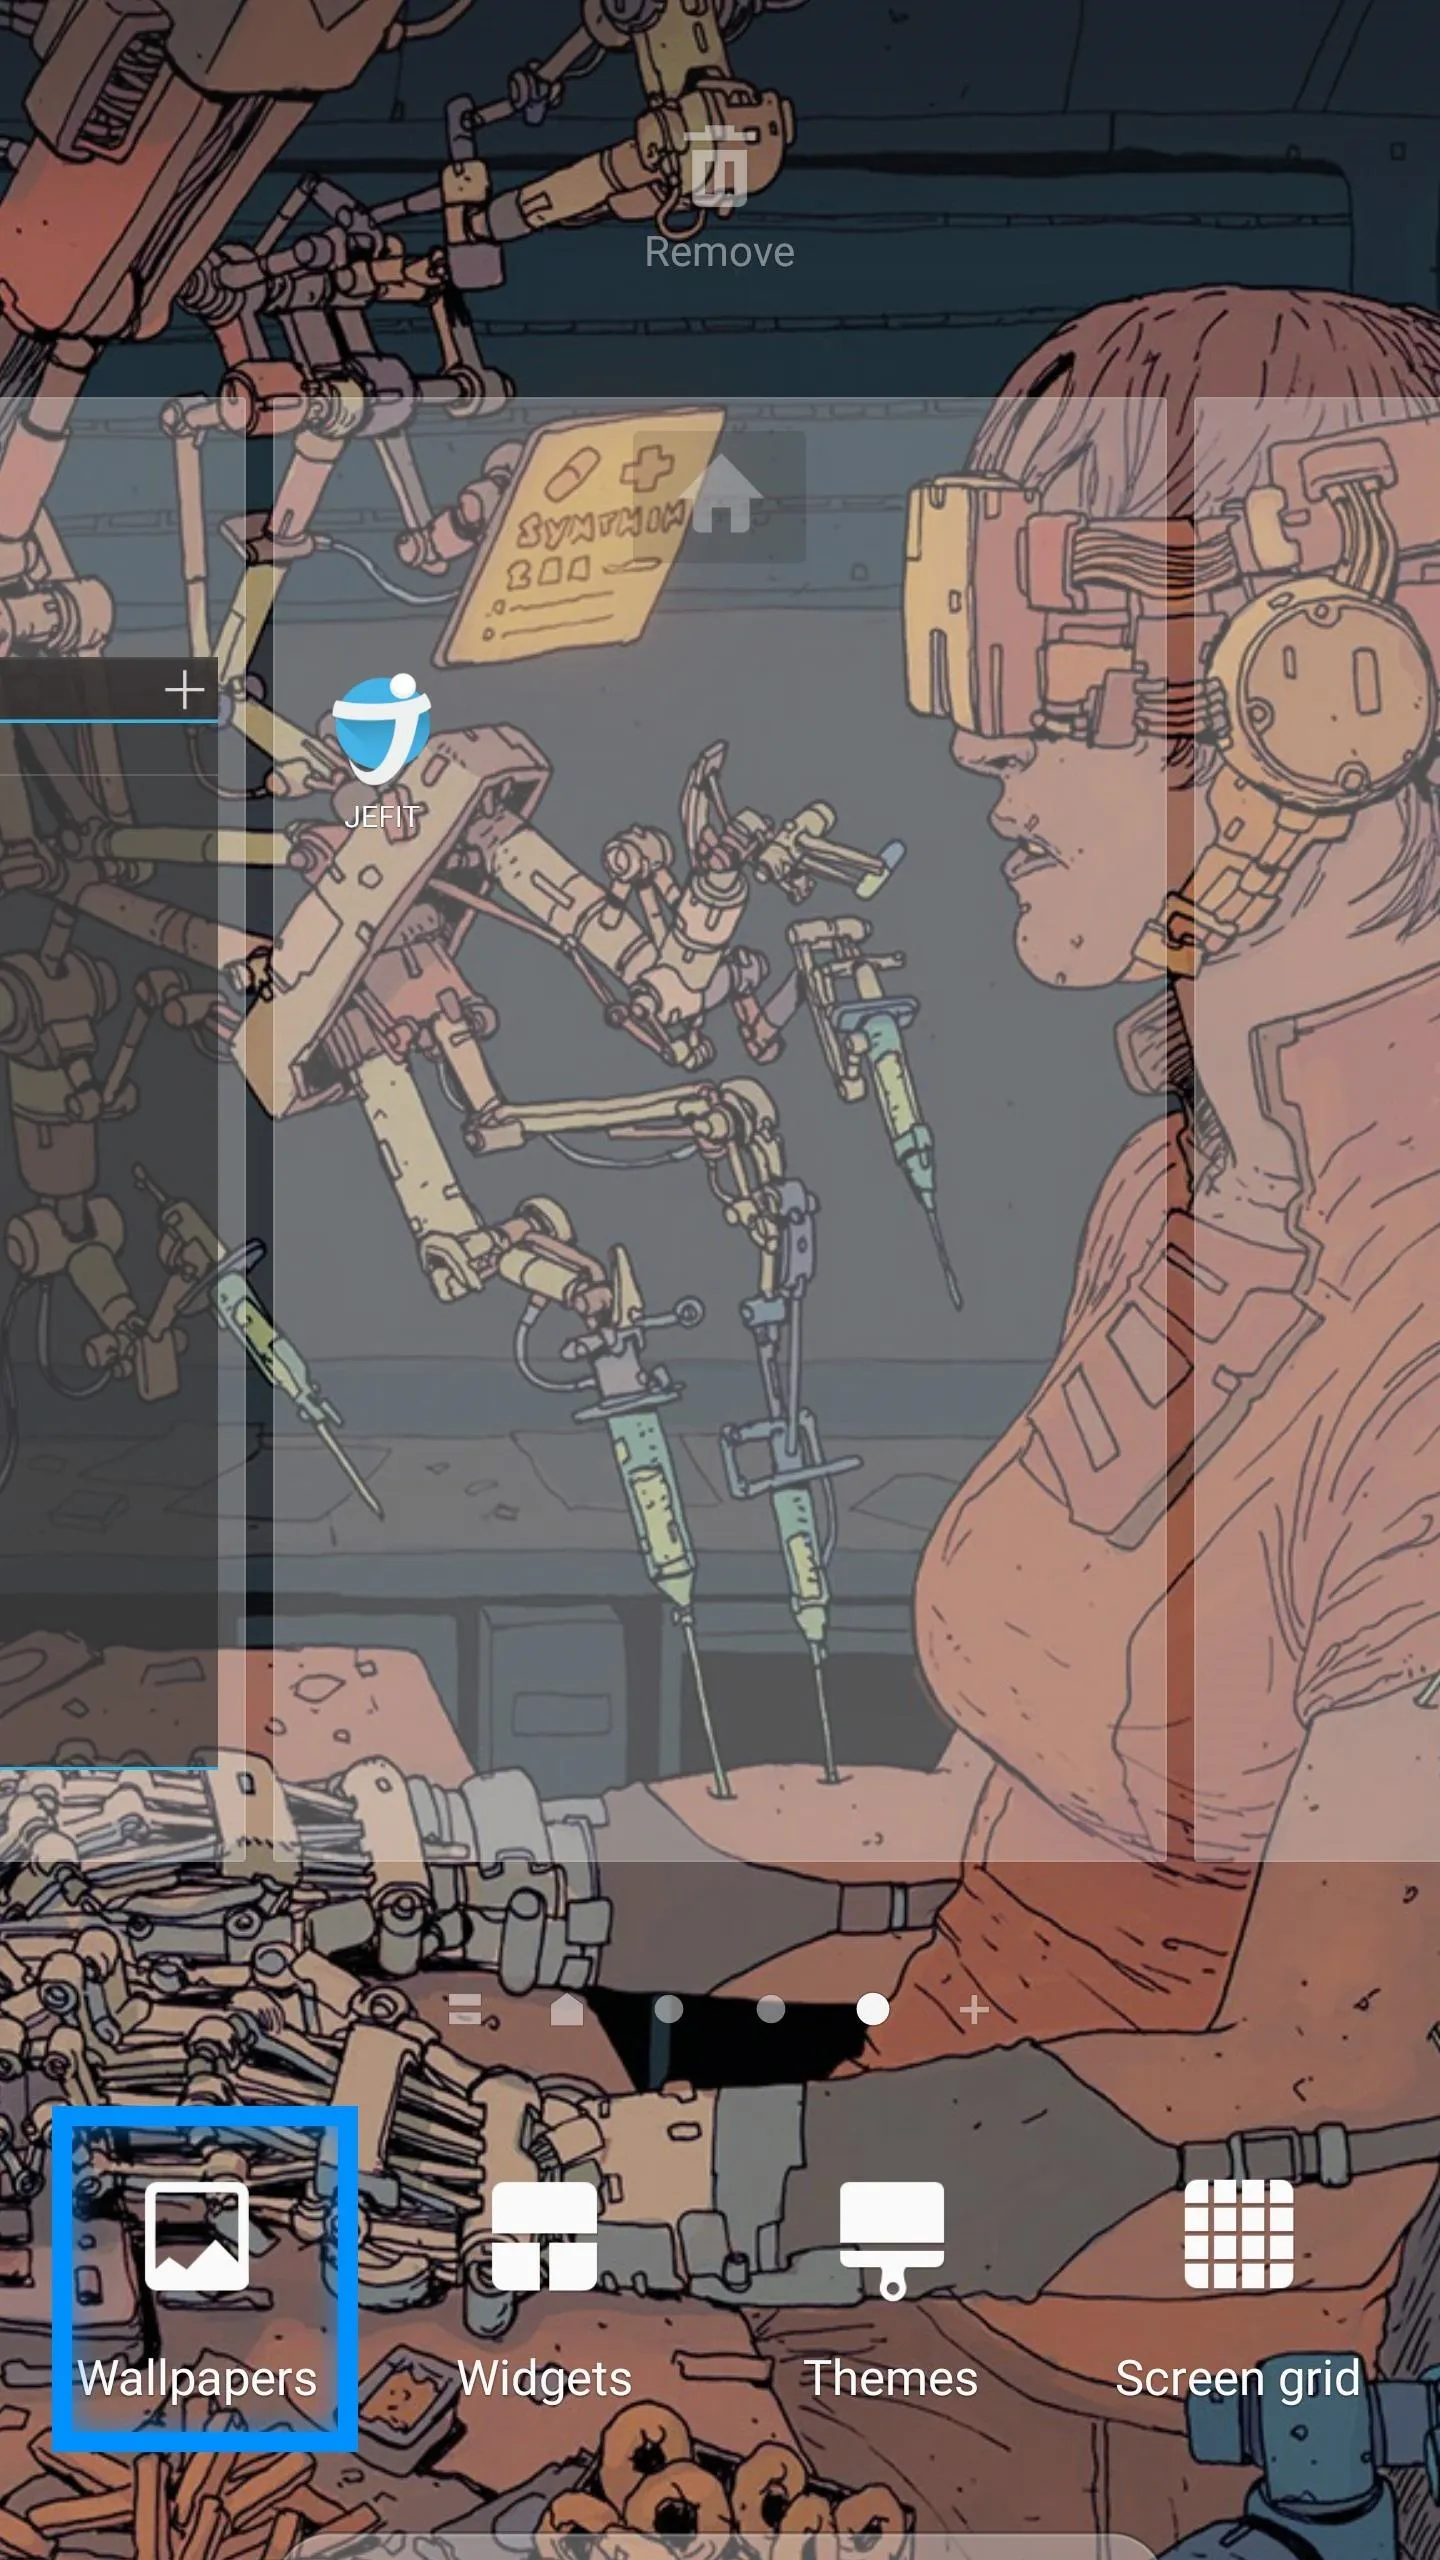
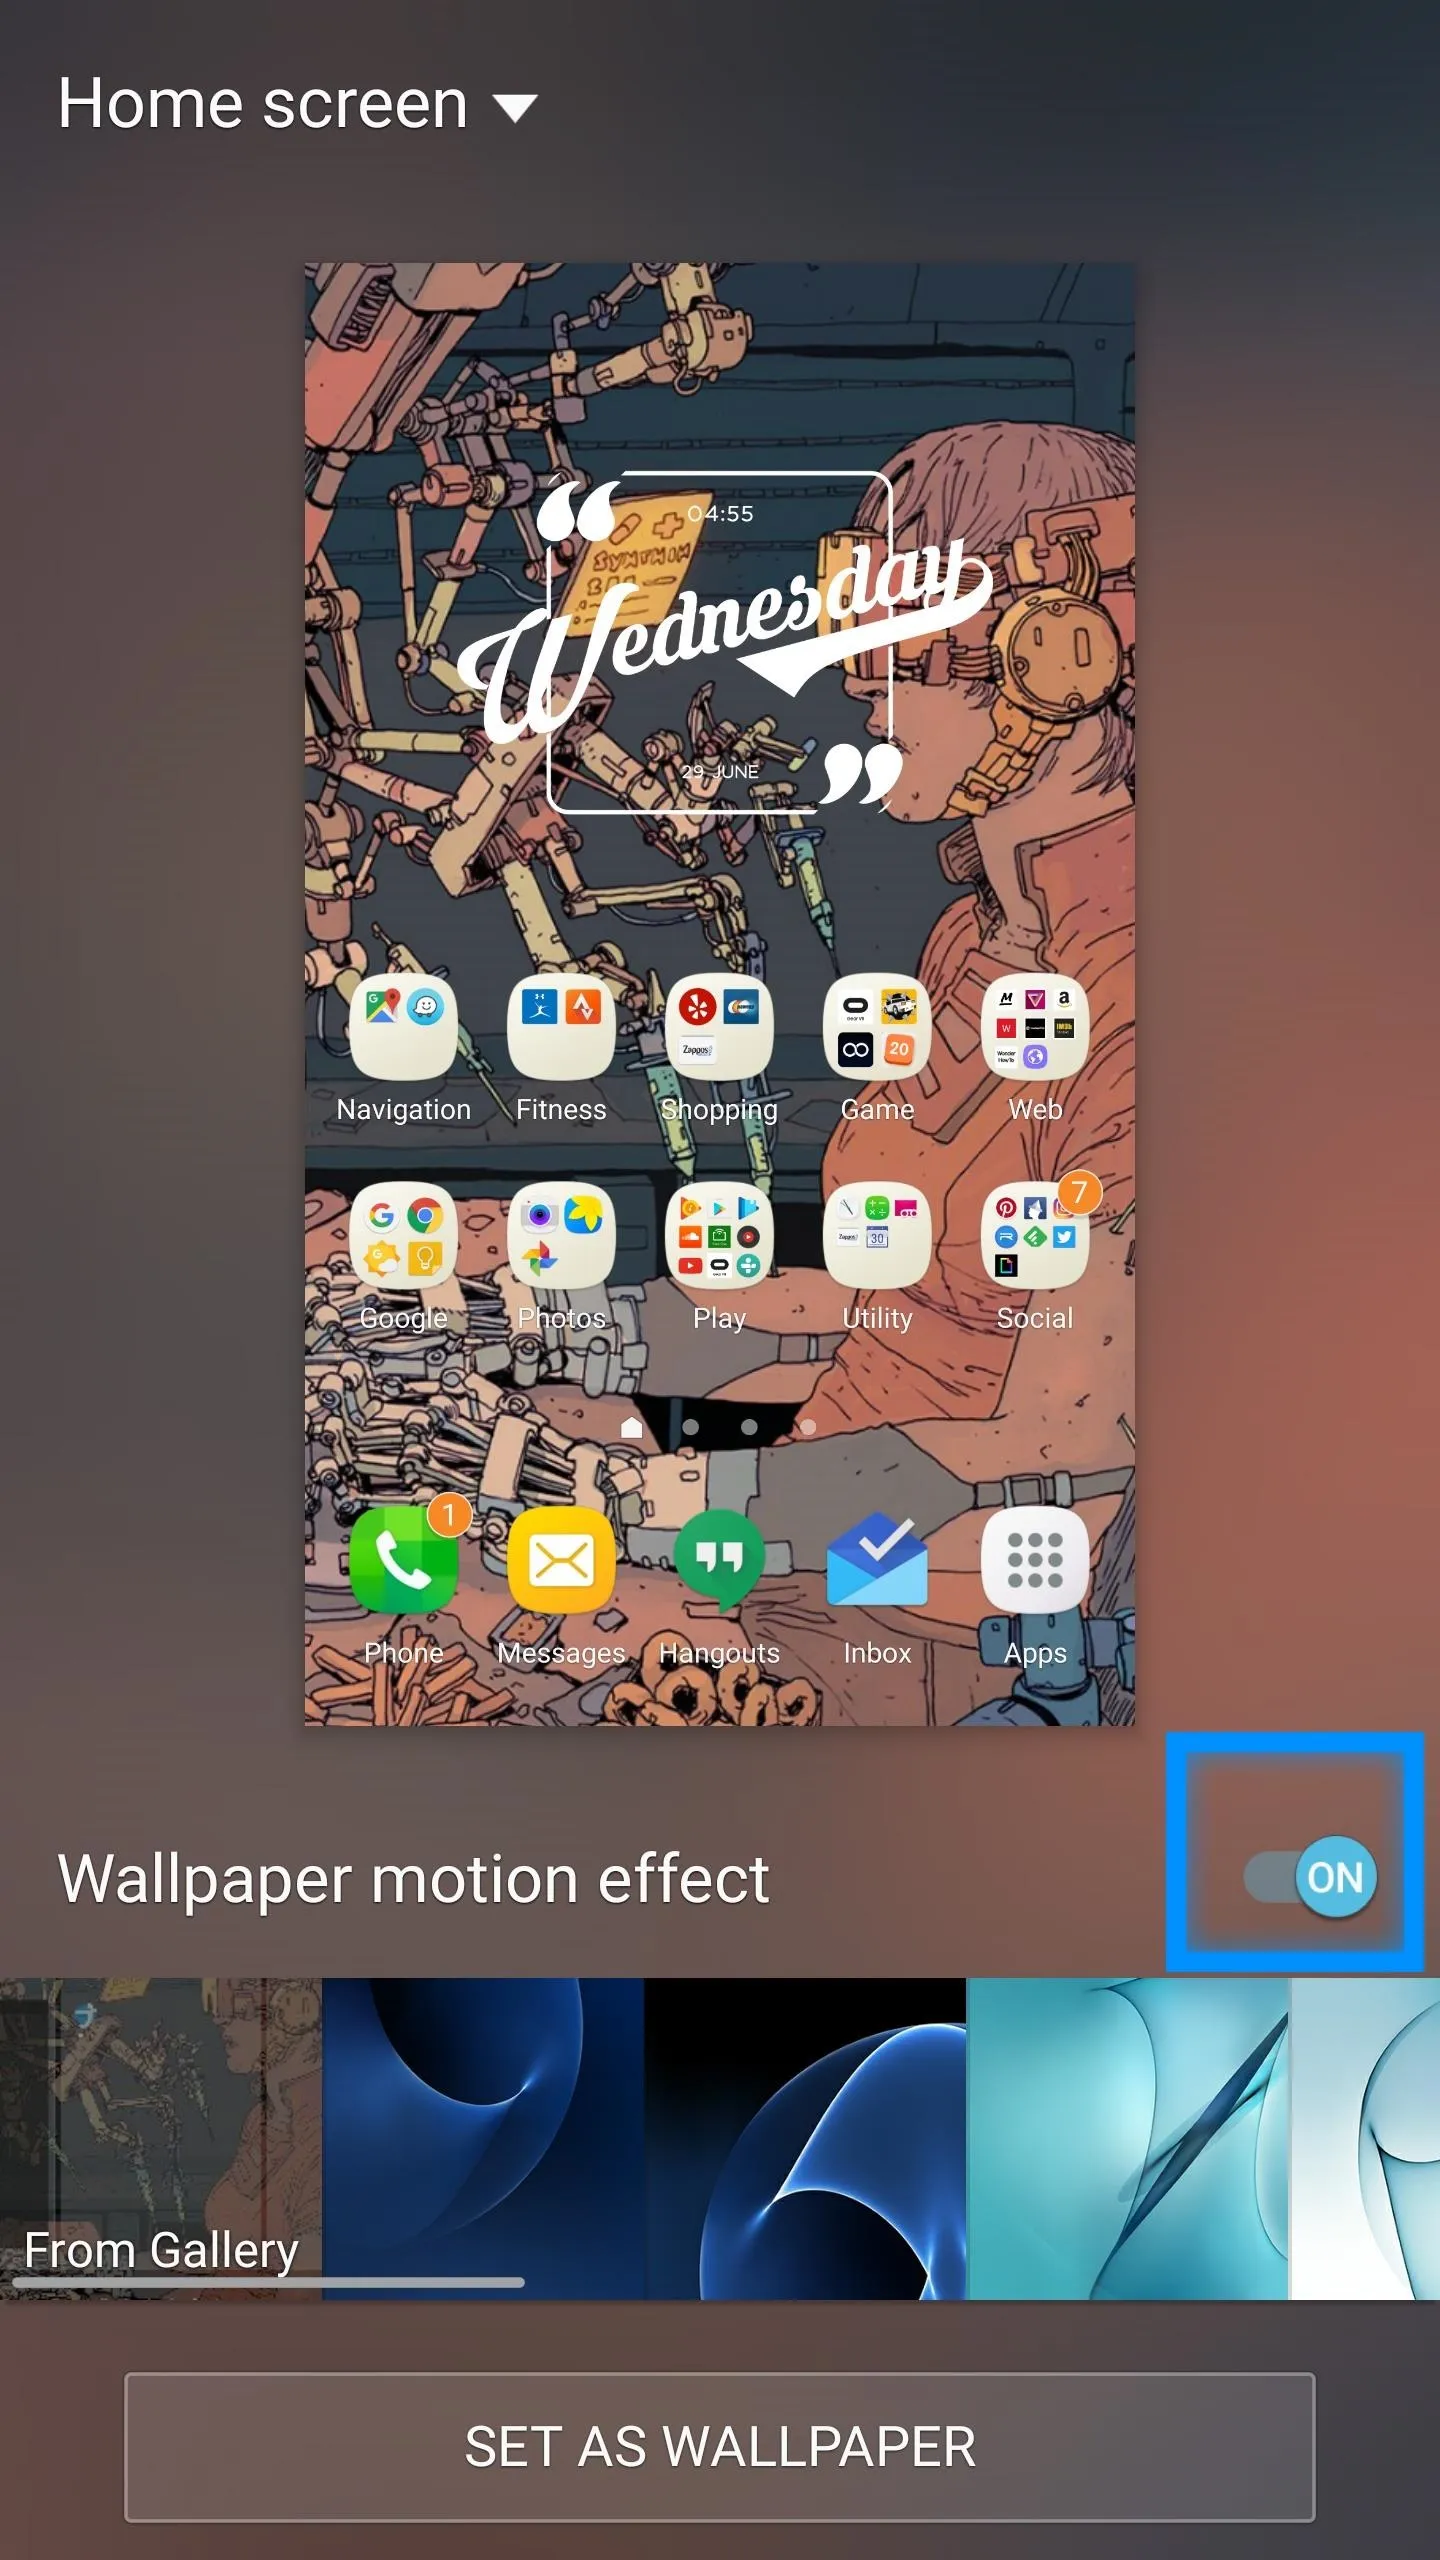
To activate the Wallpaper Motion Effect on your Galaxy smartphone, simply long-press on your home screen, then select Wallpapers. From there, toggle on Wallpaper Motion Effect and enjoy the parallax effect on your Galaxy's home screens.


3. Move Apps to Your SD Card
The inclusion of the SD card slot on the Galaxy S7/S7 Edge allows up to 200 GB of expandable storage; however, this is all for not if you don't actually utilize the extra space granted by your SD card.
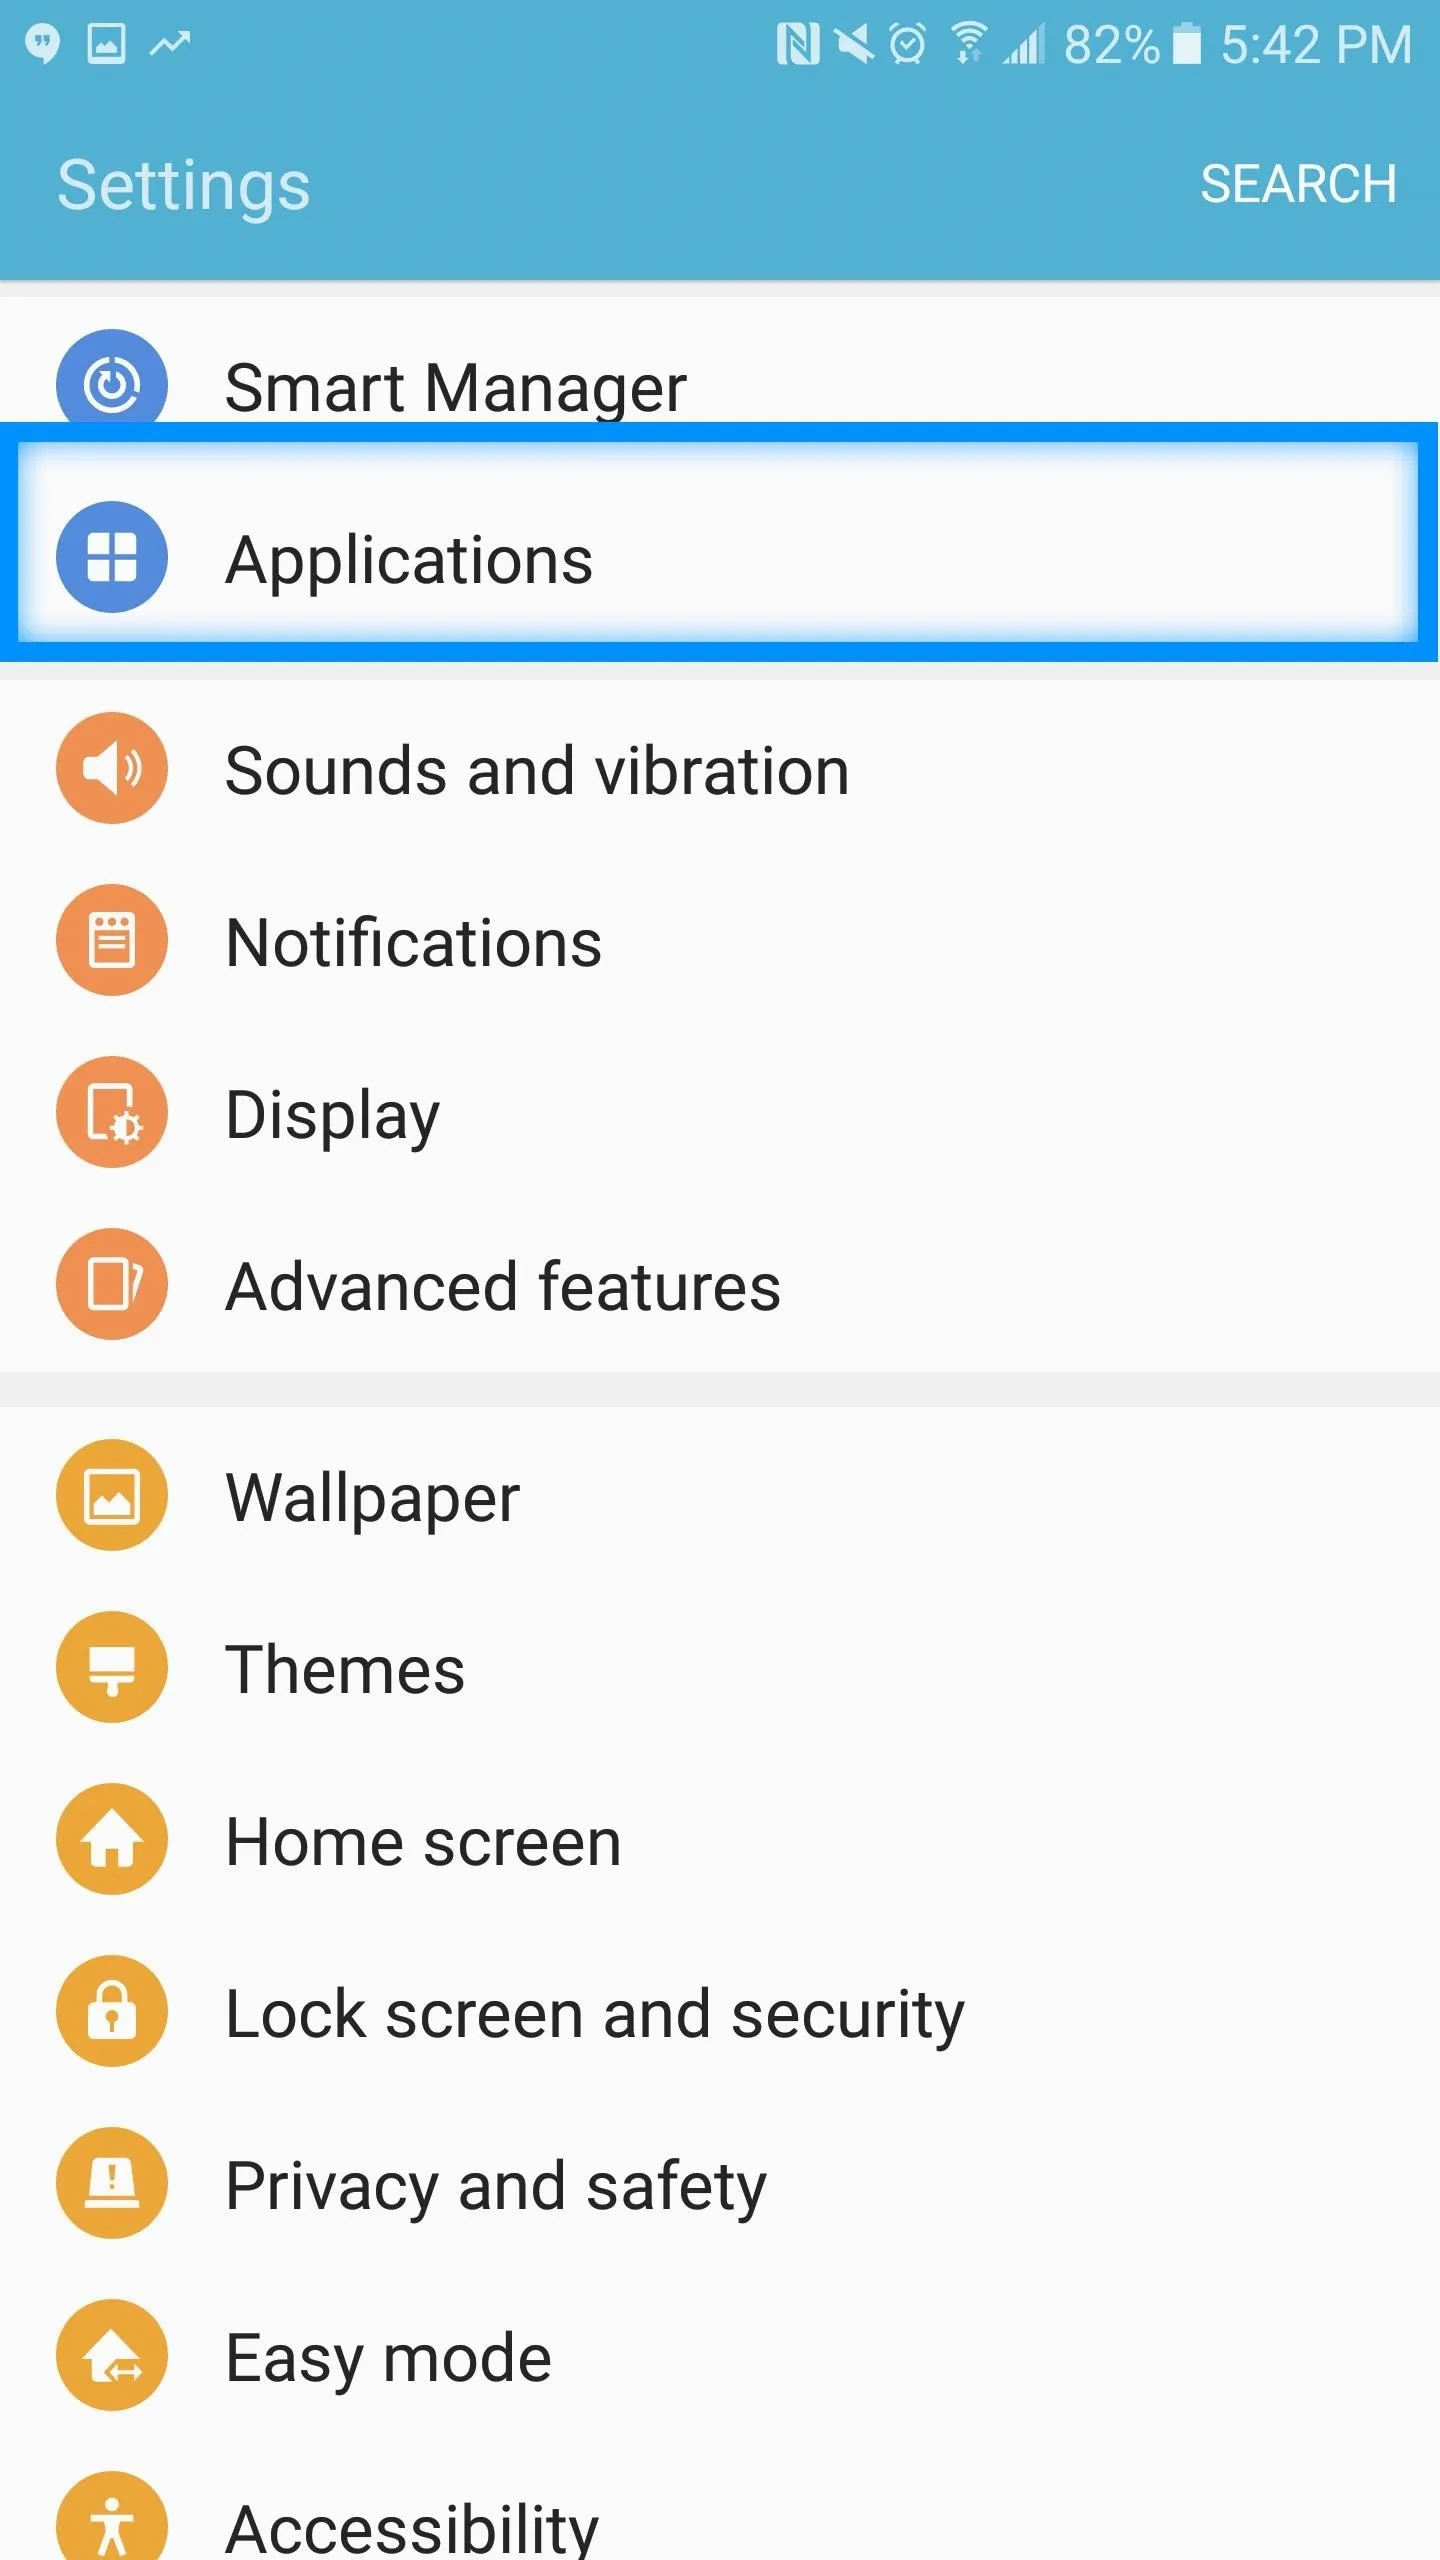
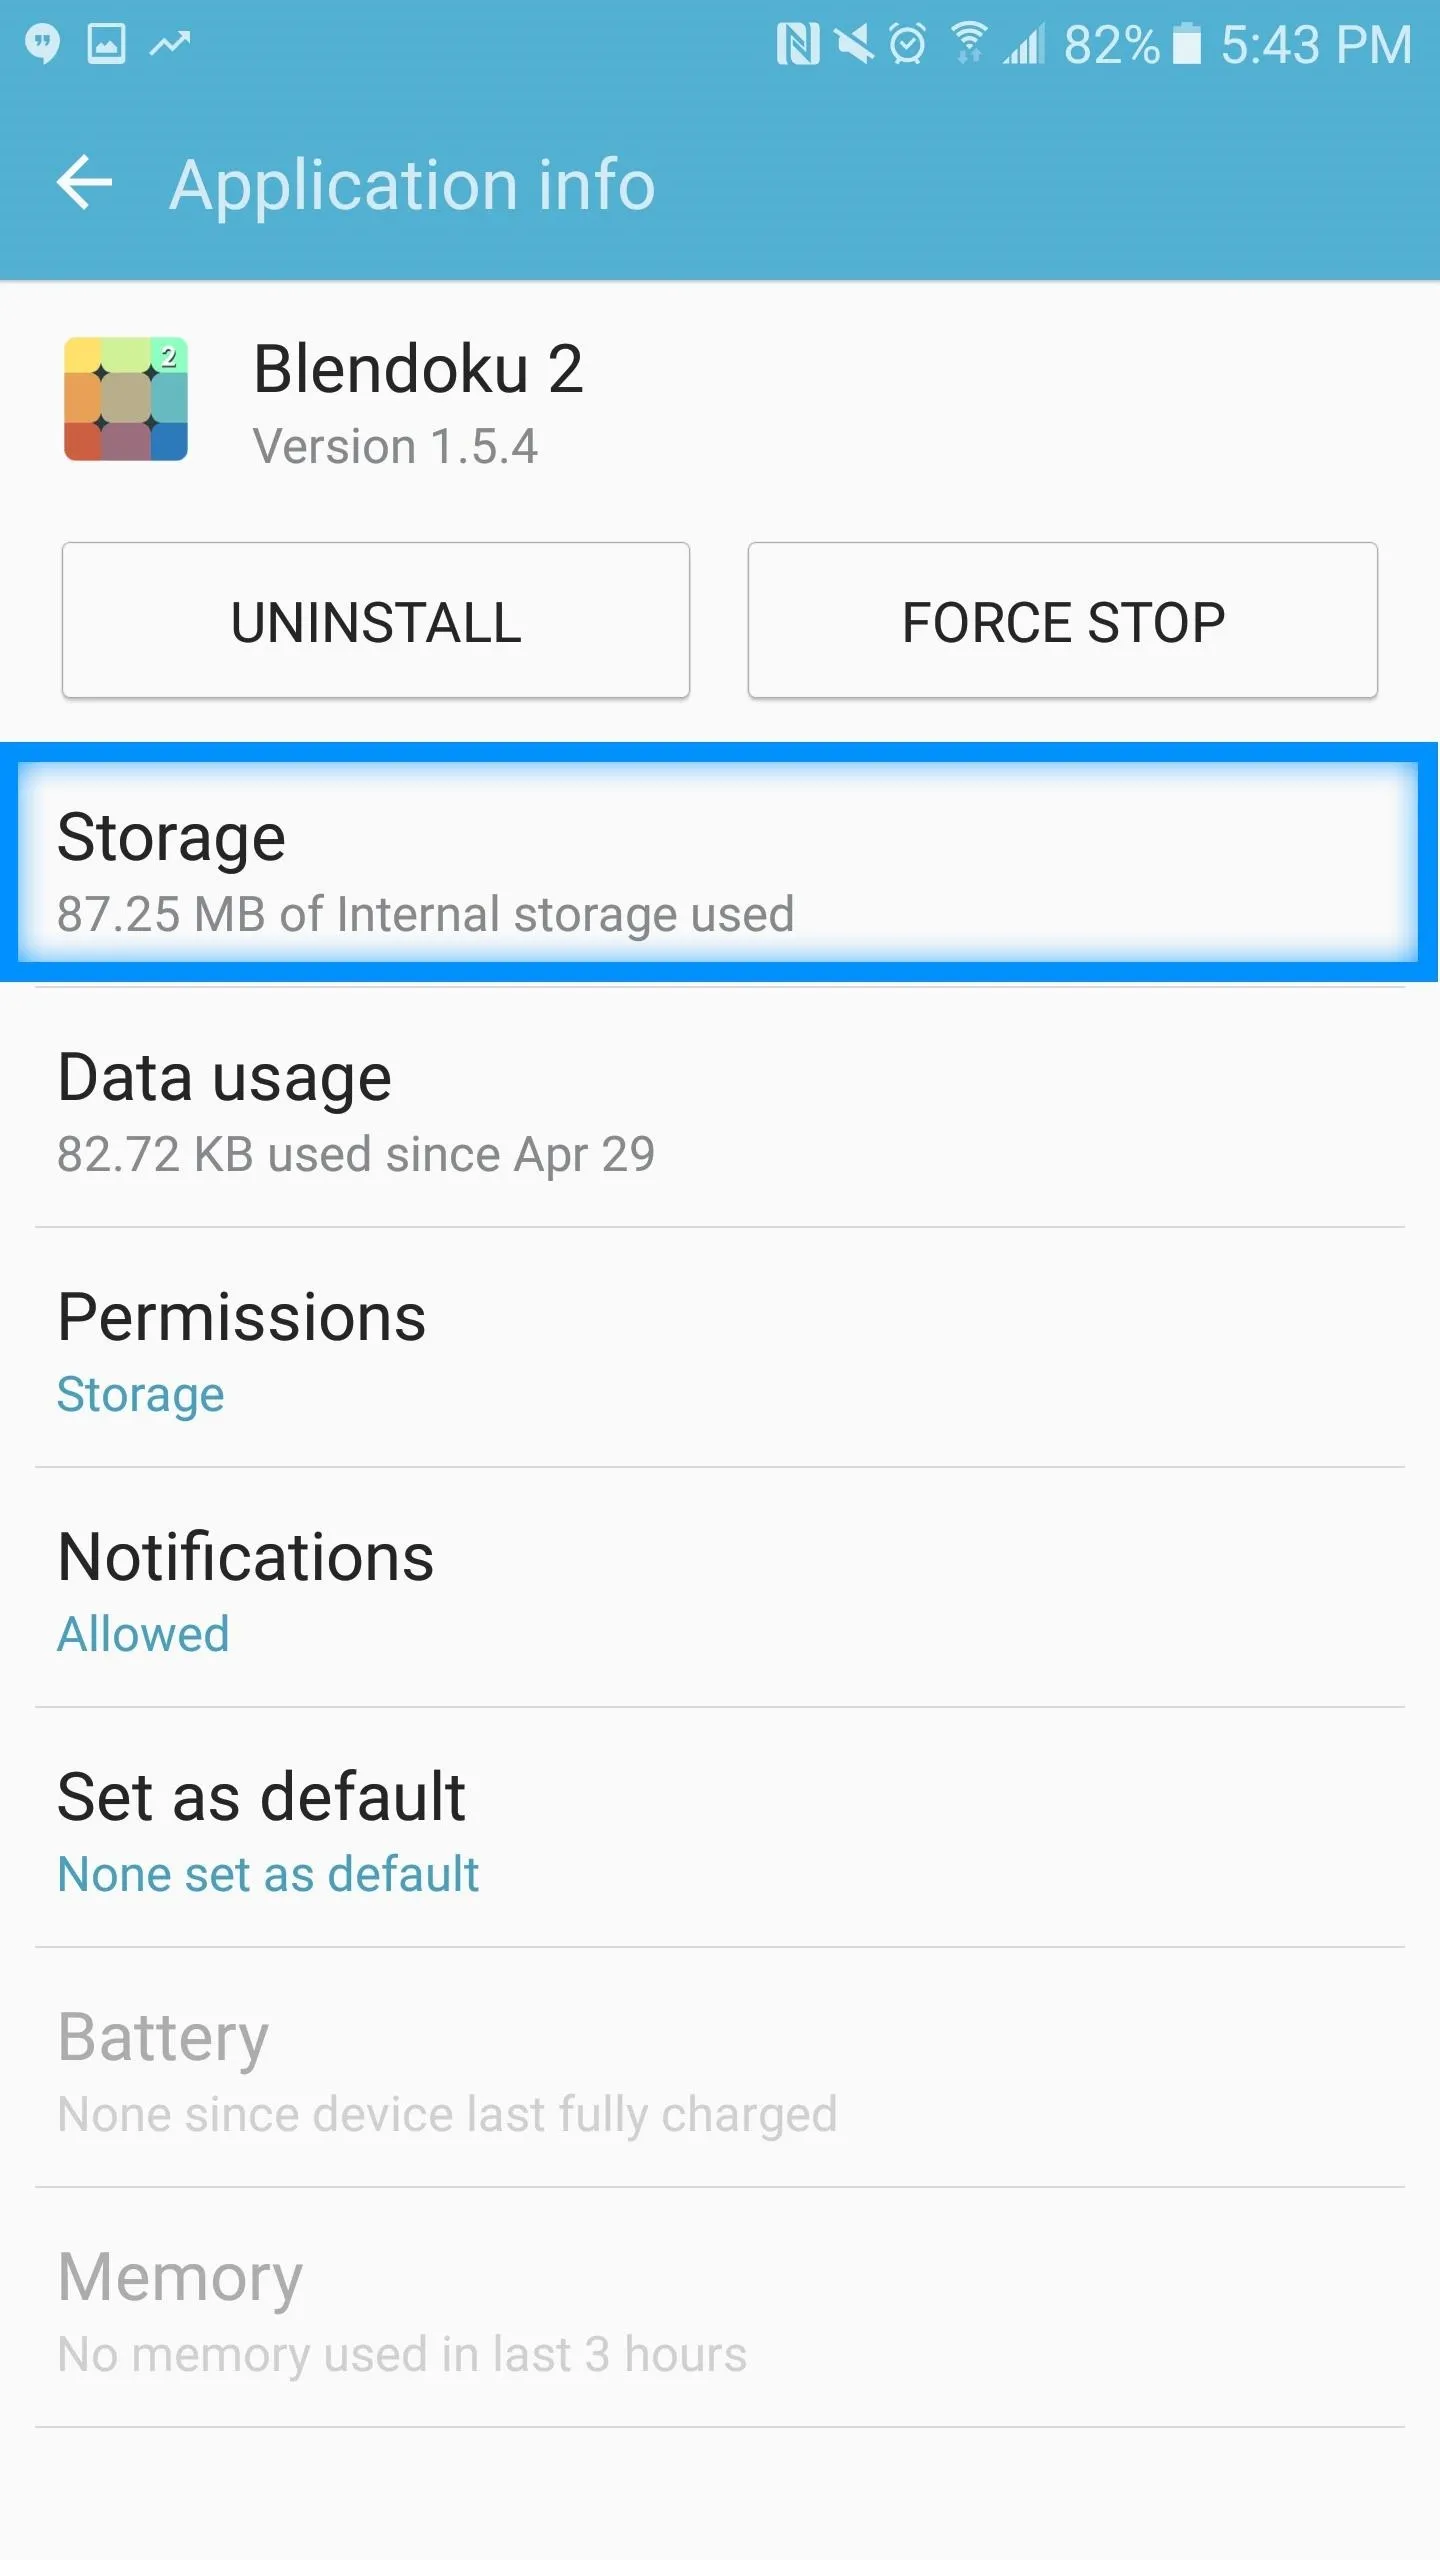
To move apps to your SD card, simply go to Settings -> Applications, then Applications manager.
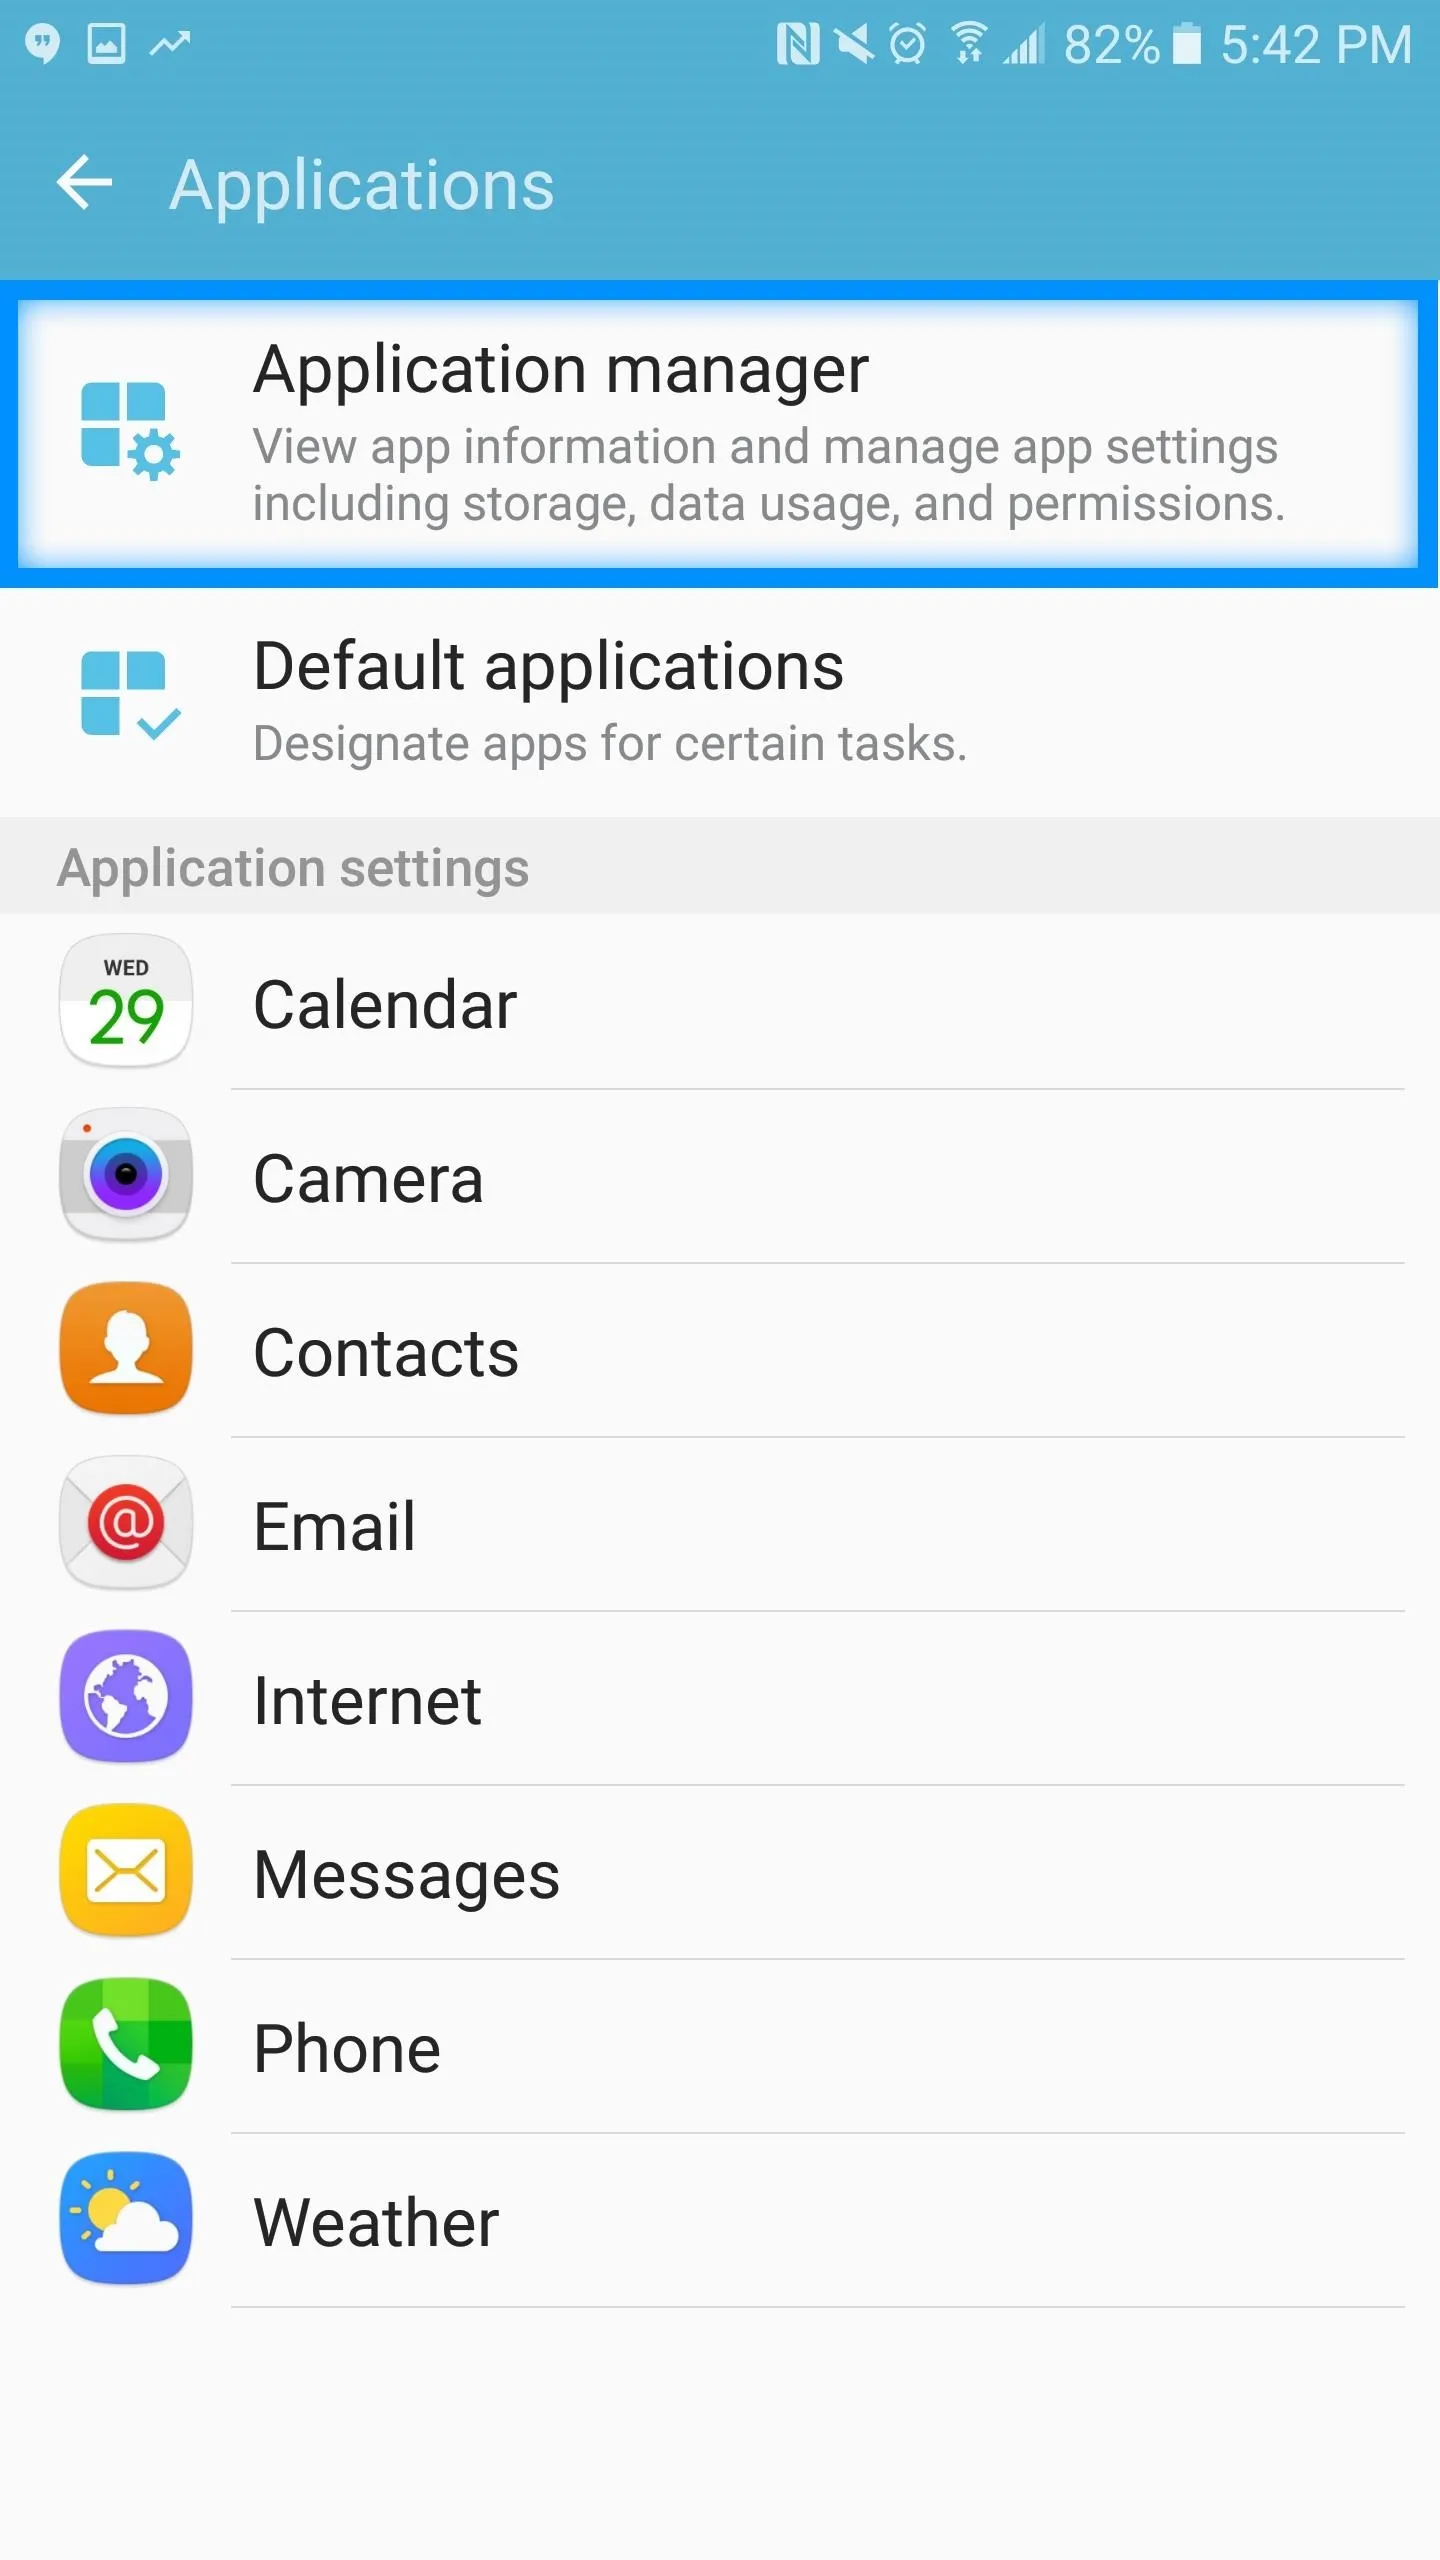


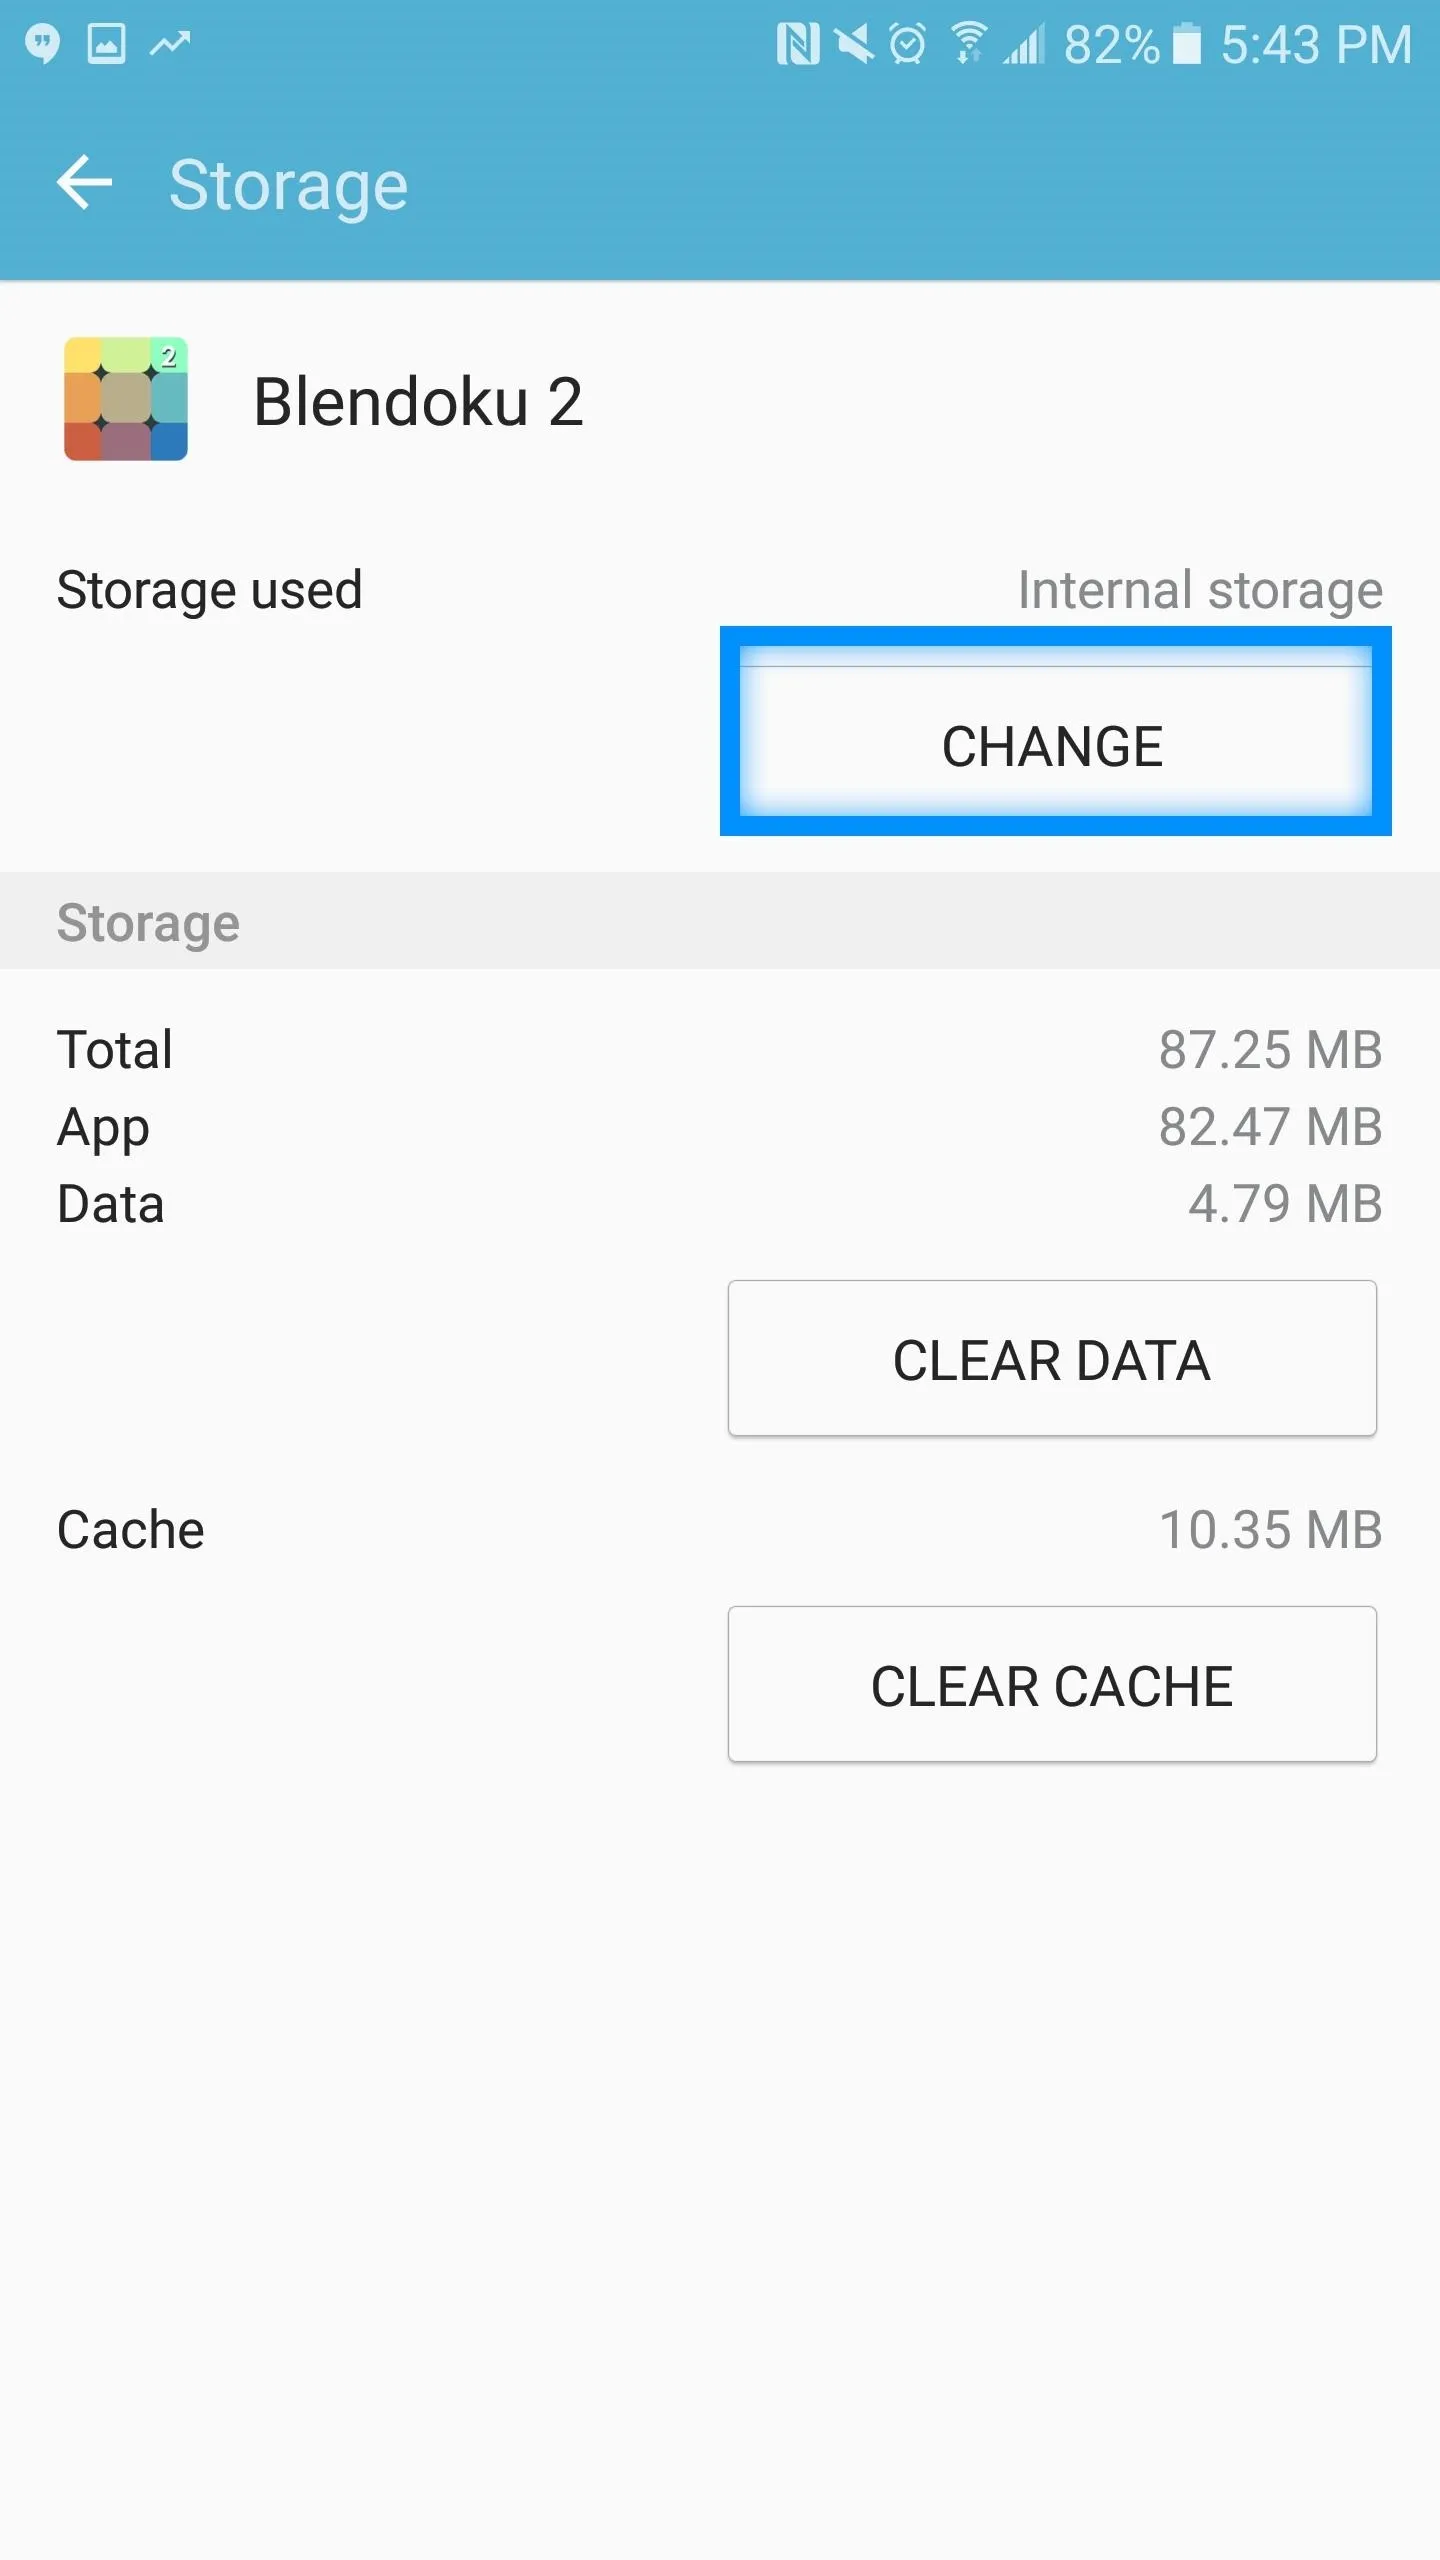
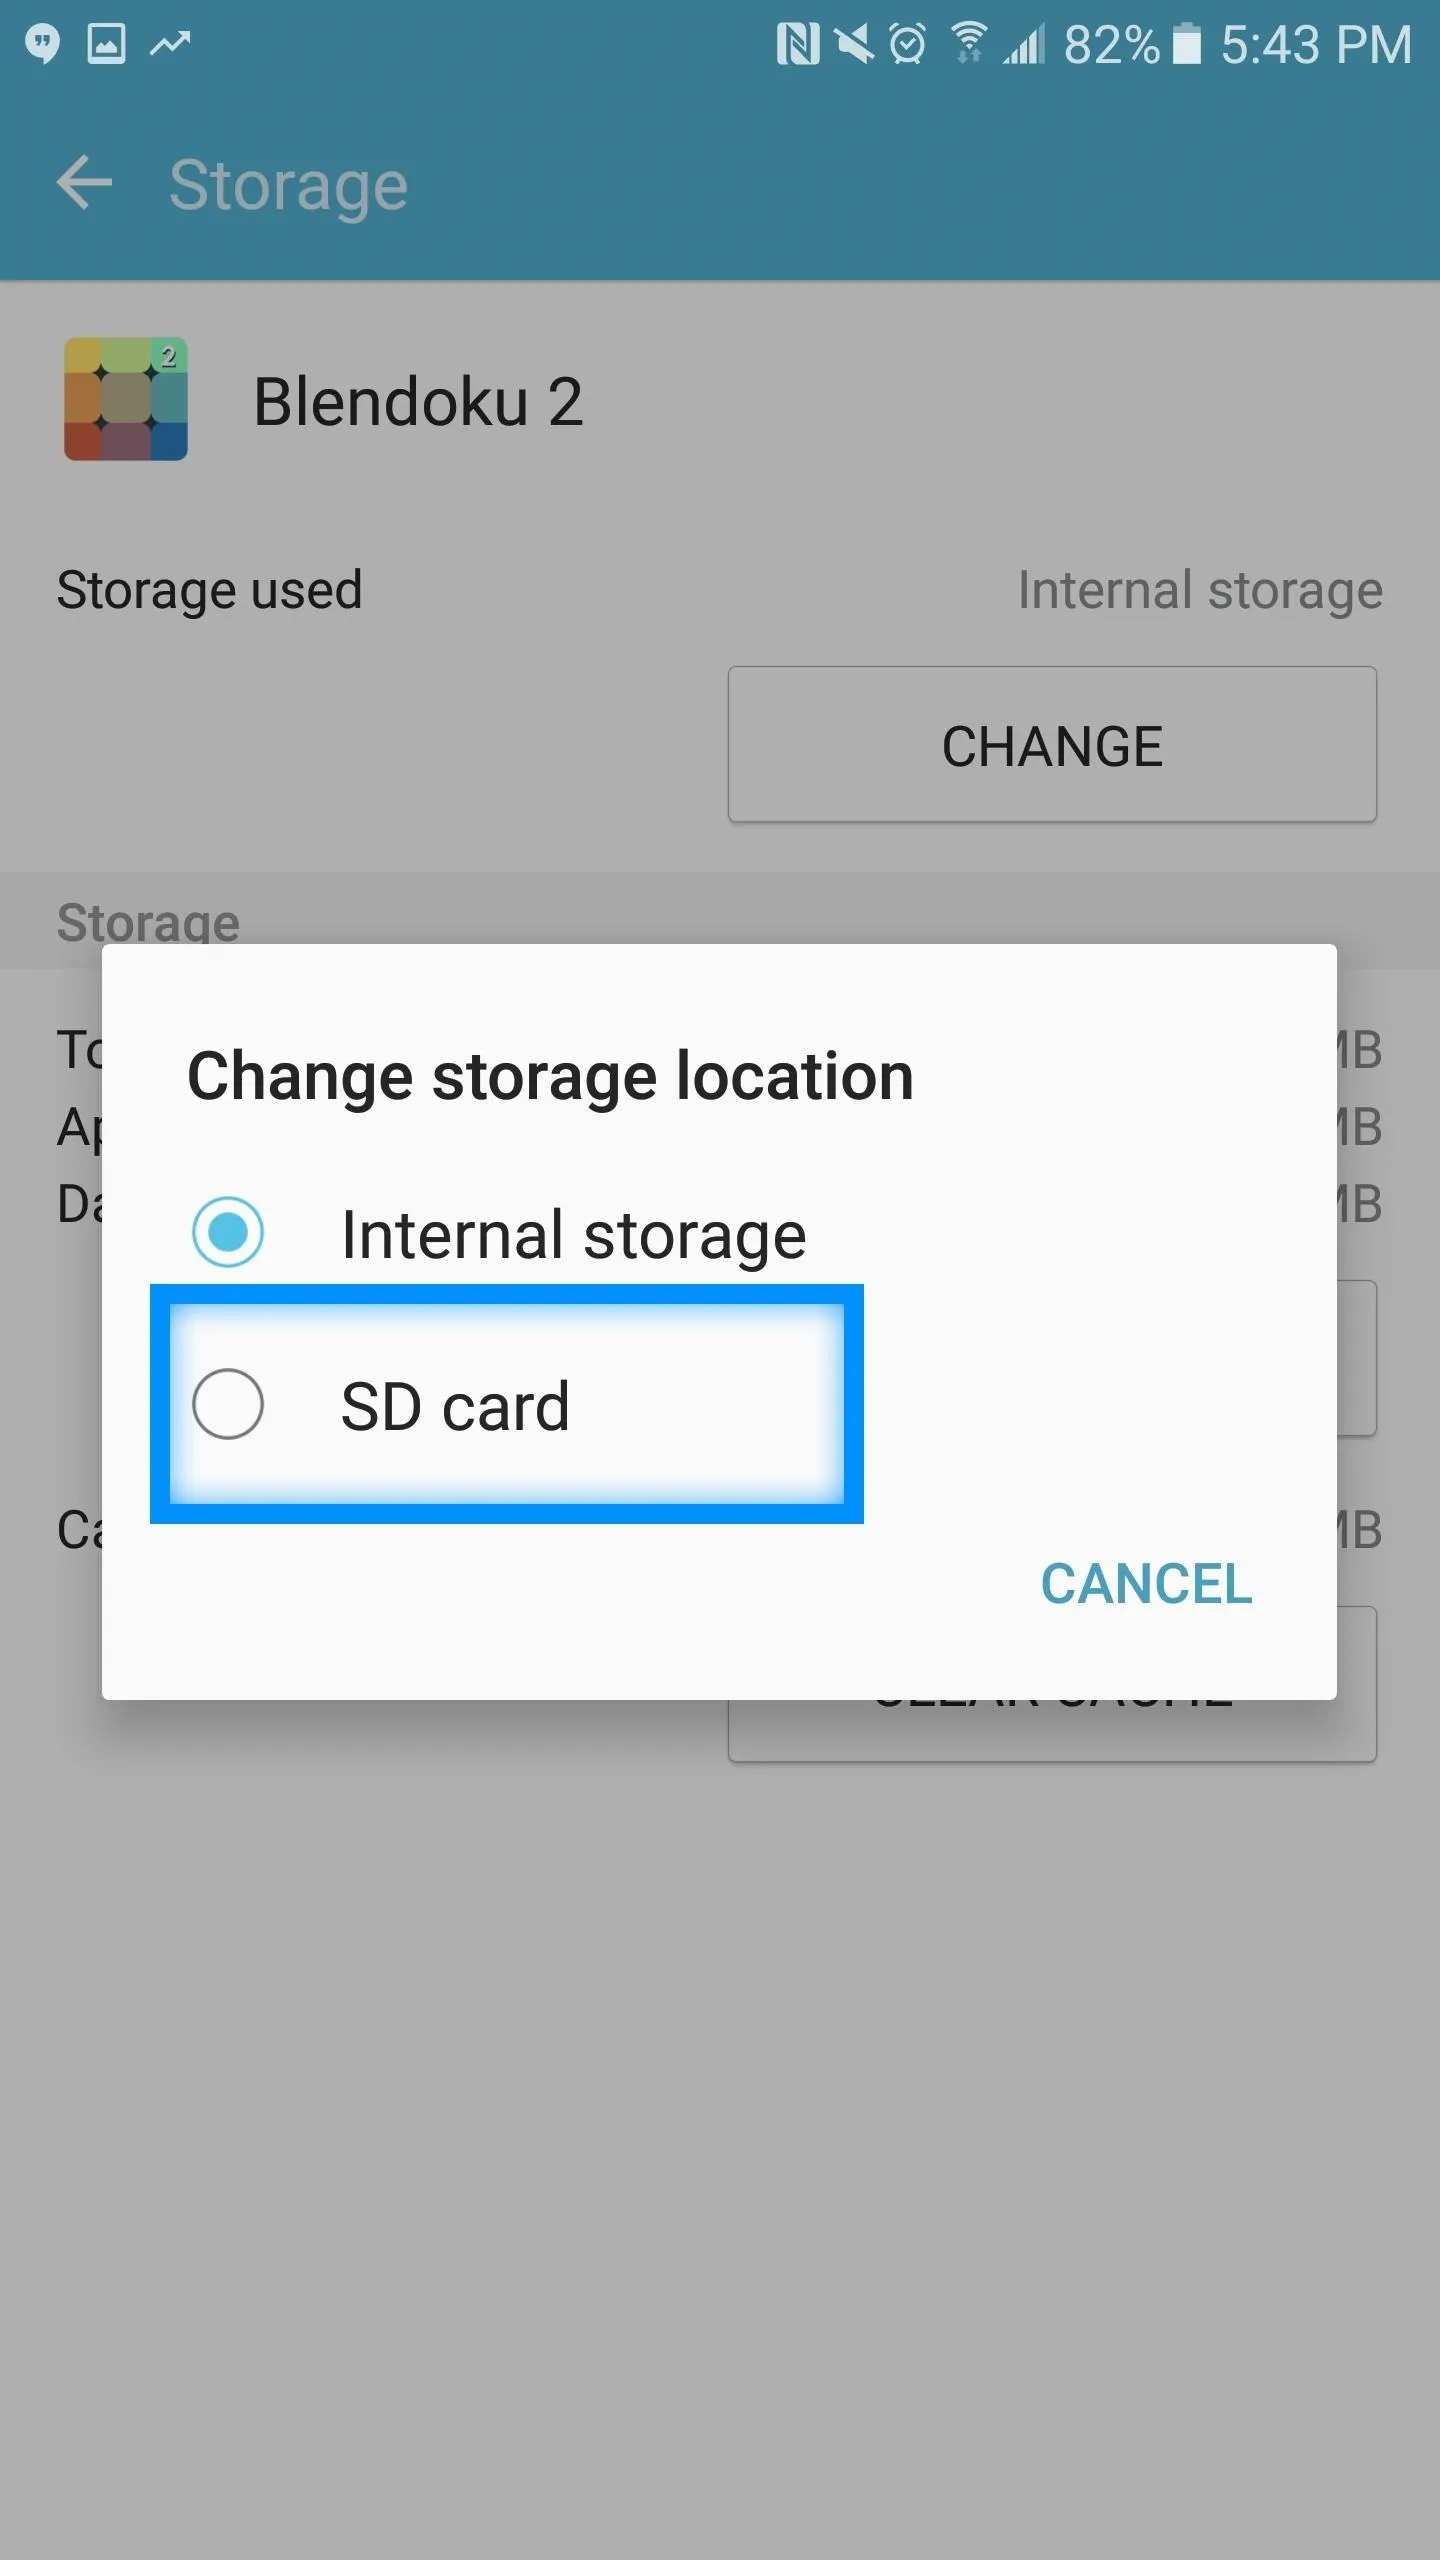
Here, you will be able to see a list of all your applications currently installed on your phone. To move an application to your SD card, simply select it, then select Storage -> Change, and a prompt will appear asking you to change your storage location—select SD card.


4. Take Scrolling Screenshots
Ever since the Samsung Galaxy Note 5, Samsung Galaxy phones have been able to take scrolling screenshots, which are an ingenious method for capturing the entirety of your screen, especially if you're reading a long article or viewing a portrait image that is longer than your screen.
To take a scrolling screenshot, simply press and hold the power and the home button at the same time. This will automatically take a screenshot of whatever is on your screen. Once the screenshot is taken, there will be a '+' icon at the bottom right that says Capture more—tap this button to have the screen scroll and Samsung's software will automatically stitch the pages together into one continuous image.


5. Log into Websites Using Your Fingerprint
The default web browser that comes with your Samsung Galaxy S7 is not only pretty quick (compared to Chrome), but it also features native fingerprint authentication for websites that require a password. If you're someone like me who uses their browser for almost everything, having the fingerprint scanner to sign into a bank account, Amazon, Massdrop, and other favorite password-protected sites saves a bunch of time and keeps everything secure.
To utilize the fingerprint scanner on the default web browser, you must first set up your fingerprint security by going into Settings -> Lock screen and security -> Fingerprints.
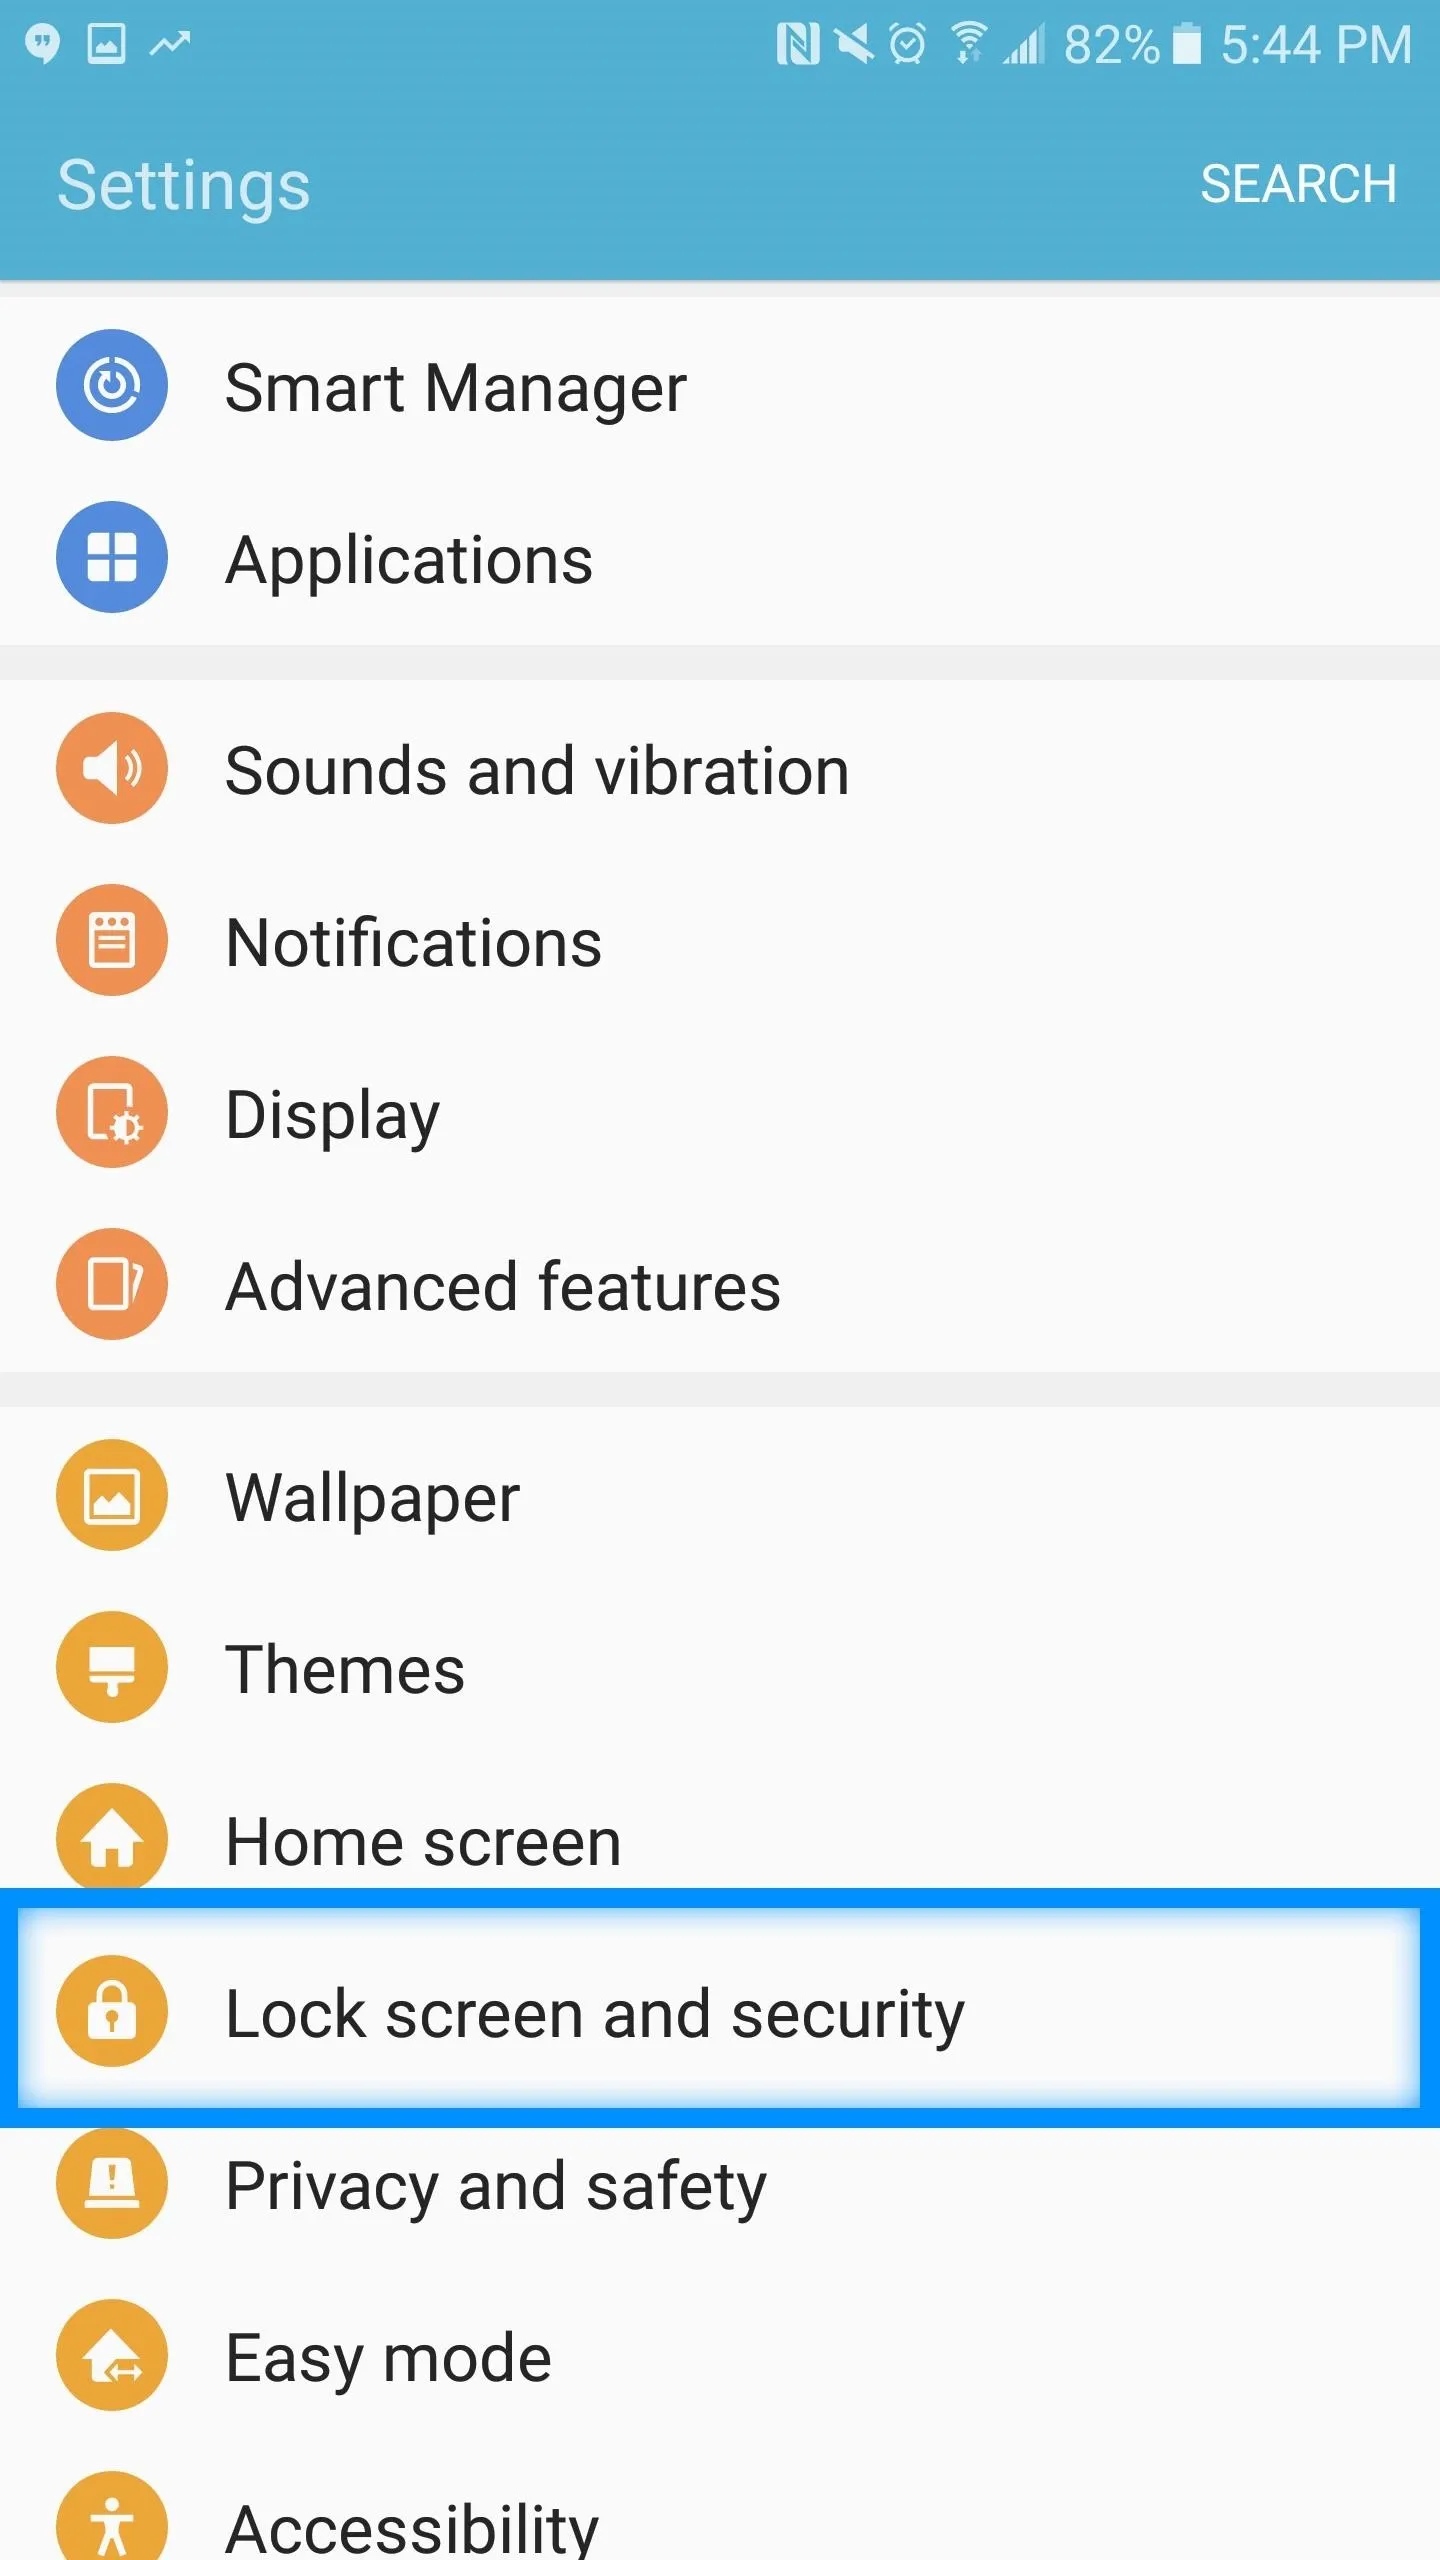
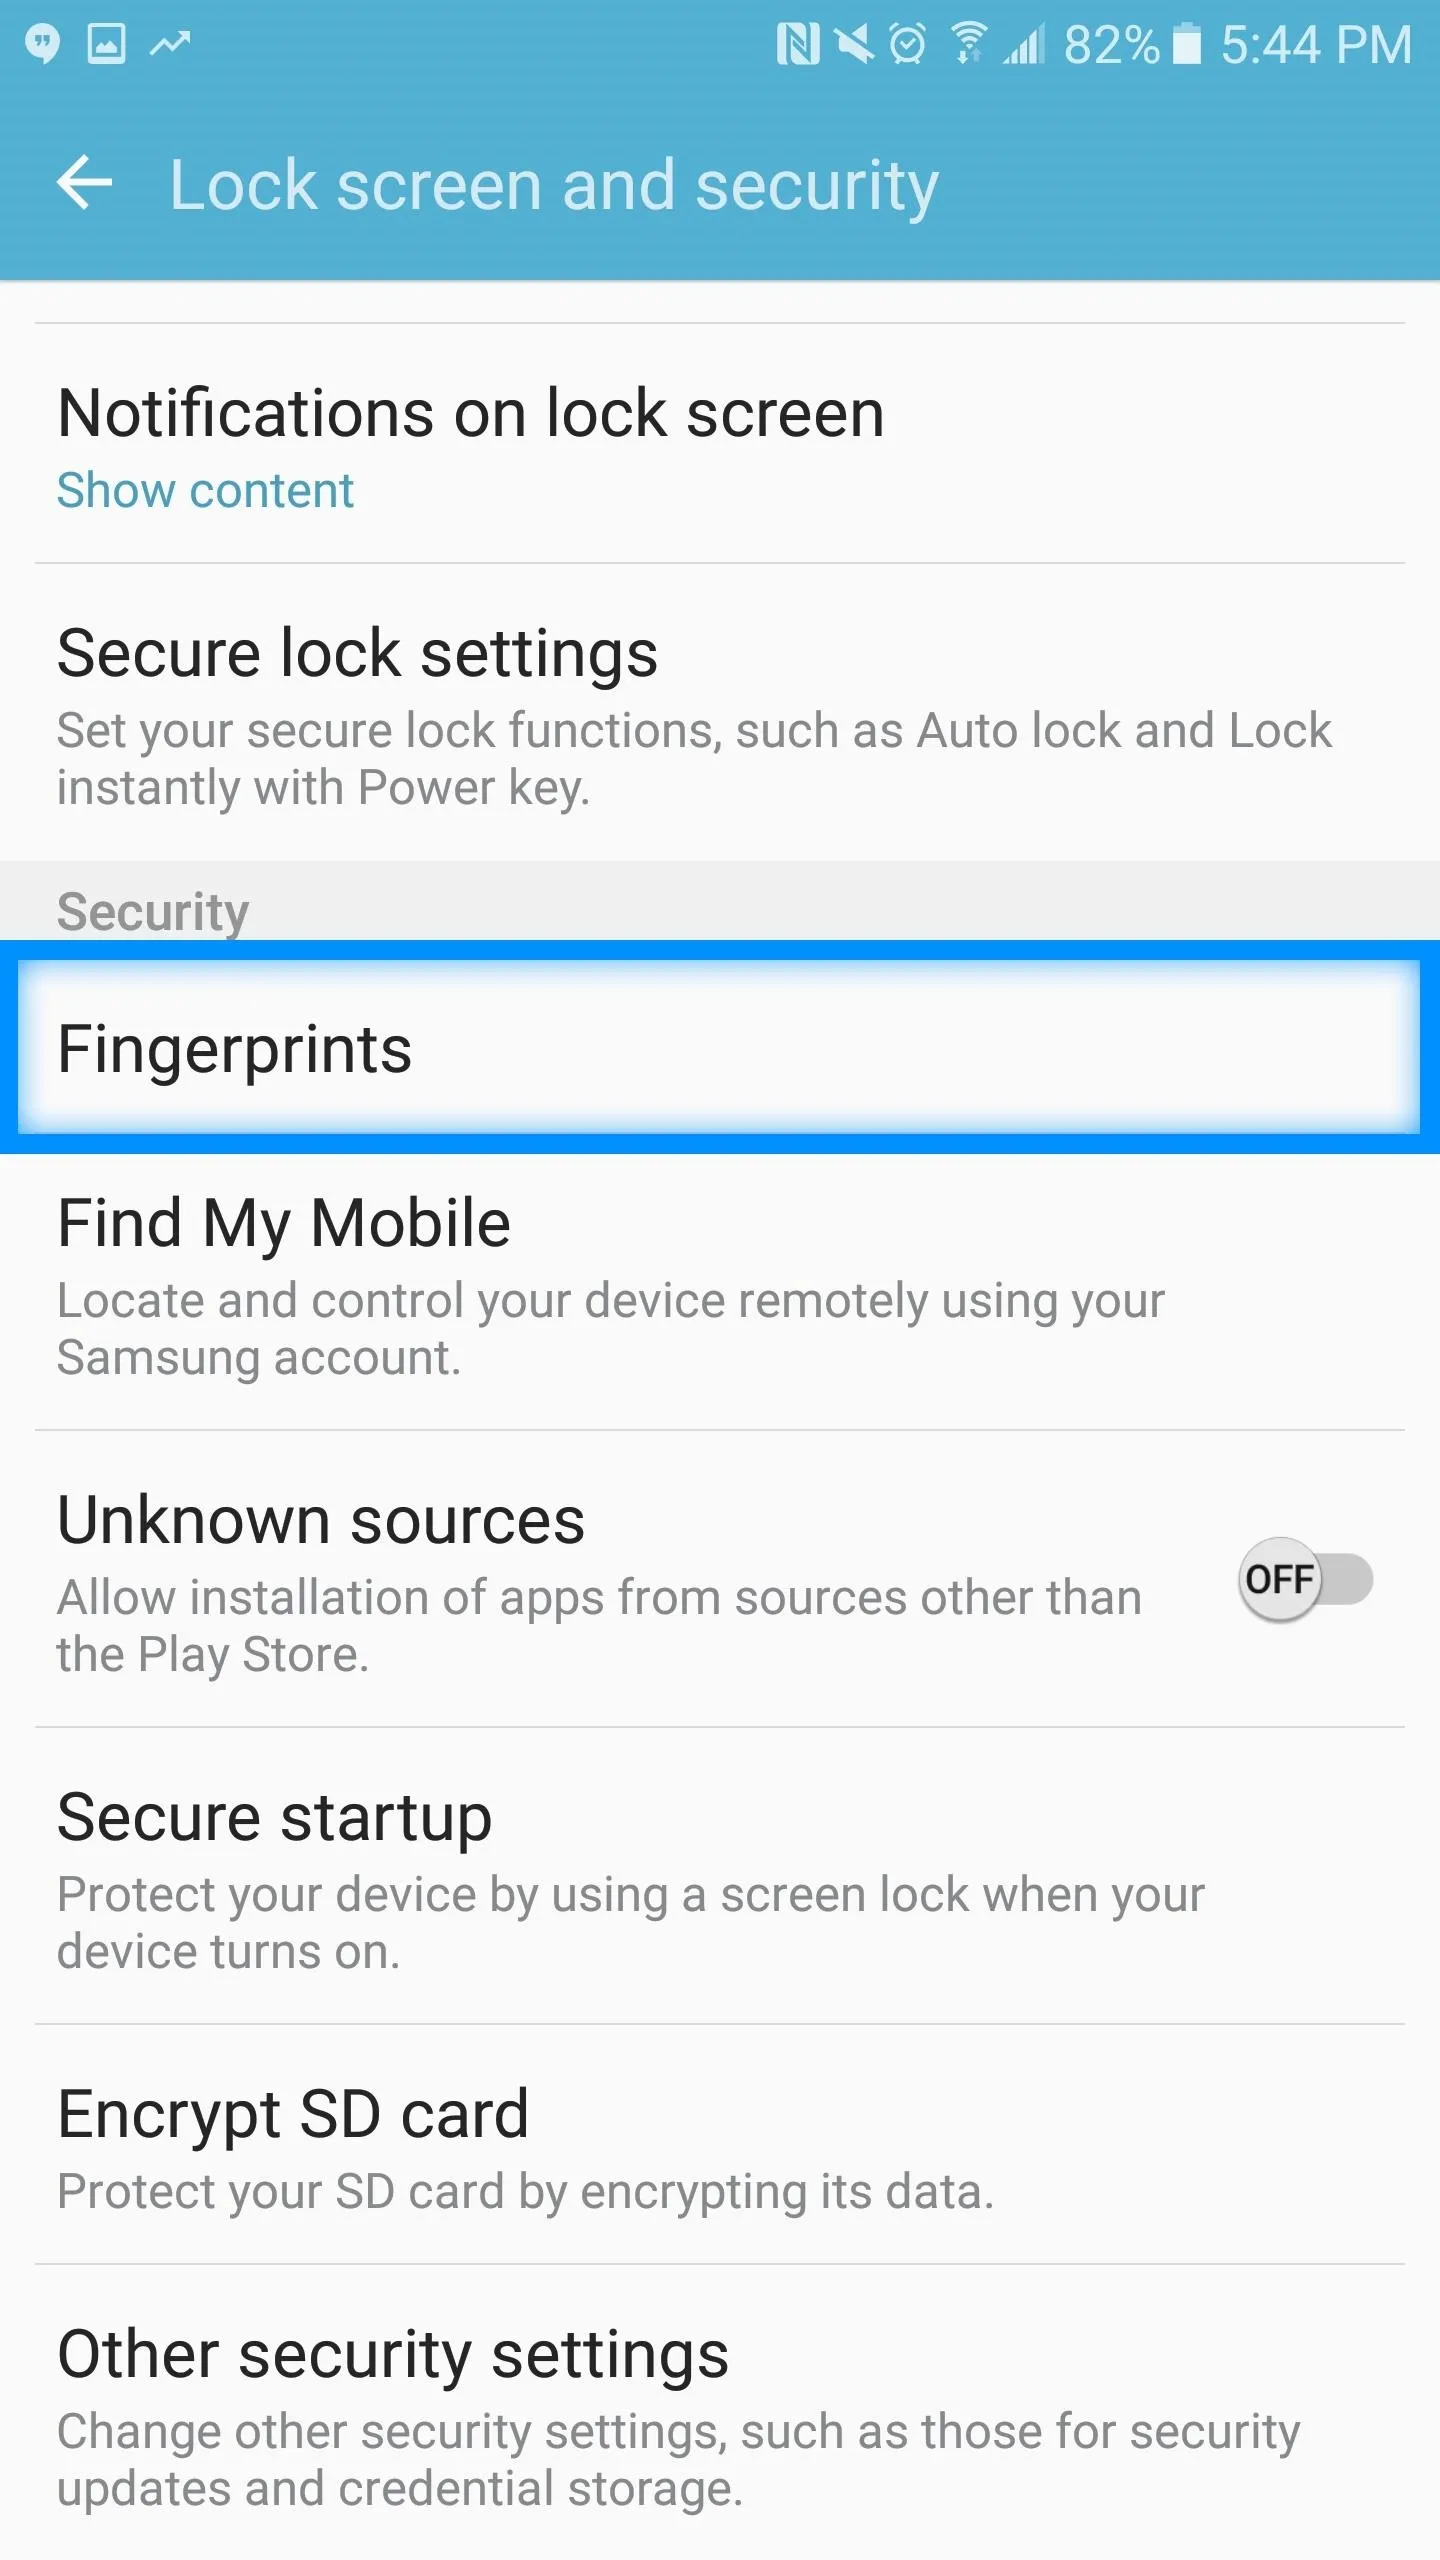
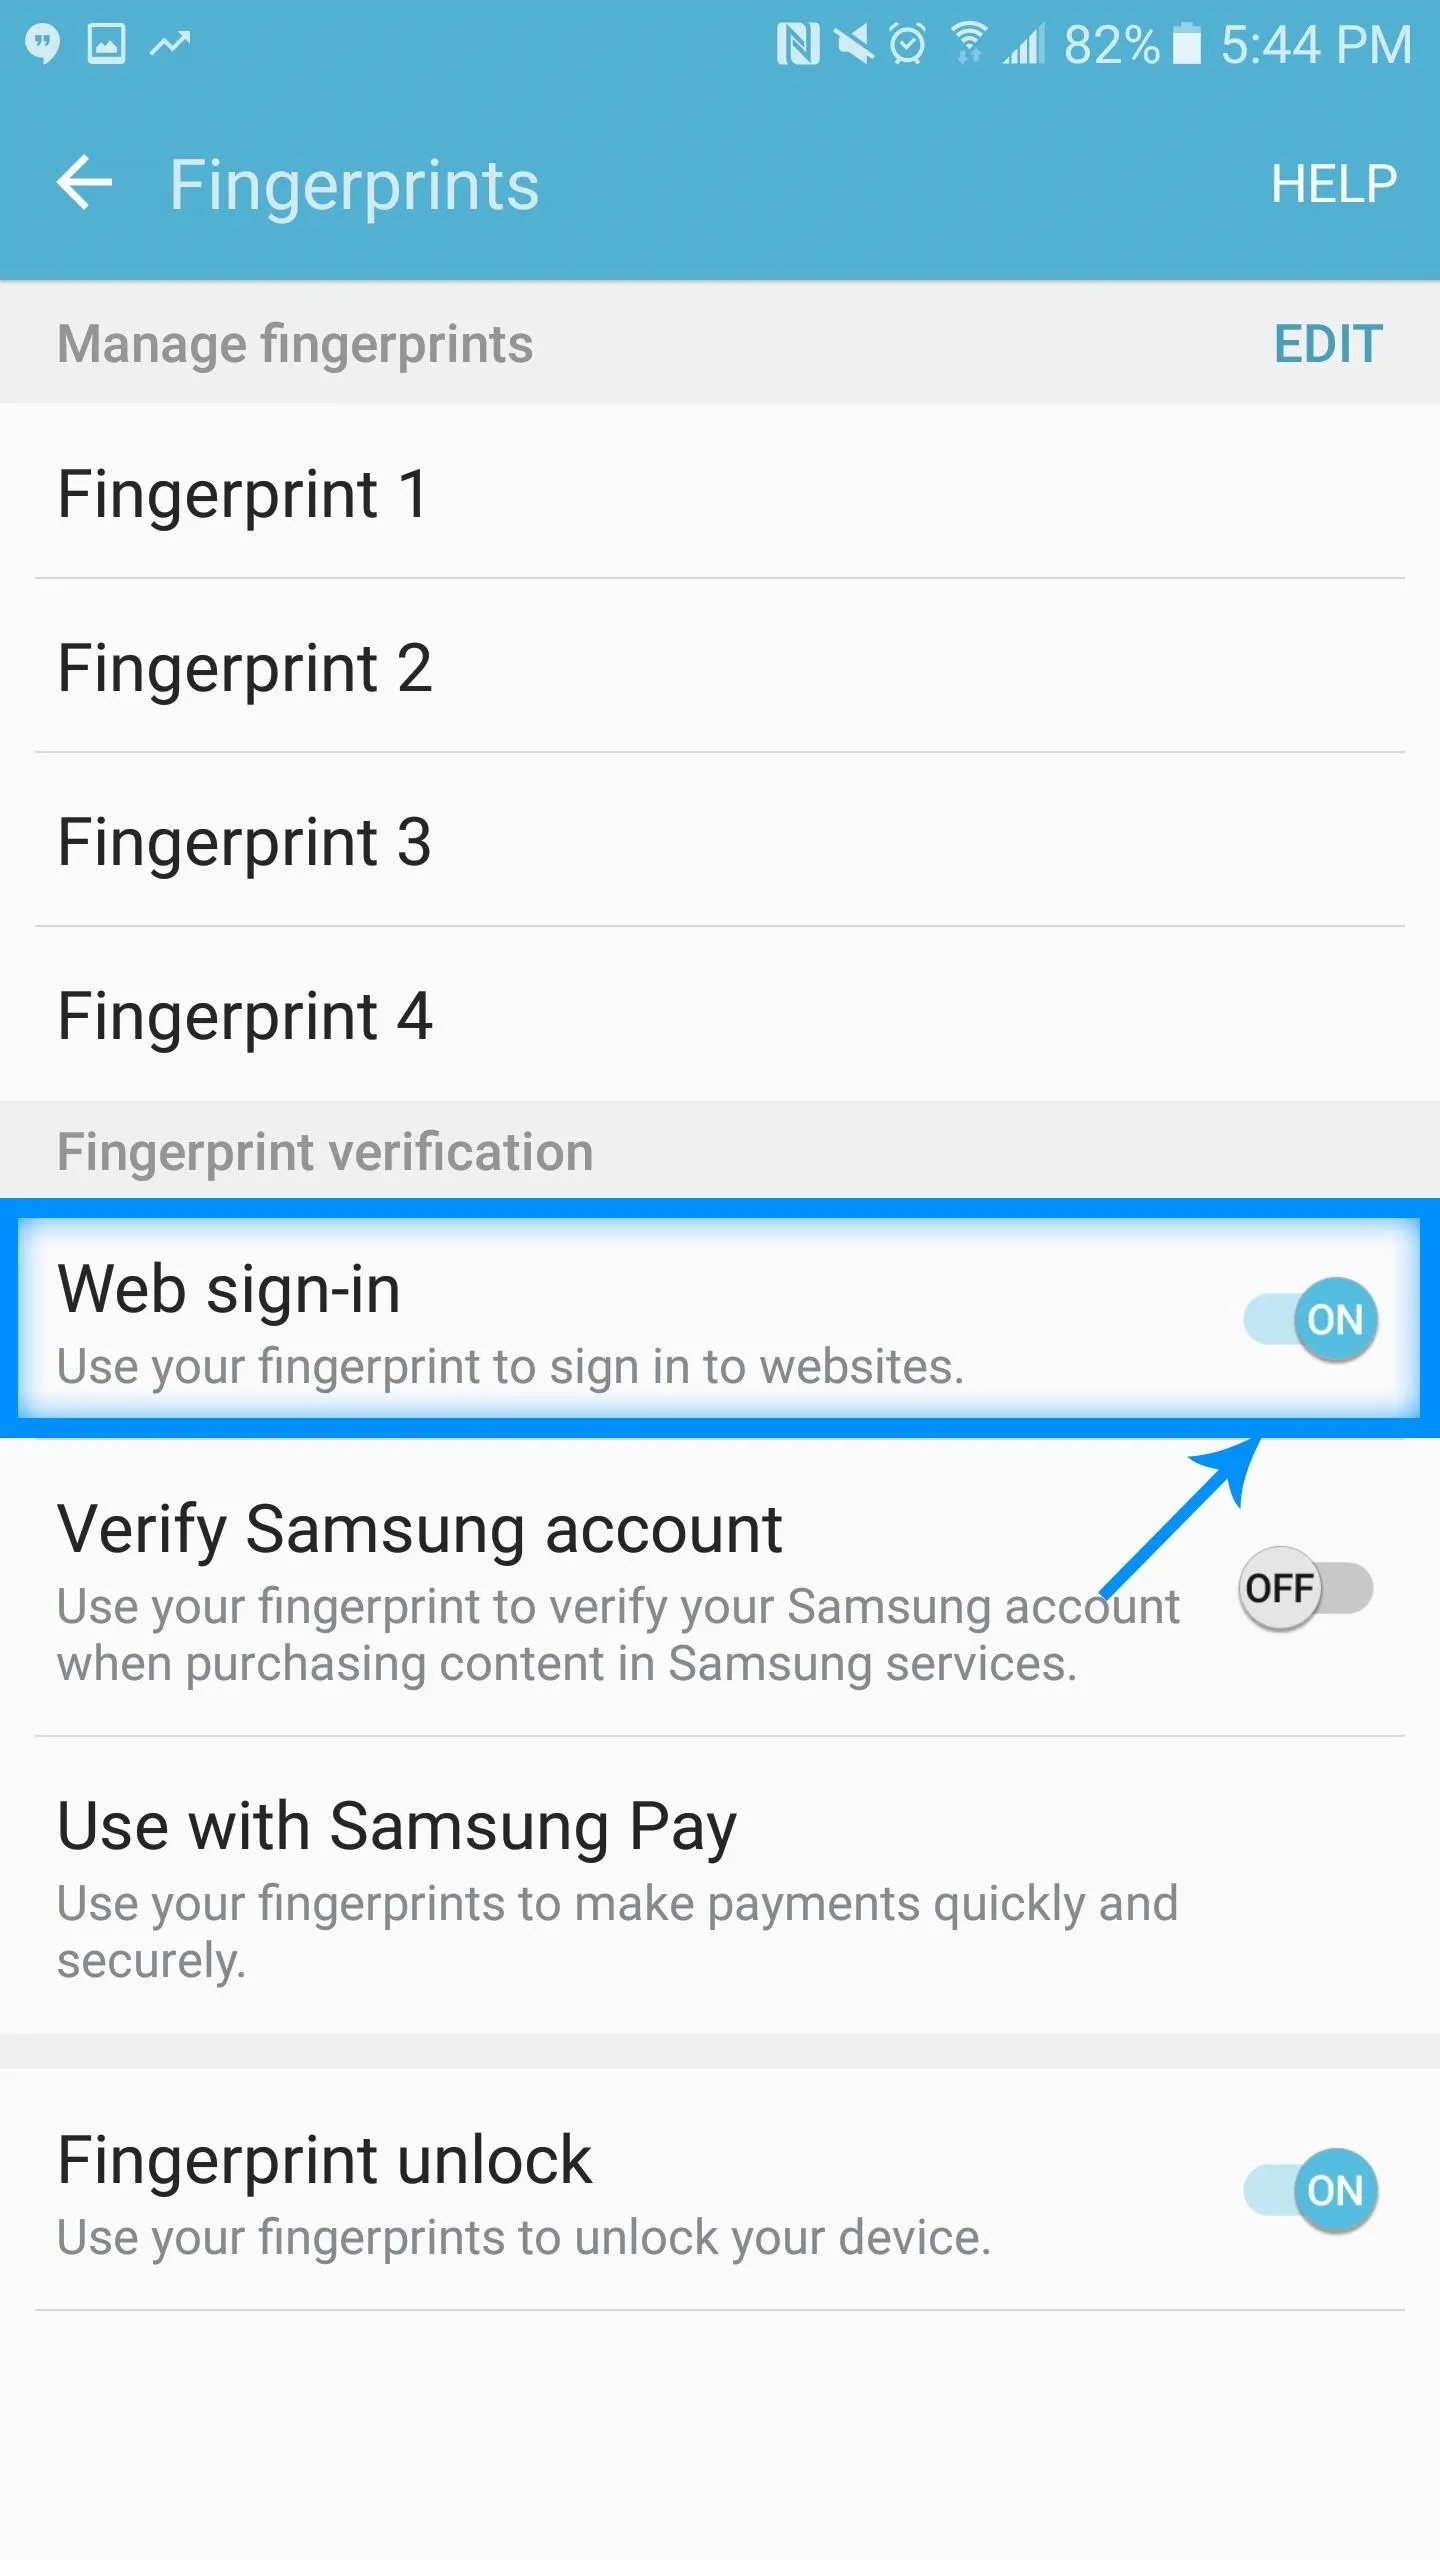


Once there, toggle on the Web sign-in option. Now, the next time you use the default web browser to sign into a secure site, the browser will ask you if you want to use your fingerprint to log in. Select yes and you're good to go!
6. Don't Be Afraid of Auto-Brightness
For many seasoned Android users, one of the first things they do with their phone is turn off the pesky auto-brightness setting. In the past, this setting was a sure way to waste battery, and for many, it was a source of agony as the screen always seemed to be set to the incorrect brightness setting.
Now, with the Samsung Galaxy S7, auto-brightness is much smarter. With it enabled, your phone will automatically adjust to the ambient lighting conditions; however, in addition to this, if you are unhappy with the setting and manually adjust it, your phone will automatically store this exact setting for the ambient conditions for next time.
Additionally, auto-brightness is the only way for the phone to enter into high-contrast mode while in direct sunlight. As such, leave it on!
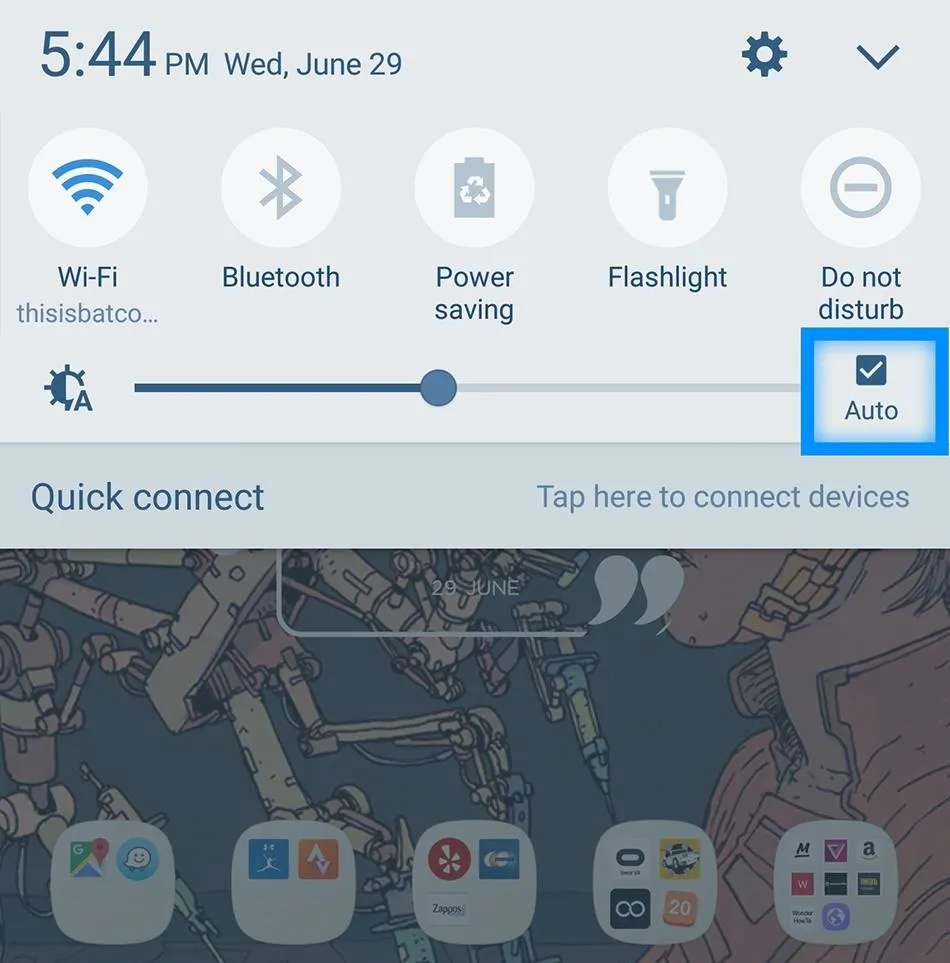
To make sure you have auto-brightness enabled, simply swipe down from the top of the screen and make sure the Auto box is checked next to the brightness slider.
7. Use Samsung's Advanced Features
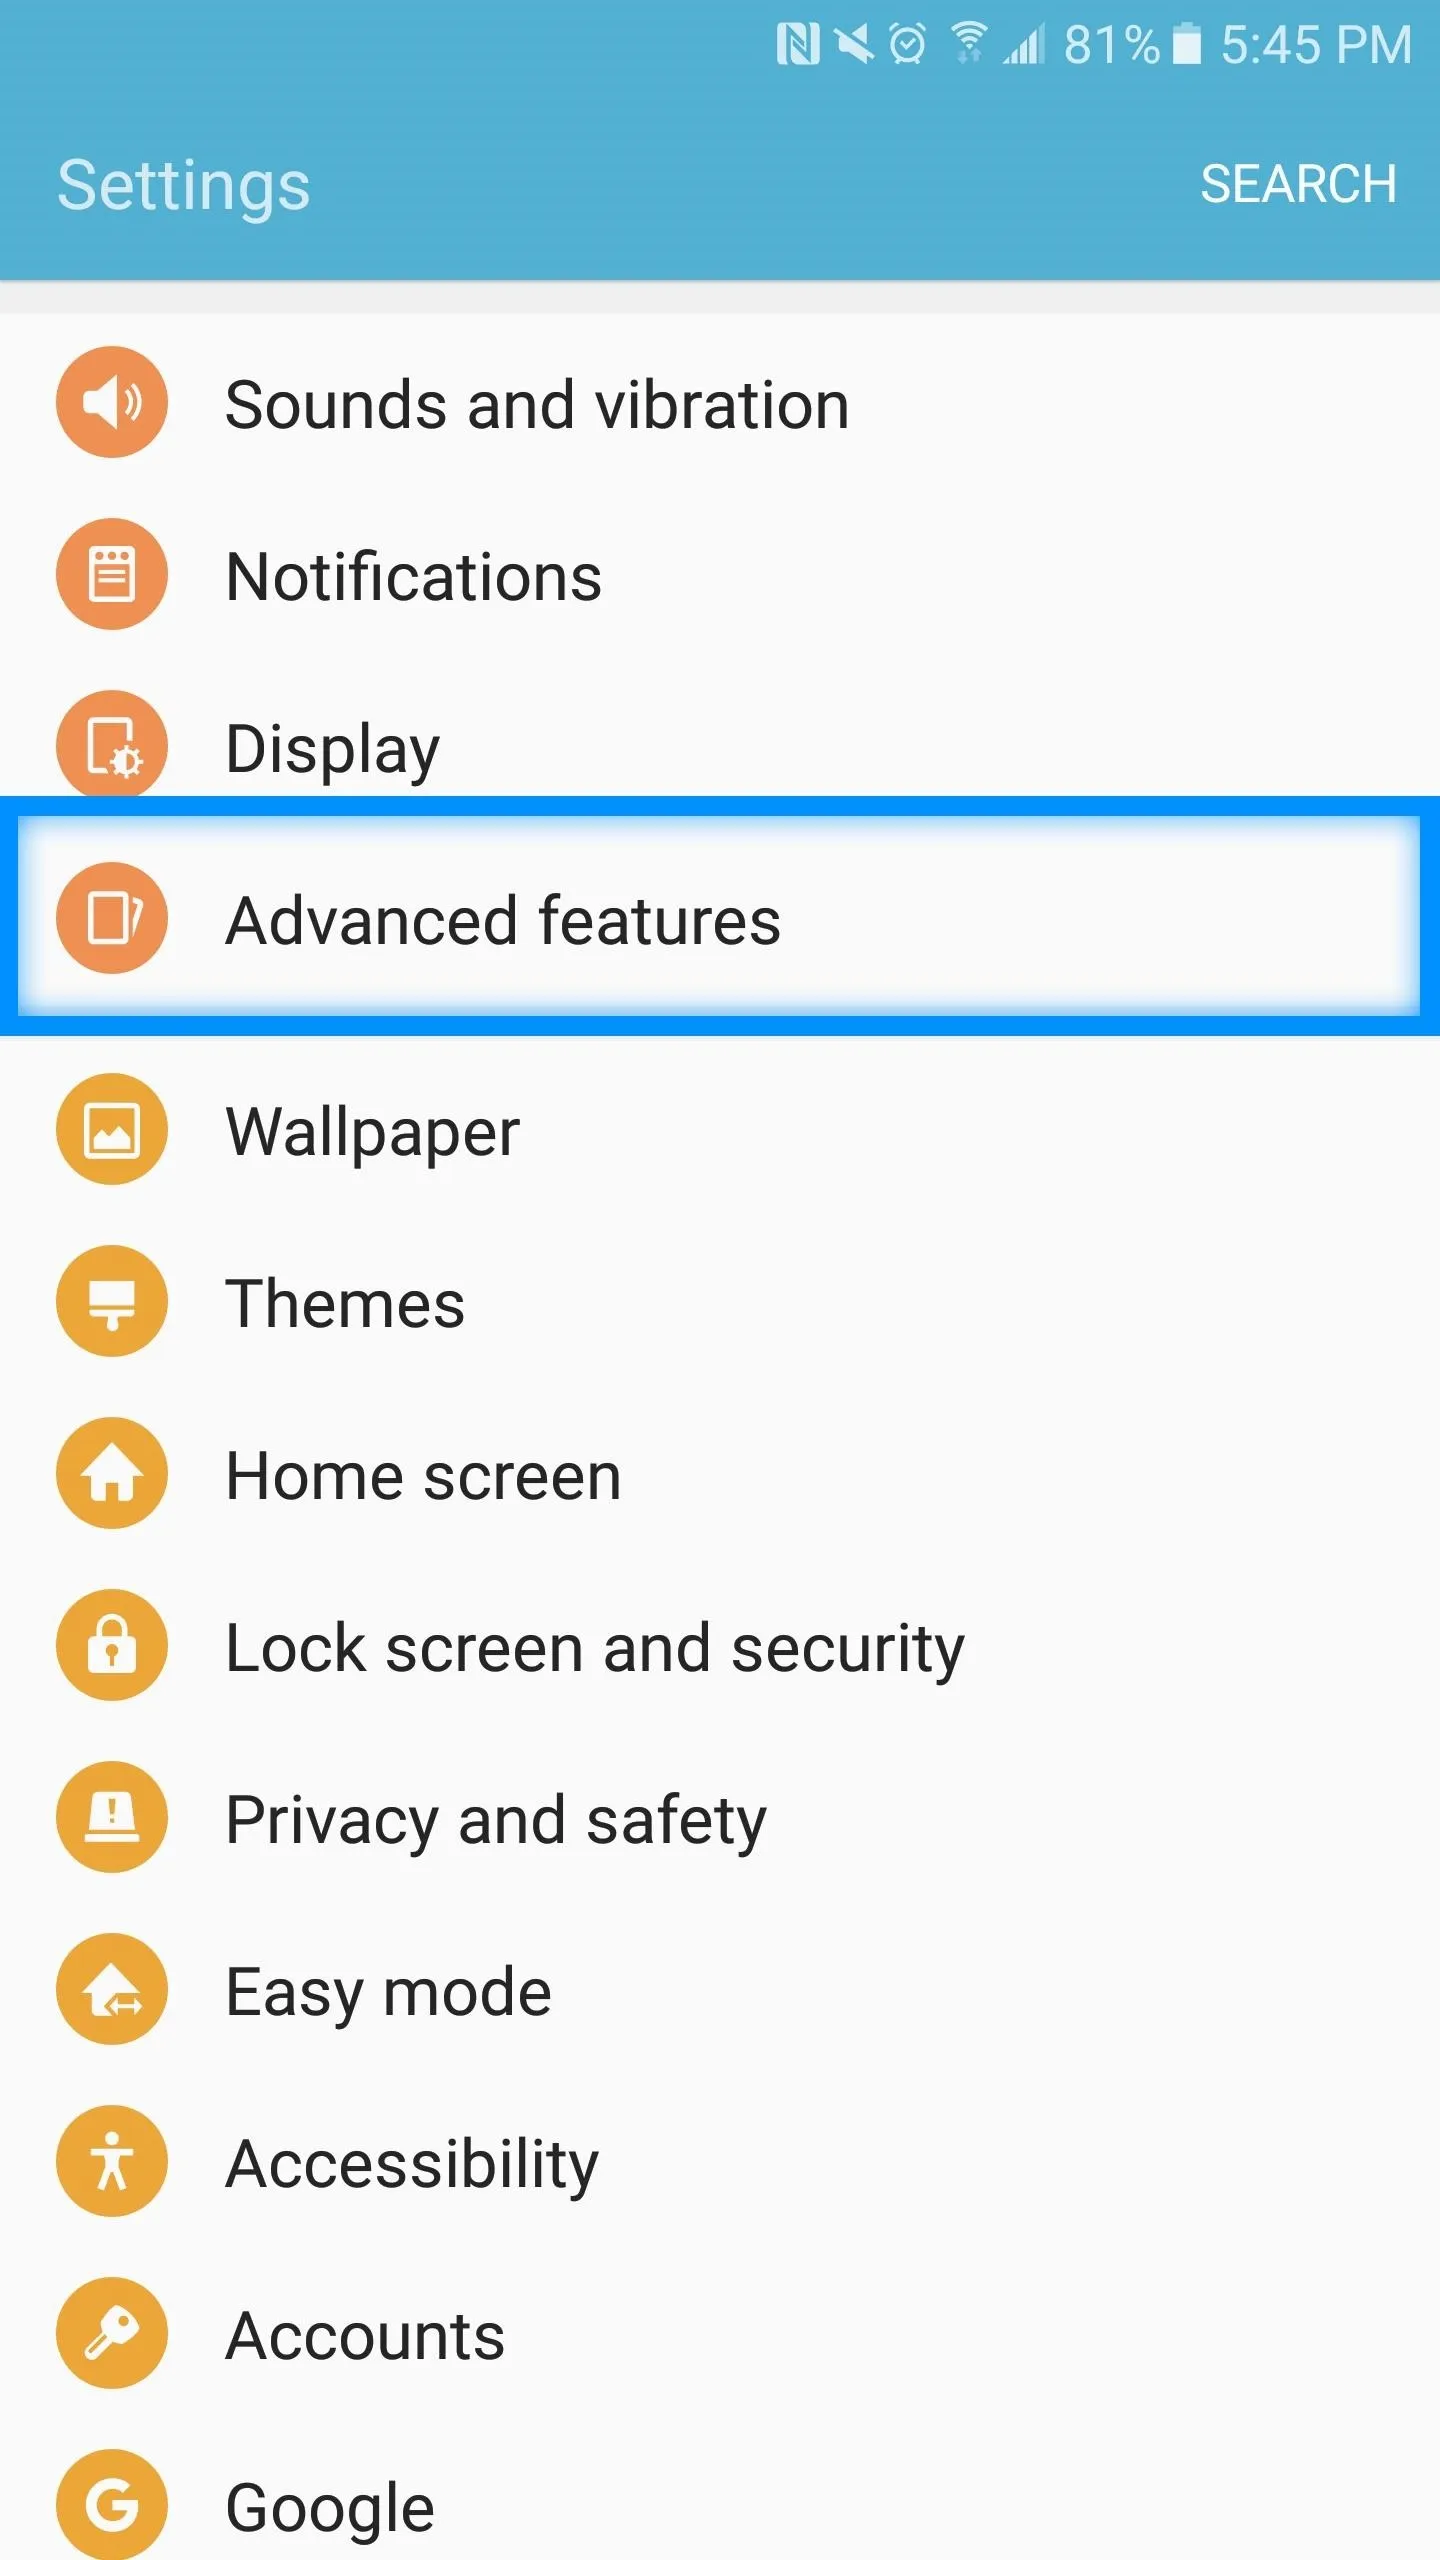
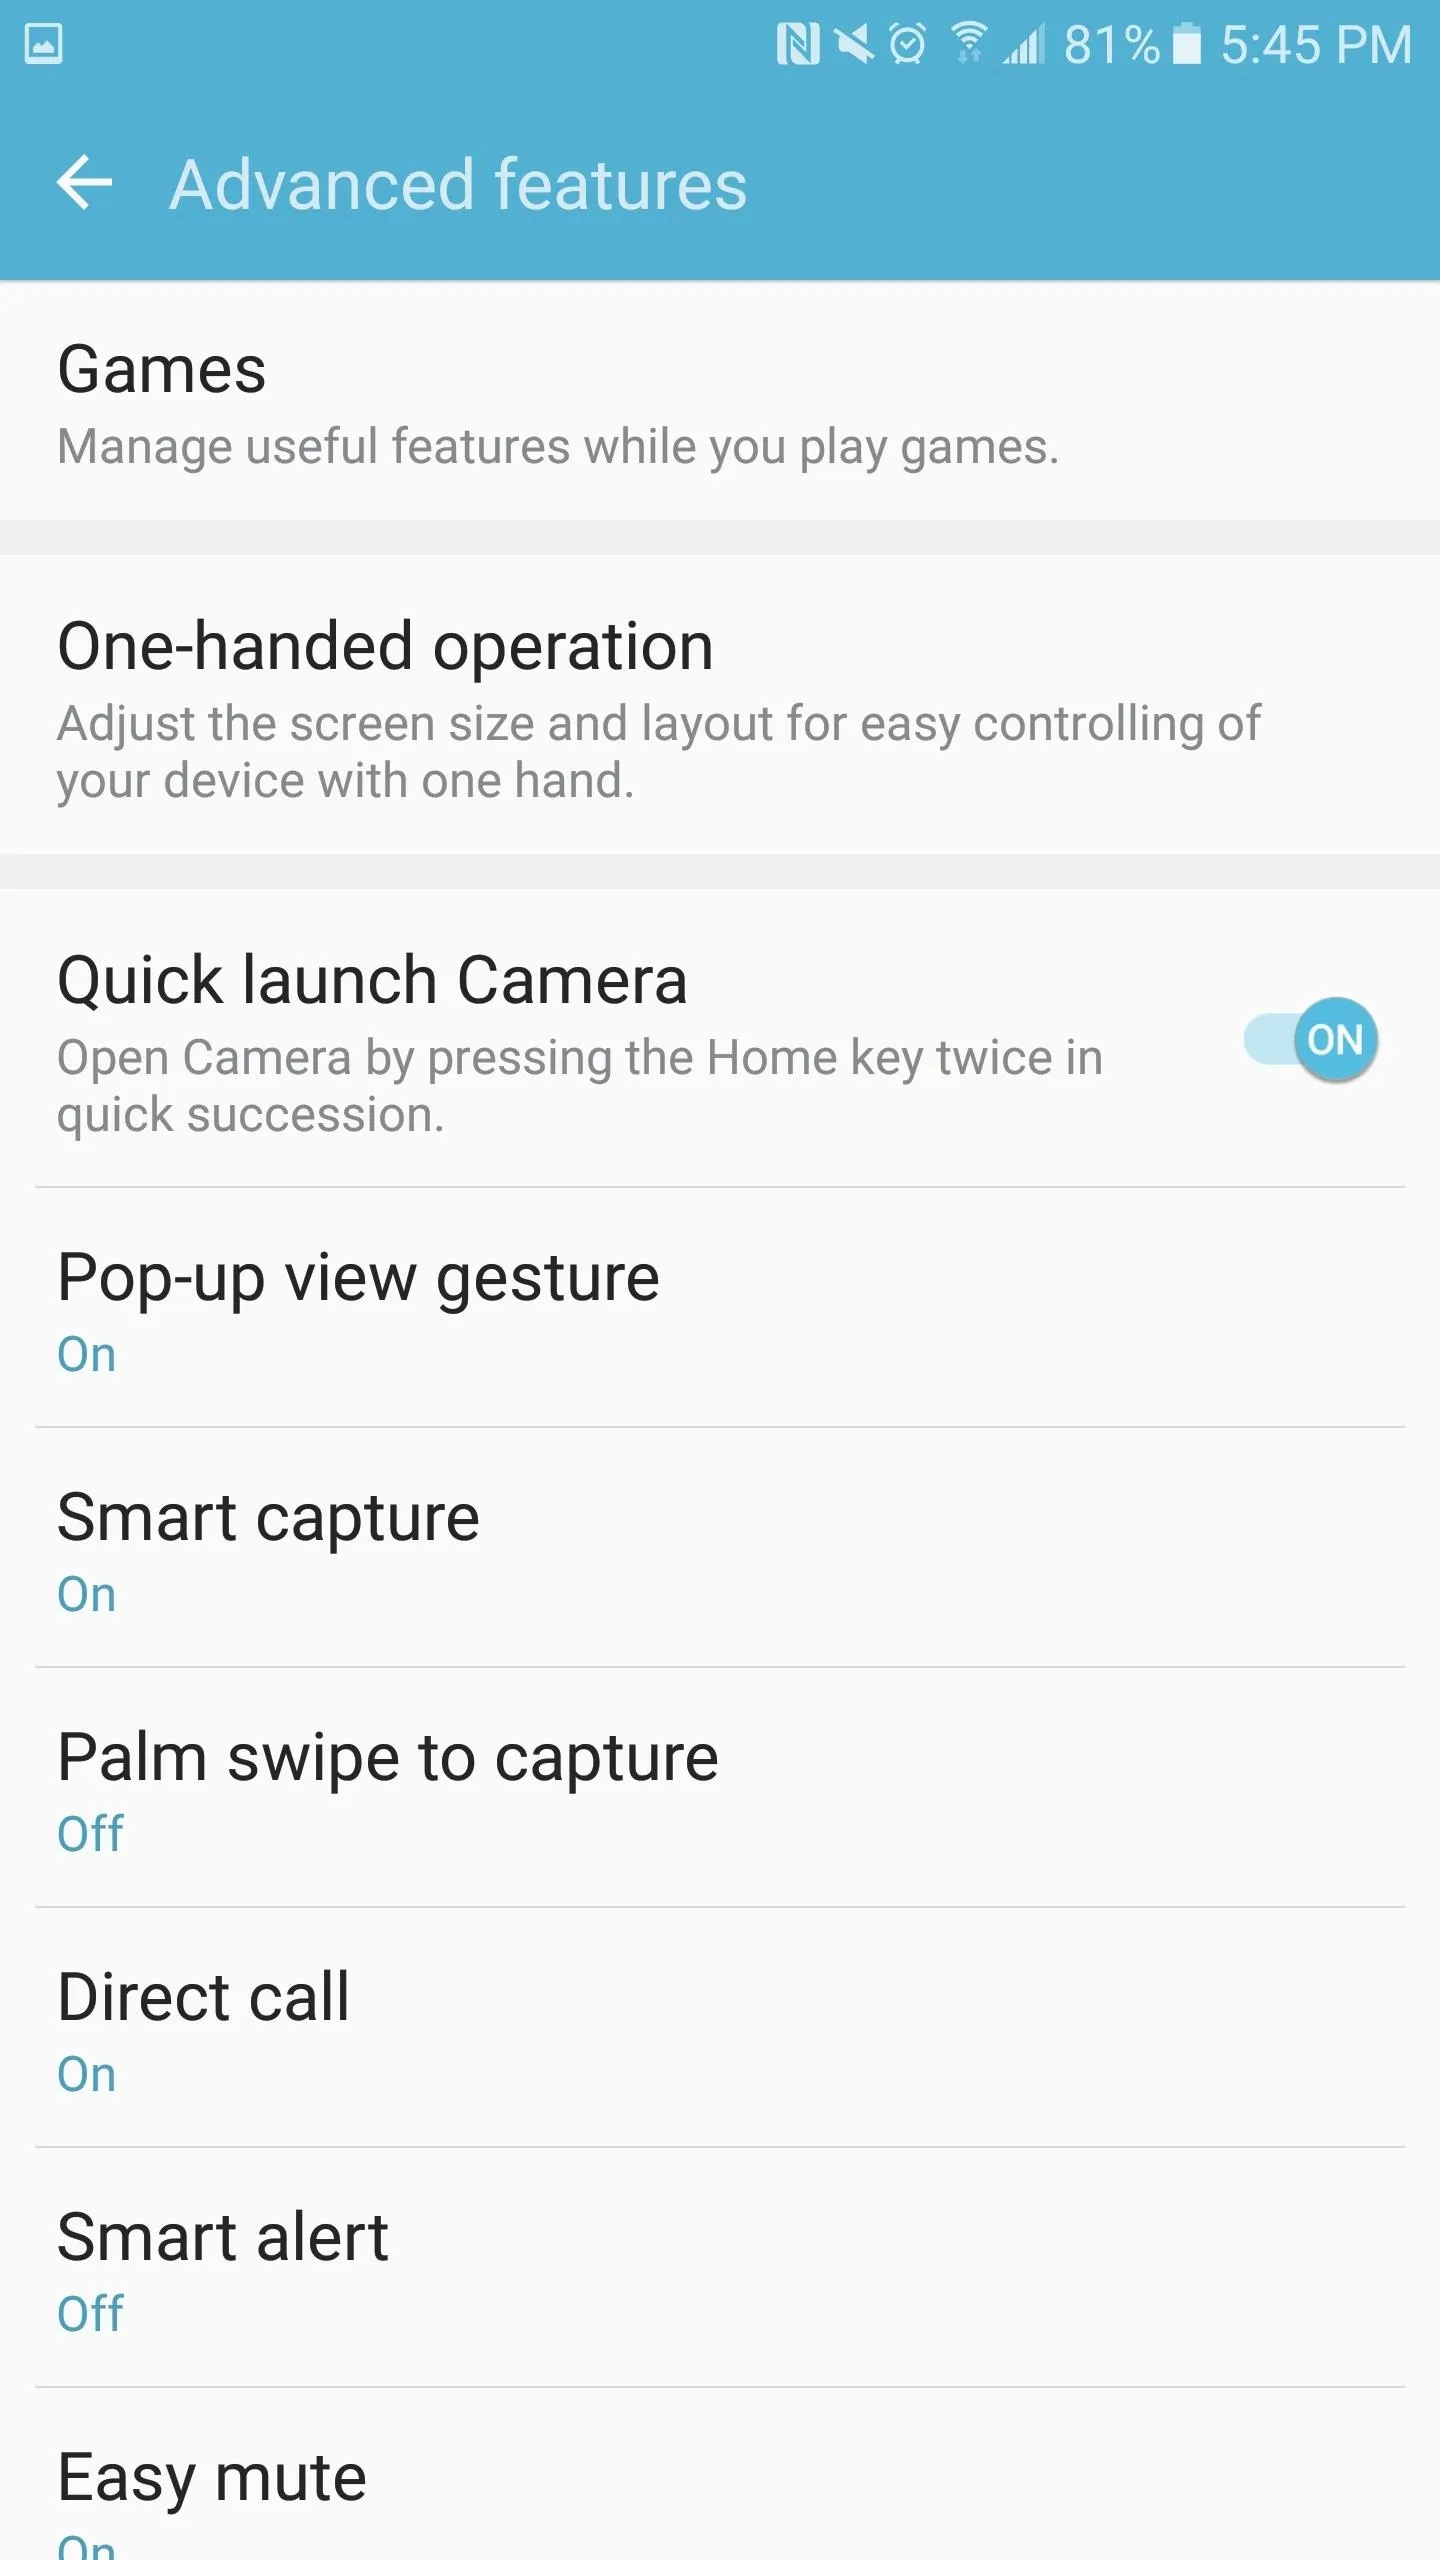
Packed within the custom settings on the Samsung Galaxy S7/ S7 Edge are a series of advanced features that you might now know about. To access the Galaxy S7's advanced features, go to Settings, then scroll down to Advanced features.
Here, you will be greeted with a series of important advanced features that you might not be making use of. One of which (and this is especially important for you Galaxy S7 Edge users) is One-handed operation. Once this feature is enabled, you will be able to triple-tap your home button to reduce the screen of the size so that you can use apps like the keyboard and calculator easier with one hand.


- Follow Gadget Hacks on Facebook, Twitter, Google+, and YouTube
- Follow Android Hacks on Facebook and Twitter
- Follow WonderHowTo on Facebook, Twitter, and Google+
Cover image and screenshots by Jacob Medel/Gadget Hacks










Comments
Be the first, drop a comment!